The 2013 car I purchased came with PDC and Navigation but did not have a backup cam. Initially I thought the backup cam wasnít important, but after a couple months of ownership, I began to have too many occasions where I said to myself, why didnít I get itÖ.
So, after some research I found Bimmer-tech and was pleased to see they offered an OEM retrofit kit for the backup camera. After some emailing with Patryk @ Bimmer-tech, he confirmed my options would make this a relatively painless install. And for the most part, it was!
First, for an easy install and proper compatibility, youíll need the following two options:
1) iDrive Navigation
2) Park Distance Control (rear only is OK)
A week later a box arrived via DHL containing the following items:
OEM camera module (and OEM mounting screw)
OEM trunk handle with OEM camera pre-installed
Wiring harness and camera cable
ODBII cable with RJ45 on other end to connect to computer for programming
OEM wire taps for 3 of the wires (yes, BMW makes wire taps for repair purposes)
Several plastic wire ties
Install manual
After reading through the manual, and a couple clarification emails with Bimmer-tech, I felt I was ready to tackle this project. First thing was to follow the advice from Patryk (and the manual) and make certain sure I had the following tools:
#2 Philips screwdriver, torx driver with 3 bit sizes, 10mm socket wrench, wire cutters (to trim the wire ties), a plastic poking tool (to help insert the pins into the factory harnesses), and a set of plastic trim removal tools. Definitely be sure to get trim removal tools!
The retrofit required I remove the following interior parts from car:
Under dash panel
Front/rear door floor sill trim
B pillar lower trim
Rear seat shoulder bolster trim
Trunk trim on right side
Trunk floor trim
Trunk lid trim
Dash trim
A/C and radio/CD trim
iDrive Navigation unit (Nav did not need to be fully removed, just enough to expose the main harness).
Took about 2.5 hours to remove all trim pieces (and about 1 hour to reinstall later). The biggest pain was to remove the OEM trunk release handle. The trunk release handle is held in place with pressure clips. The trouble is the clips are tight and the space for your hands is small. Finally got it after 30 minutes of fiddling.
From there I ran the camera cable starting at the trunk handle hole, through the trunk to the underdash area on driverís side.
Next, was to run the main harness which starts under the drivers dash (and attaches to the camera module). Three wires go to the iDrive unit. All 3 wires came with the appropriate pins so all I had to do was push them into the corresponding holes in the main iDrive connector. Fairly easy once I removed the iDrive unit.
The next two wires went to the communication protocol that allows modules to talk with each other. These wires are tapped using the supplied OEM wire taps and the wires are located along the driverís floor, in a harness that runs to the driver seat. Not terribly difficult since the manual described the correct wire colors and those were easy to find in the seat harness.
Last two wires were +12V and GND. GND was a short run that ran behind the carpet to the drivers side underdash lamp. Here I used a supplied OEM tap to connect the camera GND to the lamp GND. Easy. The +12V wire was run along the floor, next to the camera cable until I reached the rear fusebox located in the trunk floor. The rear fusebox came with the 5A fuse already installed in the empty fuse port already designed for the camera module. All I had to do was push the pin into the empty slot. It was a tight fit and the plastic push tool helped.
I completed mounting the camera module under the dash (perfect fit) and then returned the iDrive back to the dash and I reinstalled the dash trim.
I then contacted Bimmer-tech and received an email advising me of software to pre-install so they can connect to my car. Requires a Windows PC and Internet connection where your car is located. The software took about 20 minutes to download and install and then I contacted Bimmer-tech to connect. Once they contacted me, the programmer took over and programmed my car. Took about 1 hour to program and test.
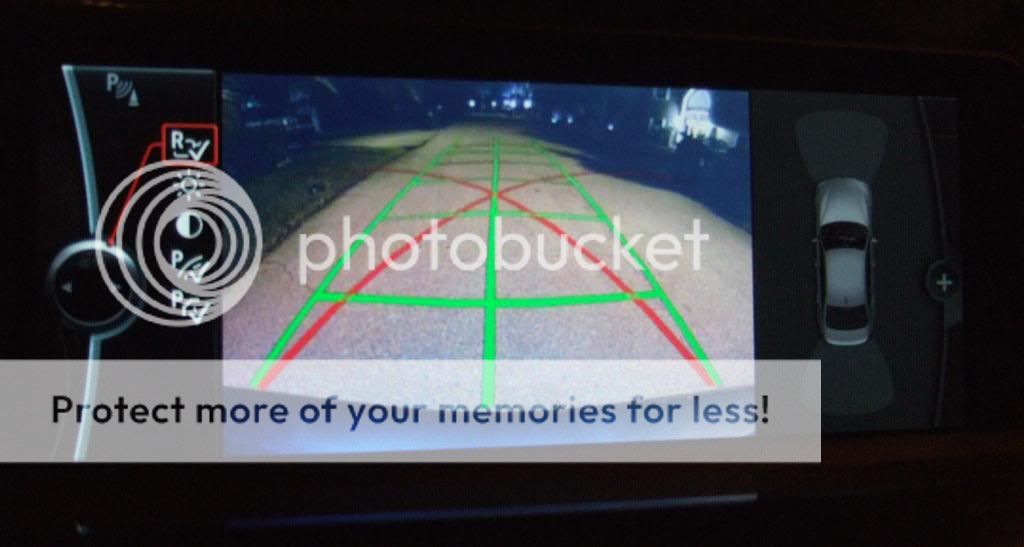
The OEM camera works the same as if it was factory installed. I compared to a friendís car that has a factory installed rear camera and indeed this one works the same.

Everything is there, parking aid lines, PDC obstructions shown onscreen, and all controls in iDrive.
The best part about the rear cam is that the video image appears almost immediately after starting car and placing car into Reverse. For anyone with CIC iDrive this will be a huge plus since the iDrive typically takes up to 20 seconds to startup and show the PDC image.
I highly recommend anyone with iDrive Navigation and PDC (rear is OK) to consider the rear camera retrofit. You wonít be disappointed. Based on my research Bimmer-tech is the only vendor offering a true OEM solution. And Patryk and his programmer were a pleasure to work with. I would recommend Bimmer-tech.
BTW, Bimmer-tech also offers a non OEM retrofit which is less $ and also works with cars lacking PDC. I cannot comment on this kit as I have no experience. Just saw it on their website and briefly discussed with Patryk.
Here's some pics from the kit and the final view in iDrive.


