BMW 3-Series and 4-Series Forum (F30 / F32) | F30POST
>
2016 420i Gran Coupe xDrive M-Sport

| 07-24-2016, 01:45 AM | #23 | |
|
Private First Class
 
99
Rep 186
Posts |
Quote:
")
__________________
|
|
|
Appreciate
0
|
| 07-24-2016, 12:52 PM | #24 |
|
Private First Class
99
Rep 186
Posts |
I did manage to get some work done even though it was very hot
 Started with breaking out the trusty old router and churn out a 3 layered MDF baffle: 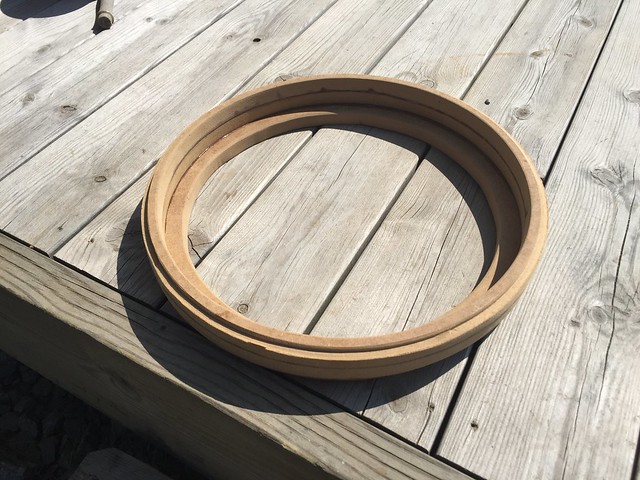 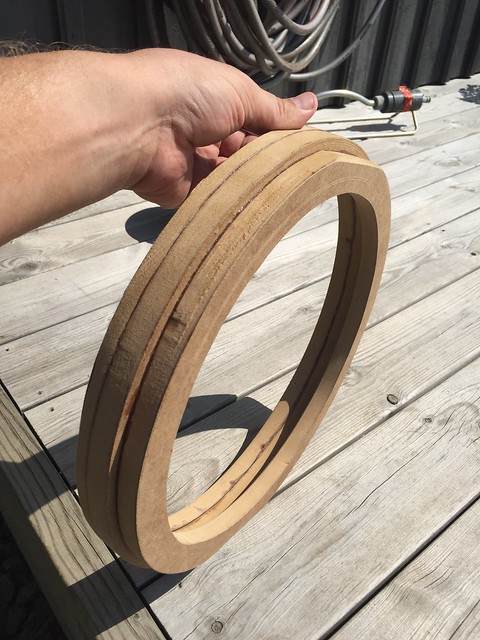  The baffle was then centered in the box itself (you can see I had to chamfer the inner MDF ring somewhat to fit within the frame): 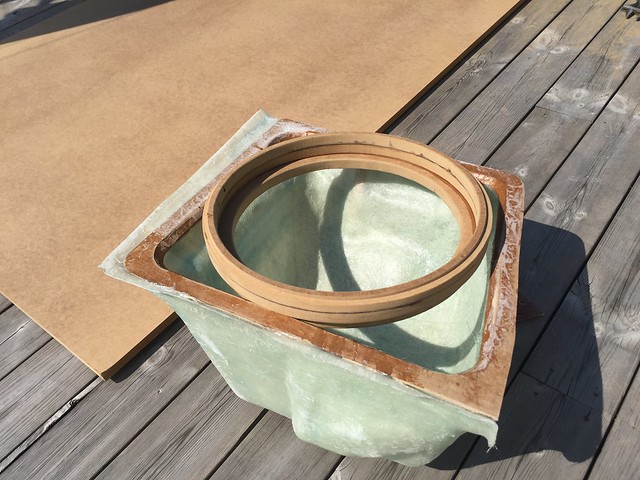 Cloth was then stretched over the baffle and frame and resin applied: 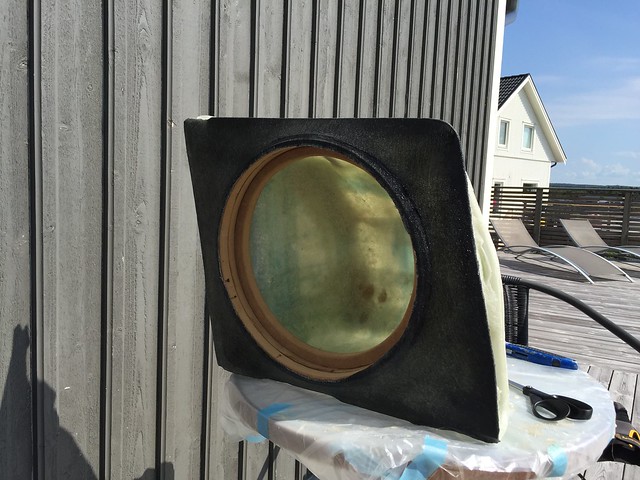 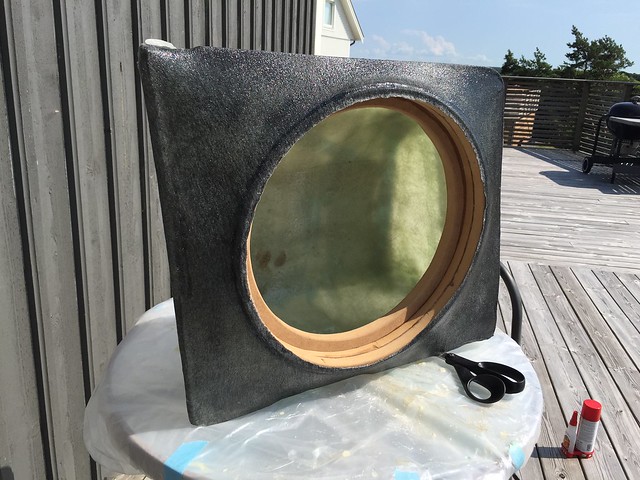 Followed by two layers of mat on the outside which will be followed by several layers from the inside for rigidity: 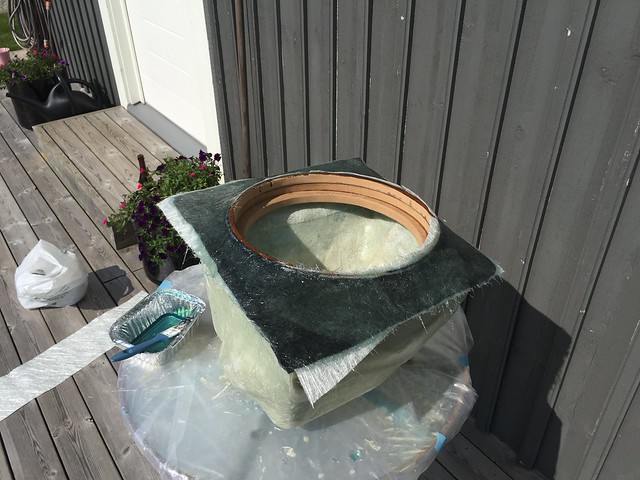 When the polyester had hardened - which went quicker than expected today even though i cut back on the catalyst  - everything was sanded down a bit and test fitted in the trunk: - everything was sanded down a bit and test fitted in the trunk: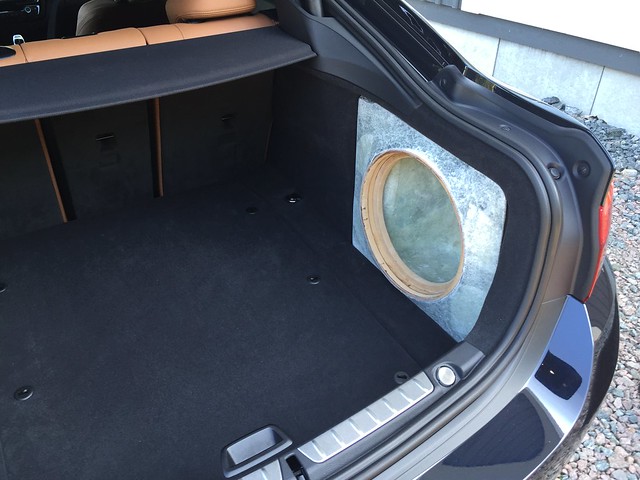 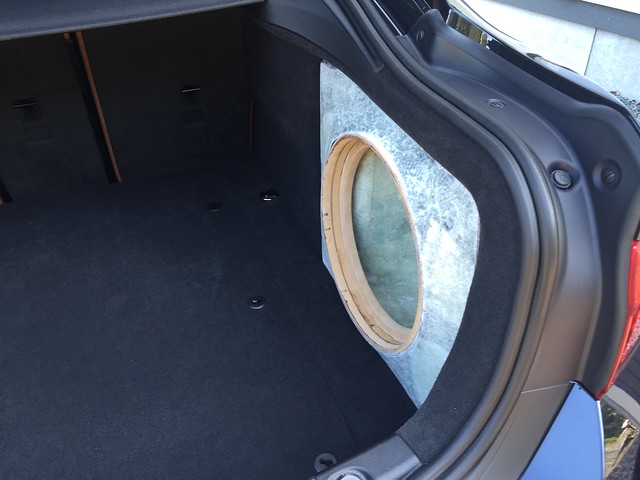  IMO it fits quite nicely and follows the contours of the adjacent trunk panels. I will be adjusting the back part of and trace the contour a bit more in detail with some rage gold to ensure a flawless fit. I think this sub box is coming together quite nicely :blush:
__________________
|
|
Appreciate
1
F36_CB1K18.00 |
| 07-24-2016, 04:33 PM | #25 |
|
Major General


763
Rep 5,560
Posts |
You really have some good skills to do all these things 👍
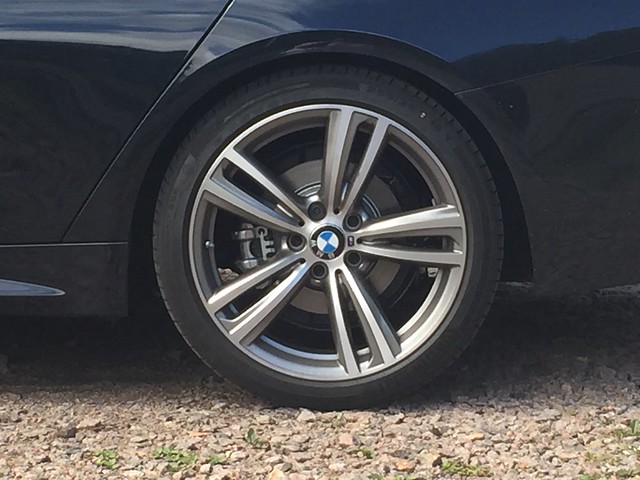
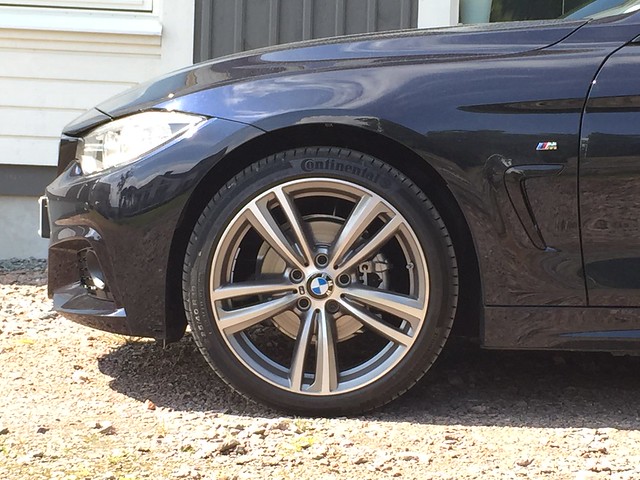
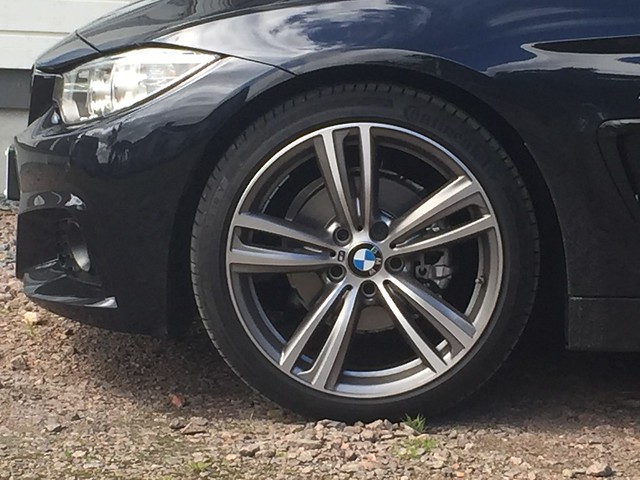
Are those Continental RFTs? I didn't know they use these tires now... Are you happy with them? I would put some Michelin PSS after they warn up, but keep the rims! Can't wait to see your progress and I hope you'll share some sound clips once the job is finished  |
|
Appreciate
0
|
| 07-25-2016, 02:00 AM | #26 | |
|
Private First Class
99
Rep 186
Posts |
Quote:

__________________
|
|
|
Appreciate
0
|
| 07-25-2016, 12:05 PM | #27 |
|
Private First Class
99
Rep 186
Posts |
Not a lot of progress today but did manage to get something out of the way...
I have been contemplating how to mount the sub box securely to the car without having to perform any major surgery on the car. I realised quite quickly I could utilise the metal bracket on top of the battery. Drilled and tapped to M6 and I had some nice bolts from before which would be handy. I added a small piece of dampening material on the bracket for the box to sit on: 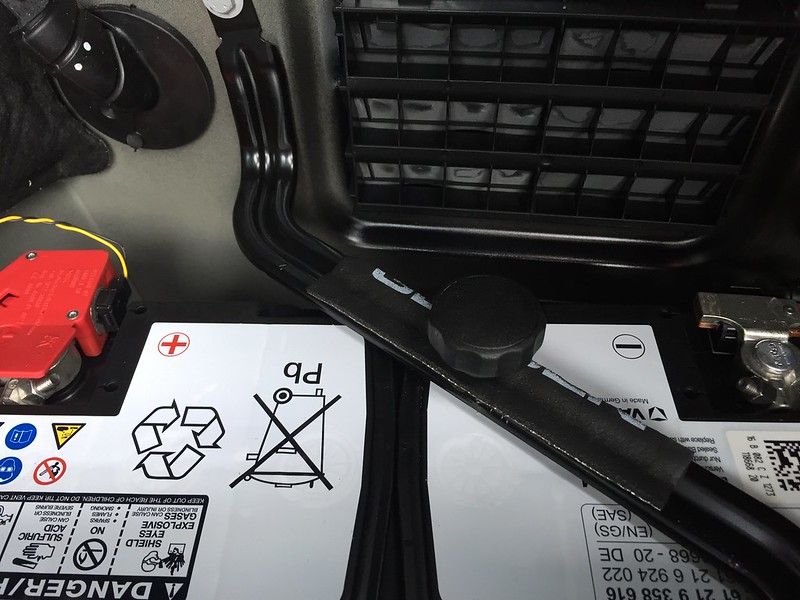 Now you can simply tip the box in, thread the bolt down through the bottom hole in the box and fasten by turning the nob. 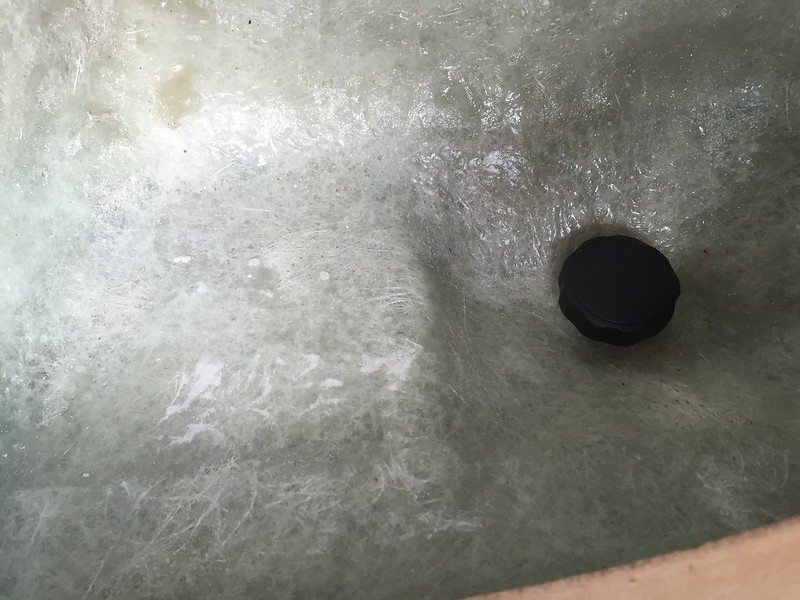 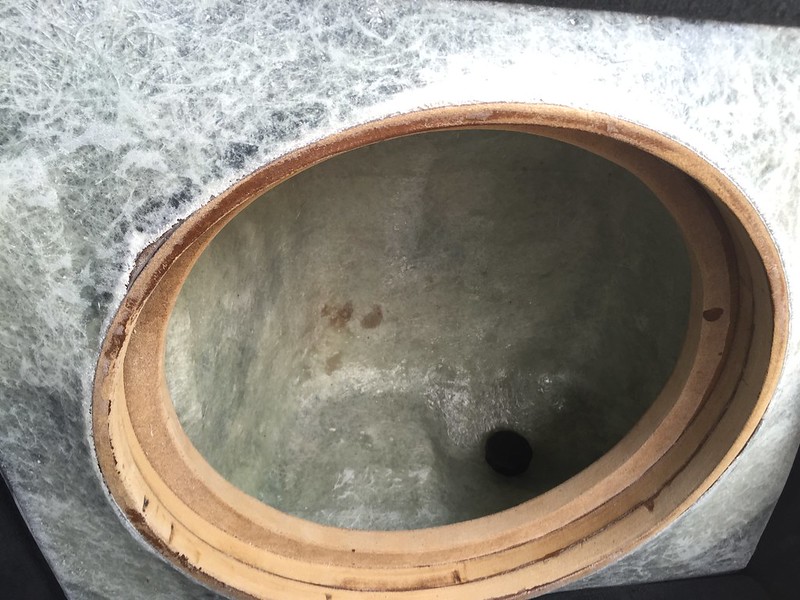 But just the one fastening point wasn't good enough IMO, I also wanted something further up / back in the box. I found two unused mounting points which seemed to be in a good spot but way to far back. I fabricated a small metal bracket to go in between the mounting points and secured it with a couple of nuts. I drilled and tapped another M6 hole so that I could use another one of my nice bolts with the nob handle. 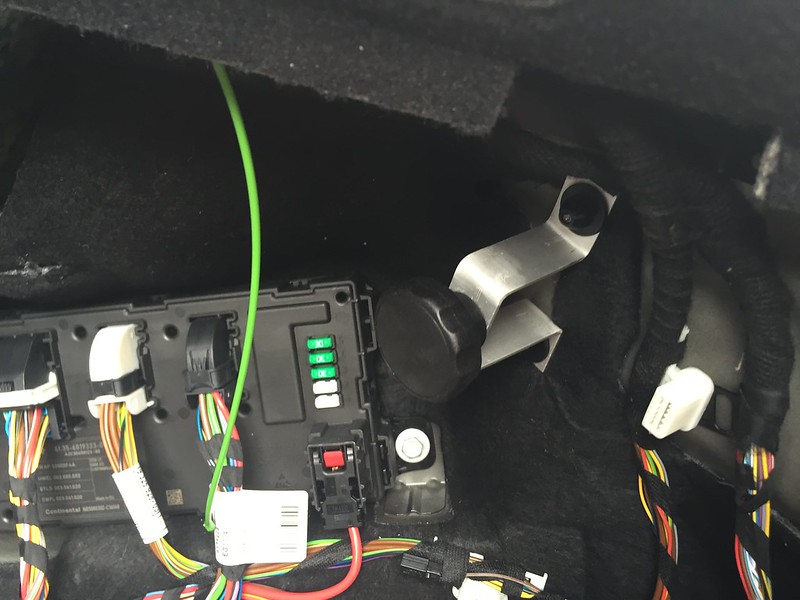  I managed to drill the first hole through the box in slightly wrong place, so will have to cover that up :blush: Also, the bolt itself was just to short, it doesn't grab on enough so will have to buy another one. With the box mounting squared away I applied a layer of Rage Gold on the box which is now hardening away
__________________
|
|
Appreciate
0
|
| 07-26-2016, 01:48 AM | #29 | |
|
Private First Class
99
Rep 186
Posts |
Quote:
__________________
|
|
|
Appreciate
0
|
| 07-31-2016, 02:18 PM | #30 |
|
Private First Class
99
Rep 186
Posts |
I didn't have a lot of time to spare today and was running in and out constantly between rain showers, but managed to get some small stuff done
A while back when planning out the trunk build I found an ideal spot to mount my fused distribution block which also had three threaded factory mounting spots. I measured and cut some 1/2 inch MDF, routered the edges to give it a more finished look and countersunk the mounting holes since I was going to use factory type nuts which have almost like a "built in" washer at the bottom. I also mounted some threaded inserts for the mounting locations for the distribution block: 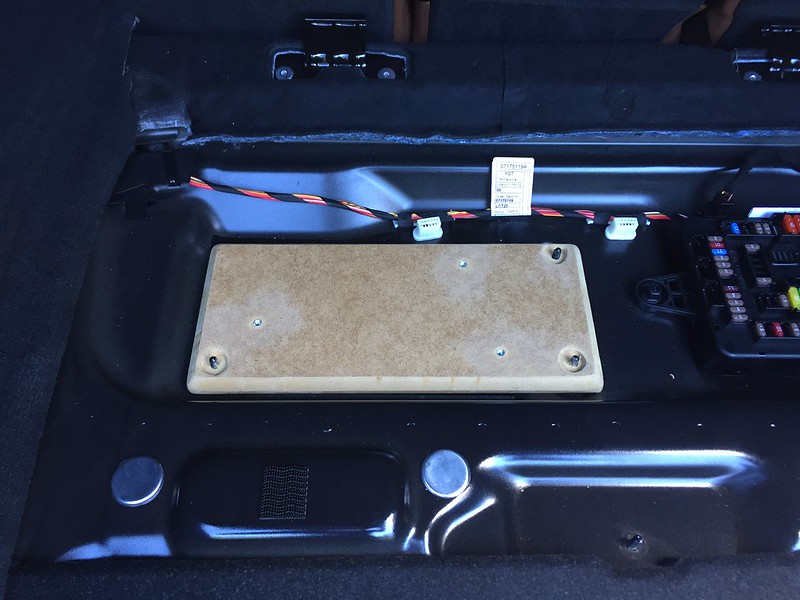 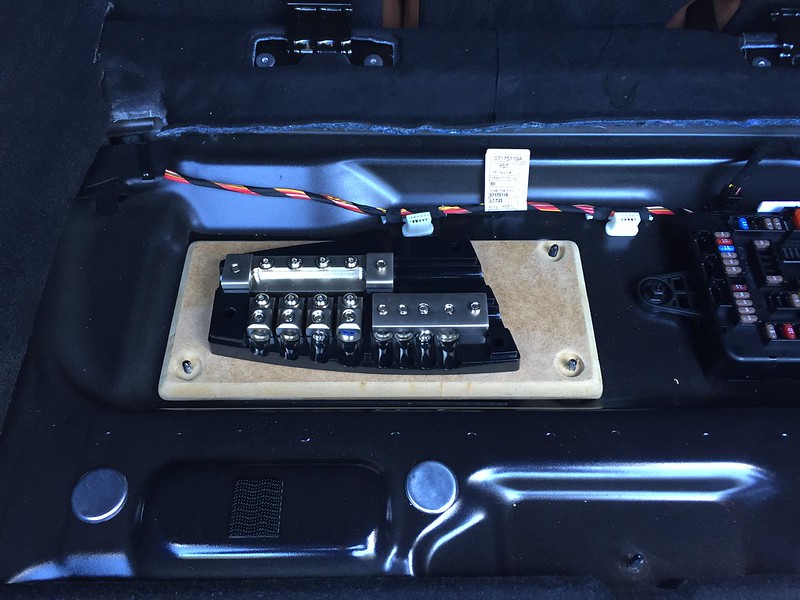 Happy with the size and shape I upholstered the piece in black vinyl (same kind will be used for other parts of the build) and secured it in the location: 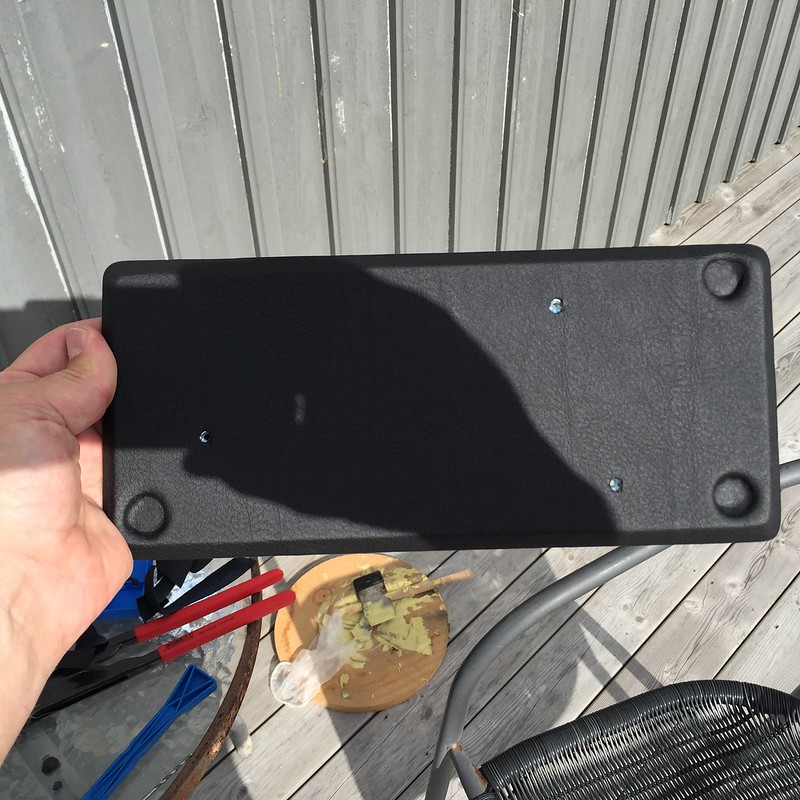 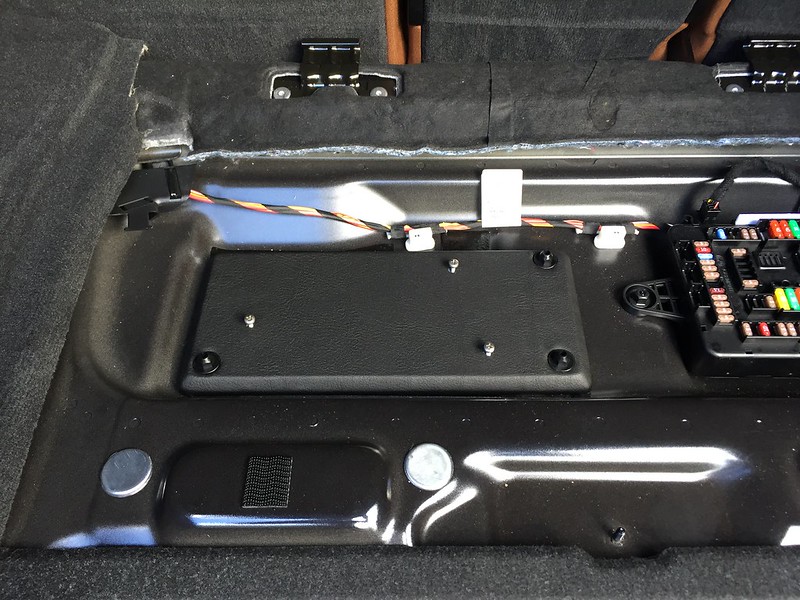 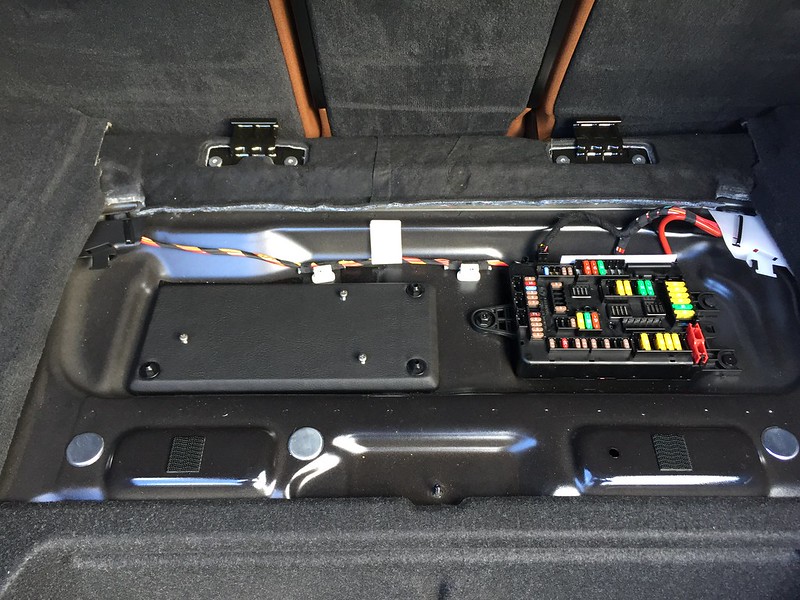 I had to drill out the screw holes on the distribution block slightly to accomodate the M4 mounting screws: 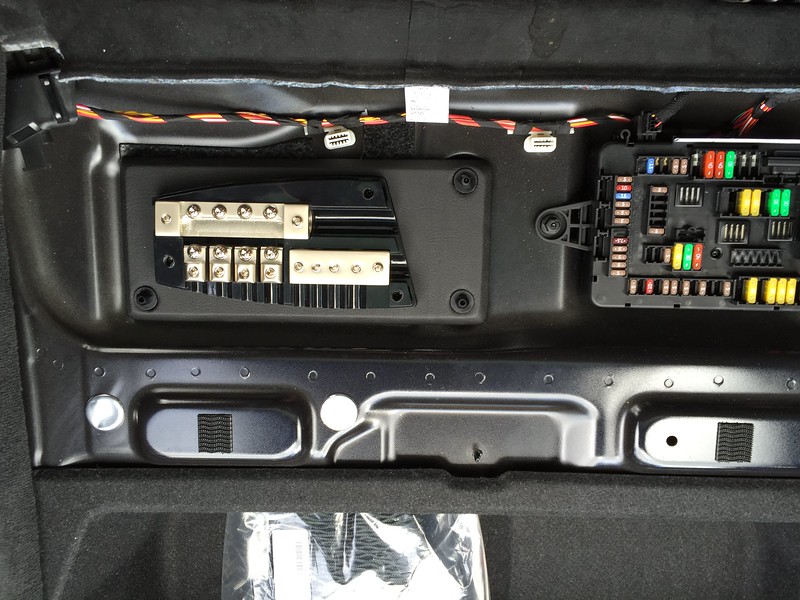 That's it for today :blush:
__________________
|
|
Appreciate
0
|
| 08-01-2016, 10:05 AM | #31 |
|
Private First Class
99
Rep 186
Posts |
Hi folks,
Had a moment to spare today so that I could continue with the power installation. Now that the distribution block was in it's permanent location I could look into the main fuse close to the battery and the routing of the main power cables to the distribution block. Is started out with trying to find a suitable location for the fuseholder that wasn't to far away from the battery while being accessible - something that proved challenging as I had chosen to fabricate my sub box on top of the battery comparment Got all the panels out of the trunk (again ) and located an ok spot for the fuse holder, only problem was the mounting options. I once again located two threaded mounting pins and then fabricated a small holder for the fuseholder: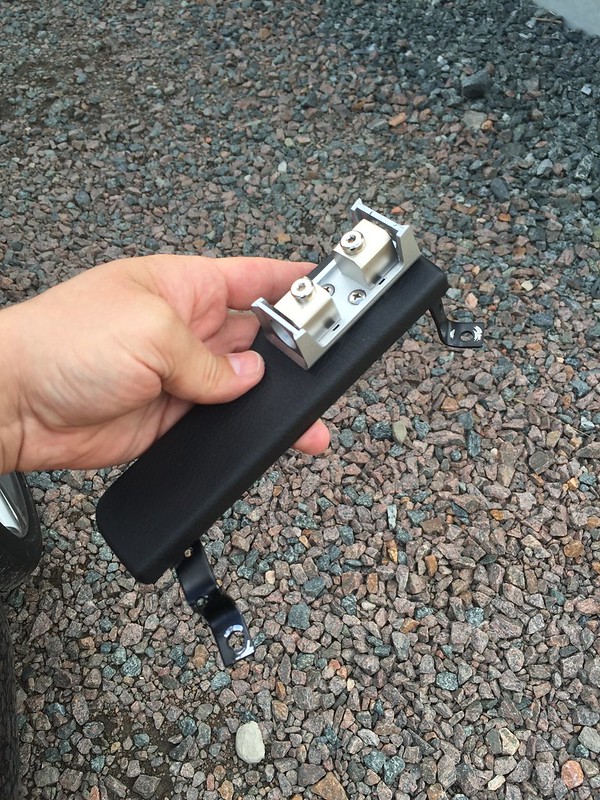 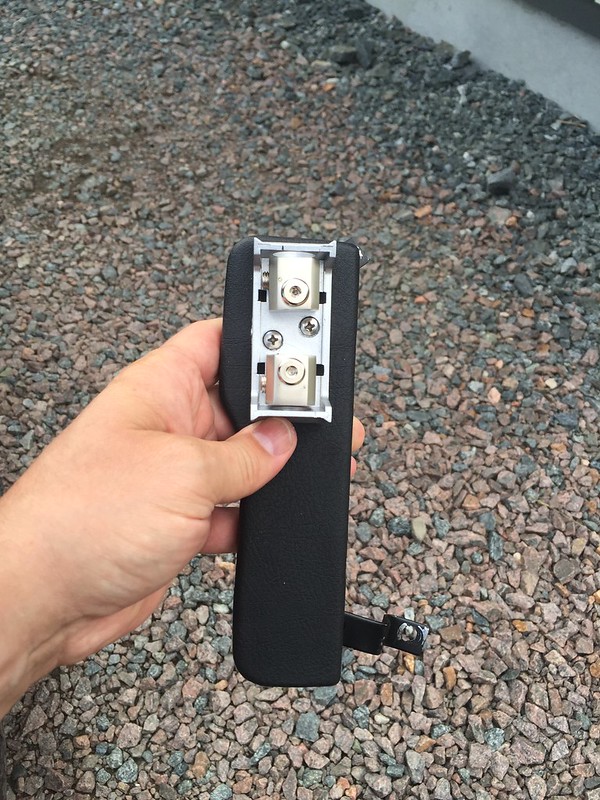 The holder was fabricated using 1/2 inch MDF and wrapped in vinyl and with two metal brackets attached. I also used two M4 threaded inserts and mounted the fuseholder using two M4 screws. Mounted in its location: 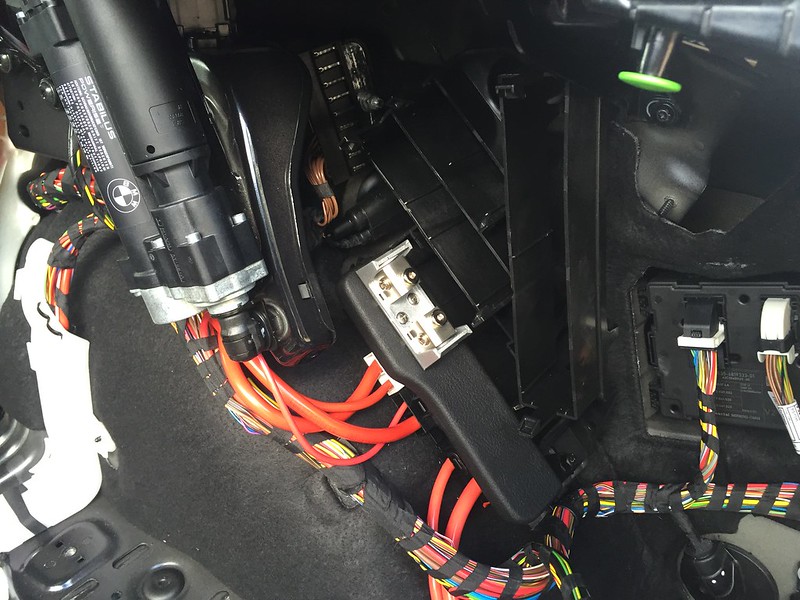 With the main fuseholder in place I could start measuring and fabricating the power cables for the power distribution. I will be using one of the factory grounding points which is located right next to the battery. By the time I had finished taking measurements for the cables heavy rain came down and I relocated my cable shop to the kitchen 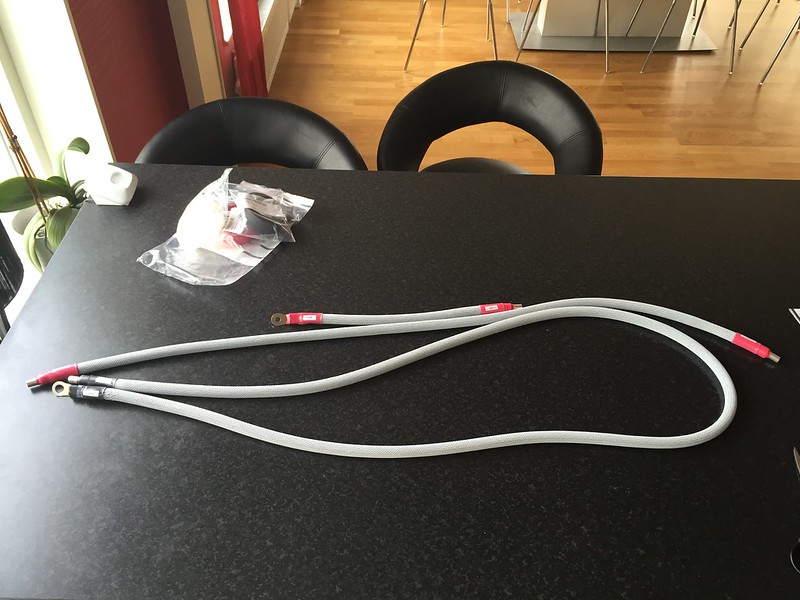 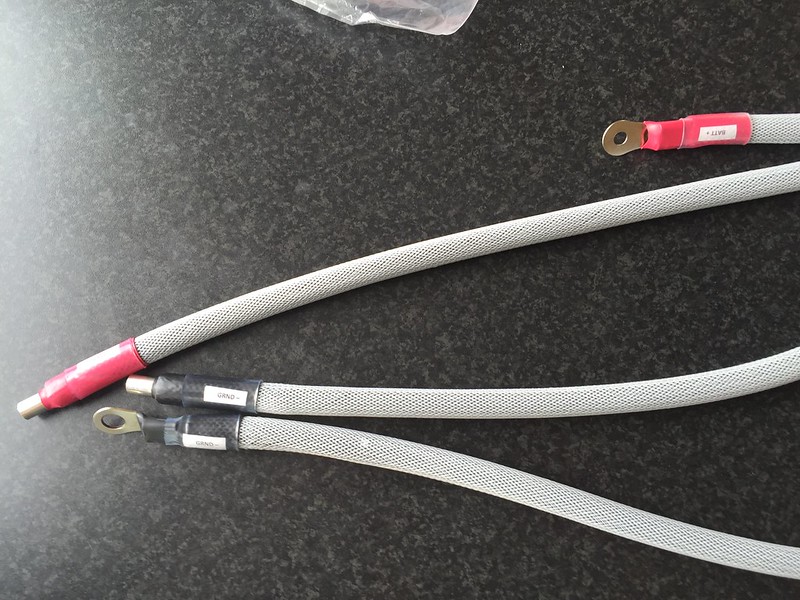 The main power cables are Knu kolossus Fleks 1/0 guage. Of course everything is protected using techflex, shrink tube, end terminals and properly identified. I was originally looking to go with carbon color techflex but in the car it just looked "black", so chose to go with white
__________________
|
|
Appreciate
0
|
| 08-01-2016, 09:43 PM | #32 | |
|
Lieutenant
 
142
Rep 454
Posts
Drives: 428i M Sport Gran Coupe
Join Date: Feb 2012
Location: Brisbane QLD
|
Quote:
__________________
2015 428i M-Sport Gran Coupe, Glacier Silver, 6sp Manual, HK Audio
"I fear the day that technology will surpass our human interaction. The world will have a generation of idiots." - Albert Einstein |
|
|
Appreciate
0
|
| 08-04-2016, 02:54 PM | #33 |
|
Private First Class
99
Rep 186
Posts |
Hi folks!
Not much of an update today. I didn't have more than a couple of hours today but figured I would have a go at getting the power cabling squared away. I used one of the existing cable trays to run the cables from the distribution block up over the wheel arch and down to the fuse holder and past the battery to the grounding point: 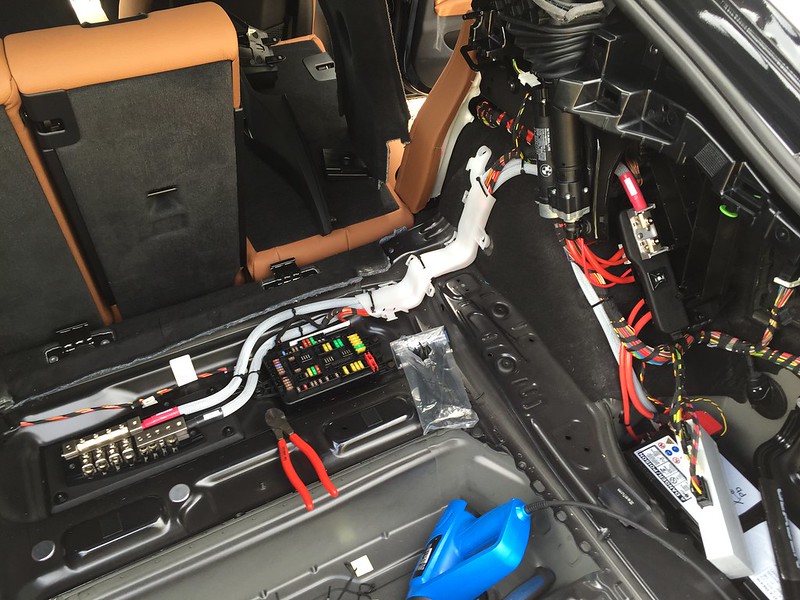 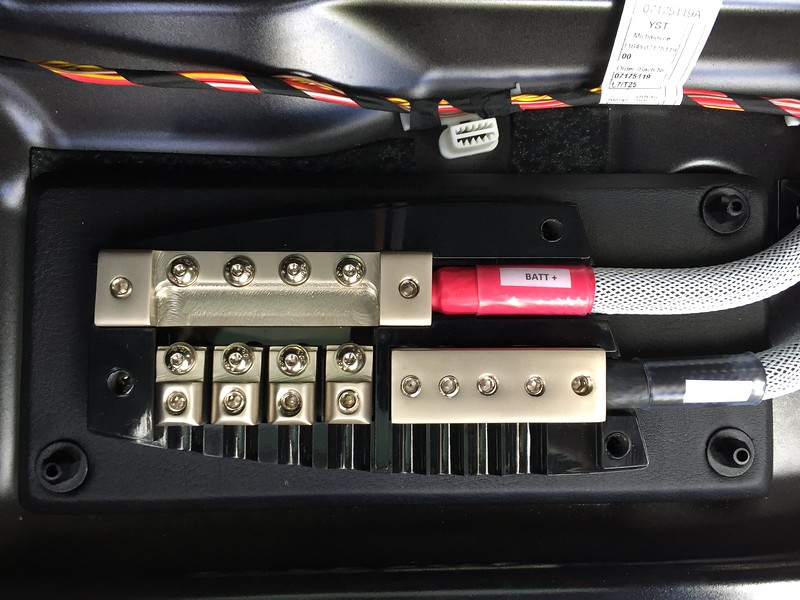 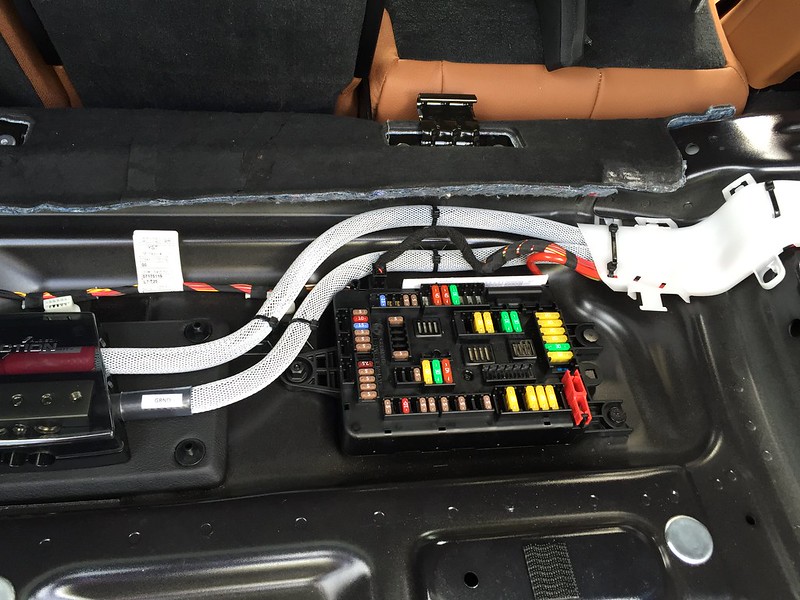 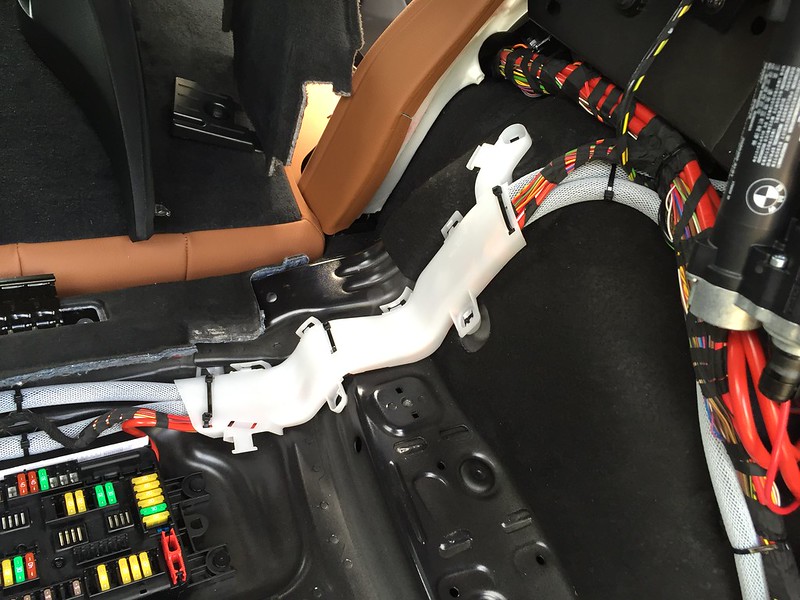 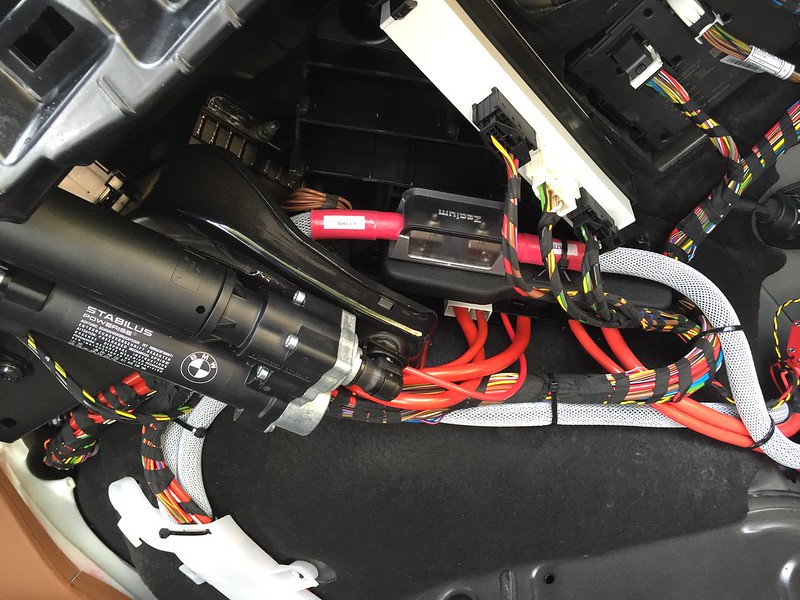 It was very tight for space around the positive post on the battery so I had to slightly file down the lug and bend it to a slight angle to ensure 100% contact: 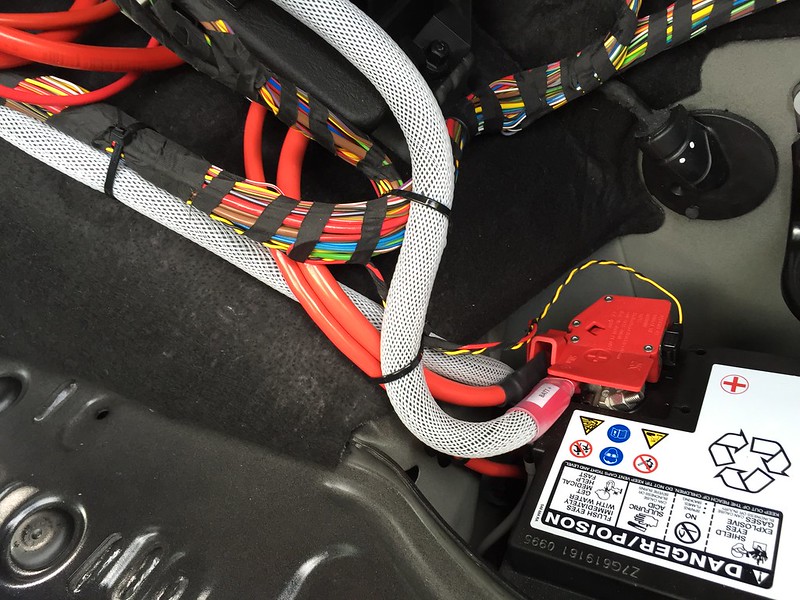 Grounding: 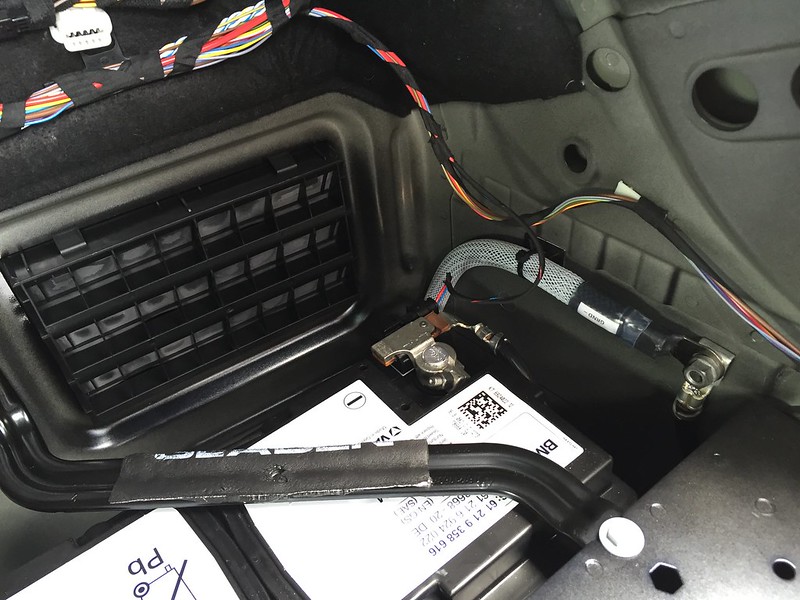 Cable management - I used cable ties every 10cm either using existing fastening points / stock cable runs or using cable tie anchors:   Feels good to have this squared away, now I can focus more on fabrication around fitting the amps over the weekend
__________________
|
|
Appreciate
1
F36_CB1K18.00 |
| 08-07-2016, 02:00 PM | #34 |
|
Private First Class
99
Rep 186
Posts |
Hi folks,
I thought I would share the progress on the amp rack. As I originally showed, the intention is to squeeze the amps (which are quite big ) into the small storage compartment below the trunk floor: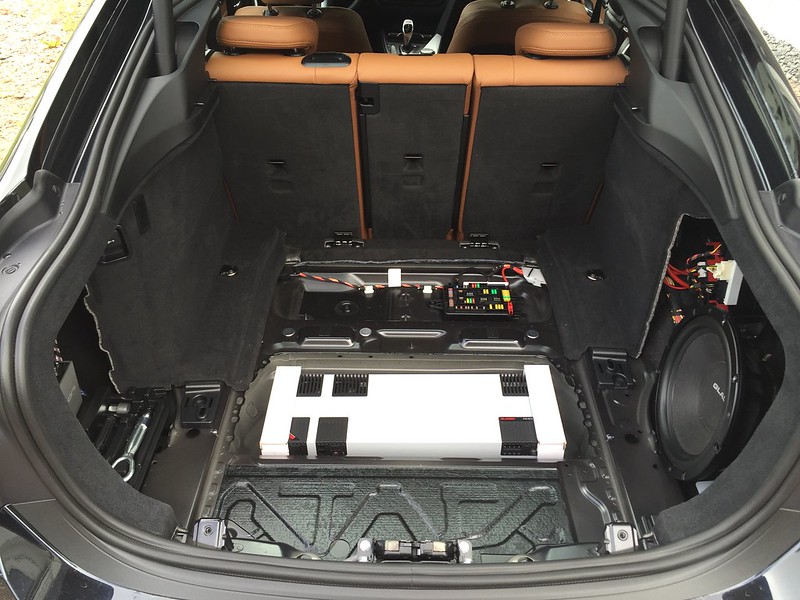 Earlier on I contemplated having the amps fitted at an angle, but after measuring it didn't seem feasible if not raising the floor, which I don't want to do. I chose to have them mounted flat to maximise space in the compartment. I started out by measuring from the underside of the trunkt floor and calculating the different offsets between the mounting panels and supports and compensating for material. I also factored in that I wanted to allow for the lower amp to breath adequatly as well. I also had this idea I wanted to build in some "cable management" into the mounting panels, will see if this will work practically when routing the cabling further on. I measured the mounting panels and routered grooves for the cables: 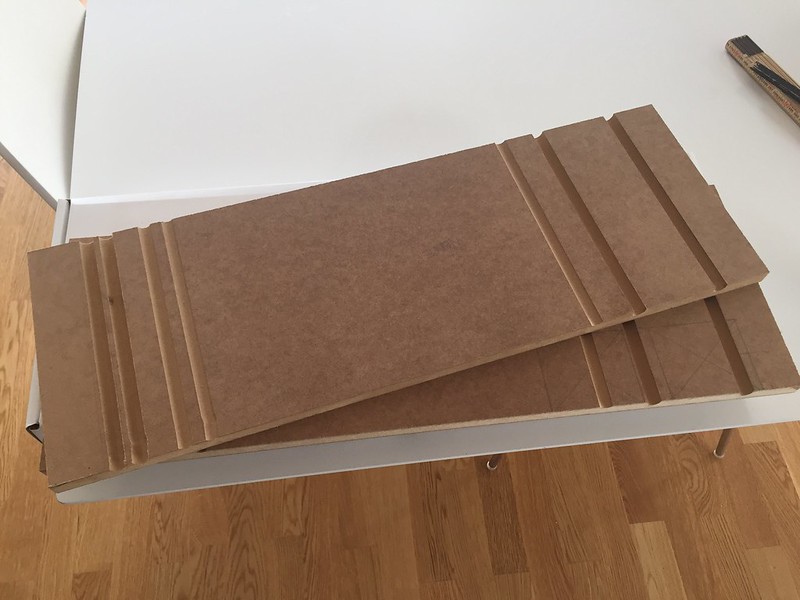 As mentioned above, I wanted to allow for some breathing space for the lower amp (even though I have never had any temperature issues with these amps in the past) and routered openings for where the fans are fitted: 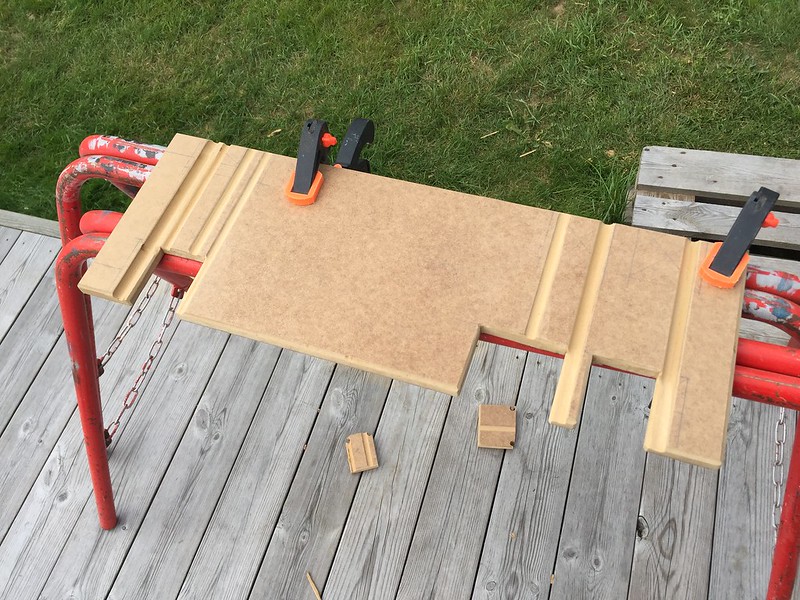 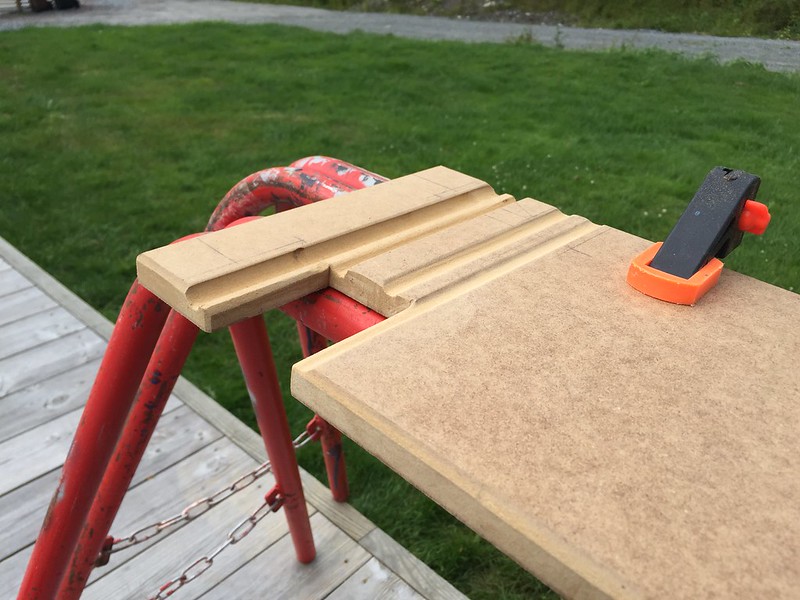 So basically this will be the principle: 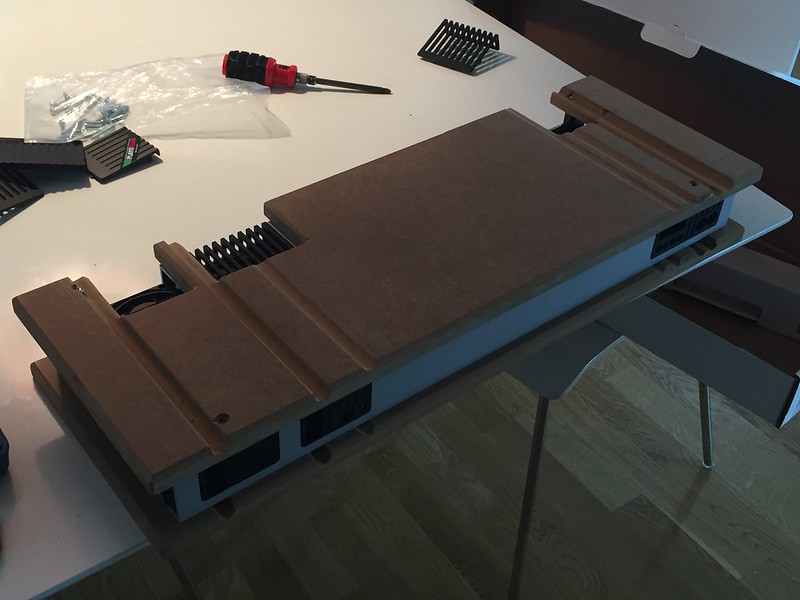  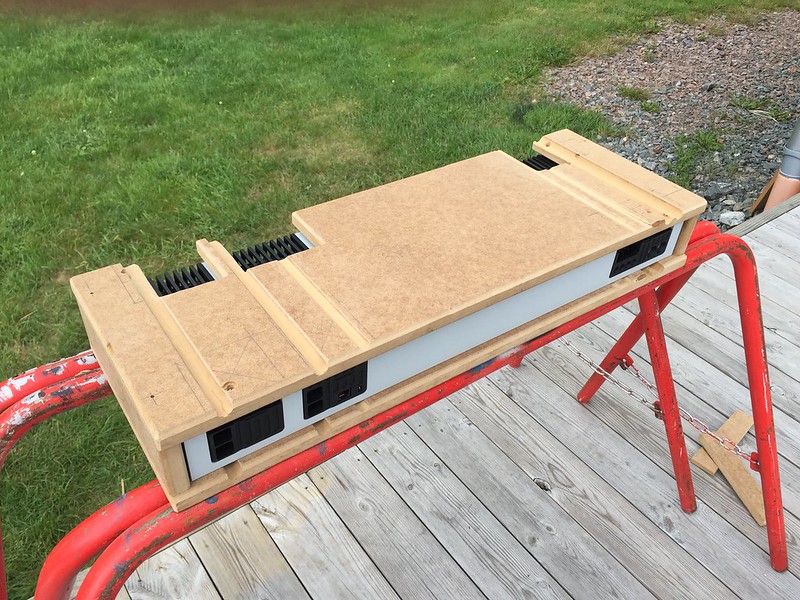 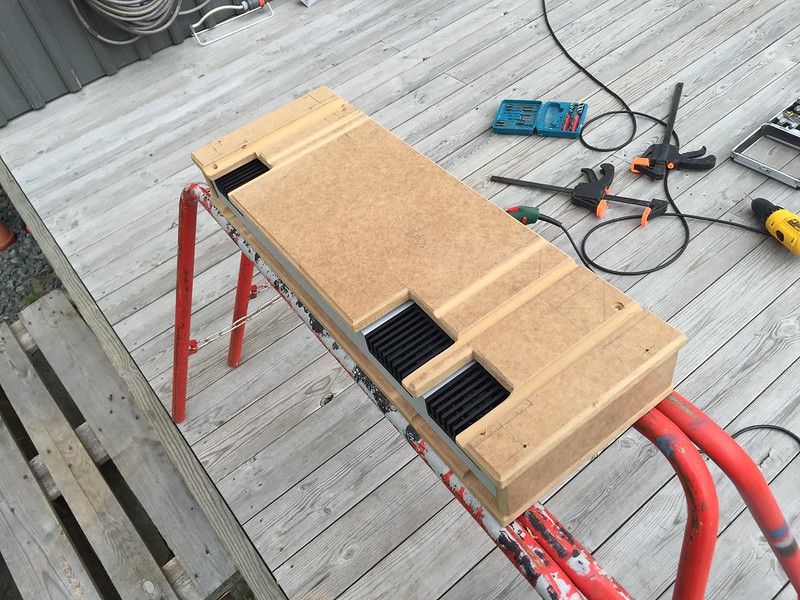 I also fitted threaded inserts for the amps to allow for proper maintenance. Next I test fitted the amp in the car to check for height etc: 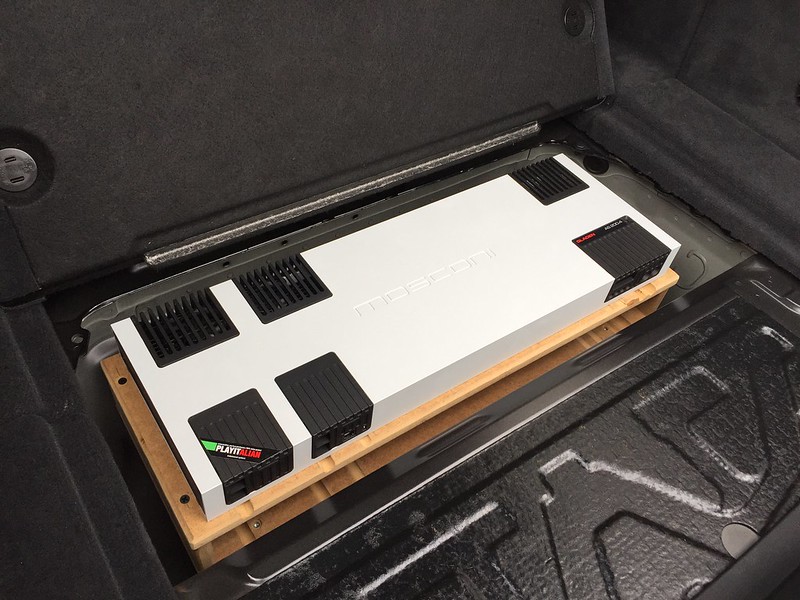 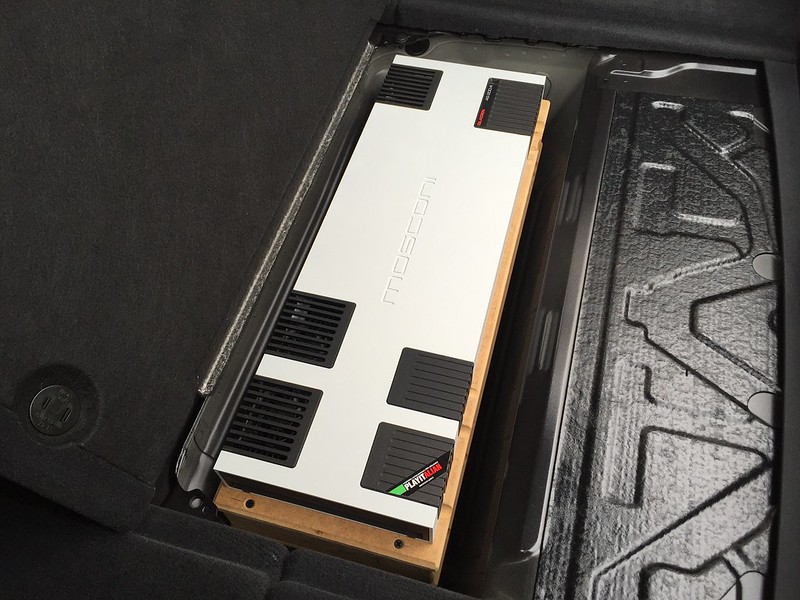 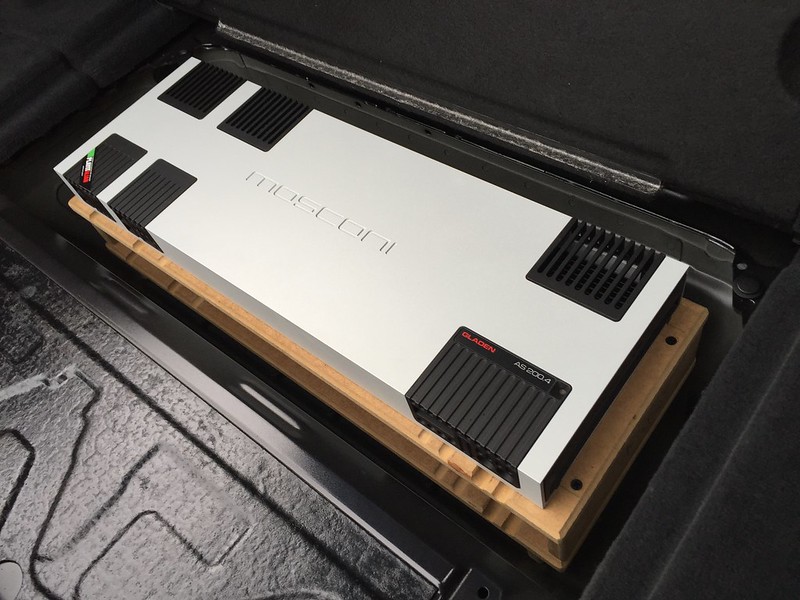 Content with the test fit it was time for upholstry using the same vinyl as before, test assembly of the parts and both amps. Lower mounting panel and supports: 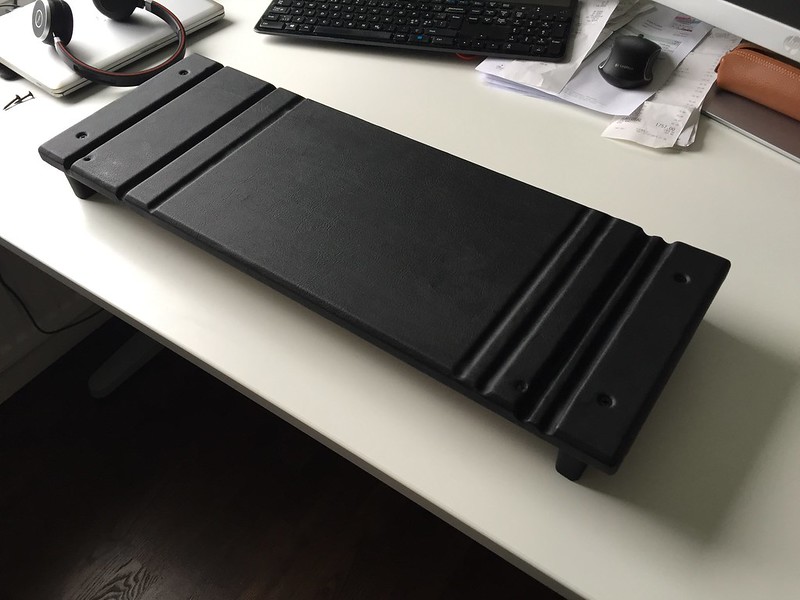 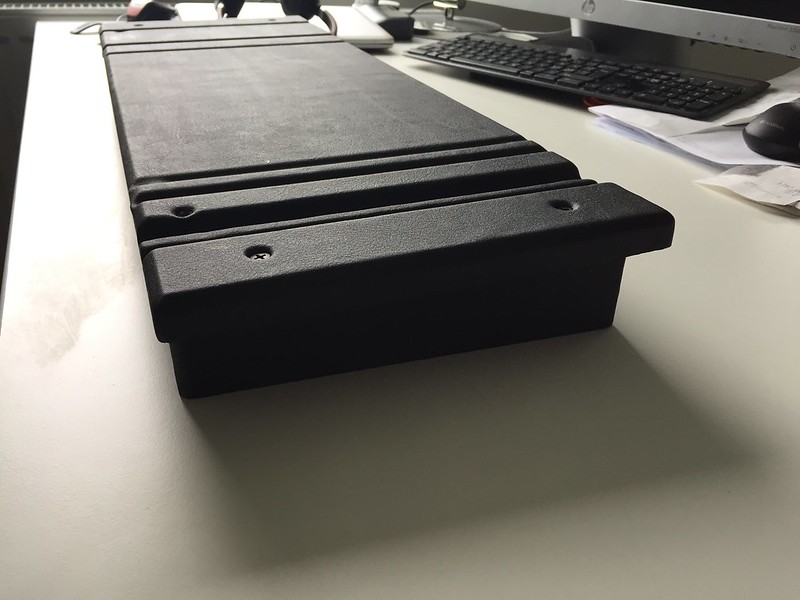 Amp 1 fitted: 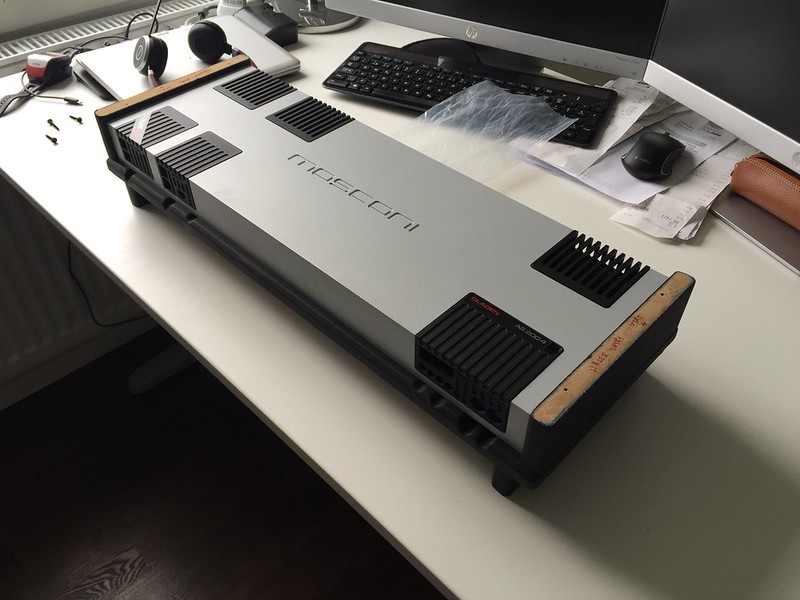 Amp 2 fitted: 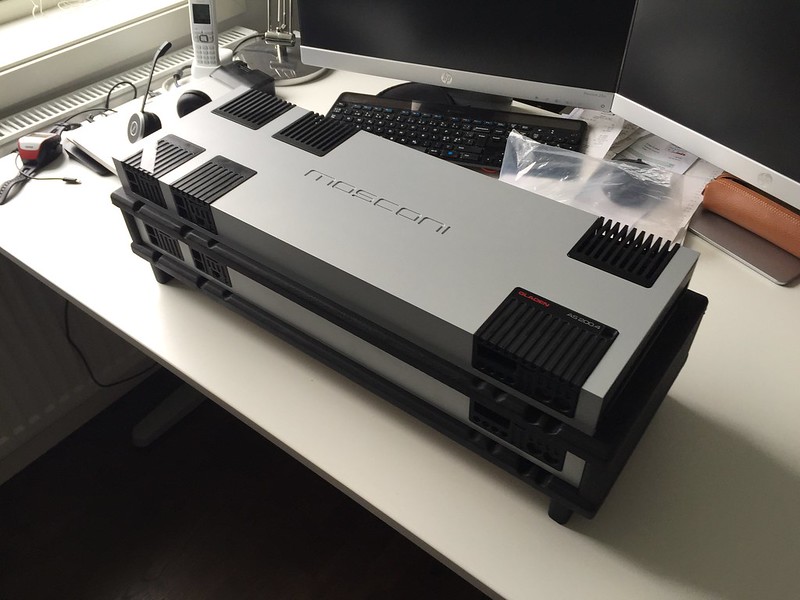 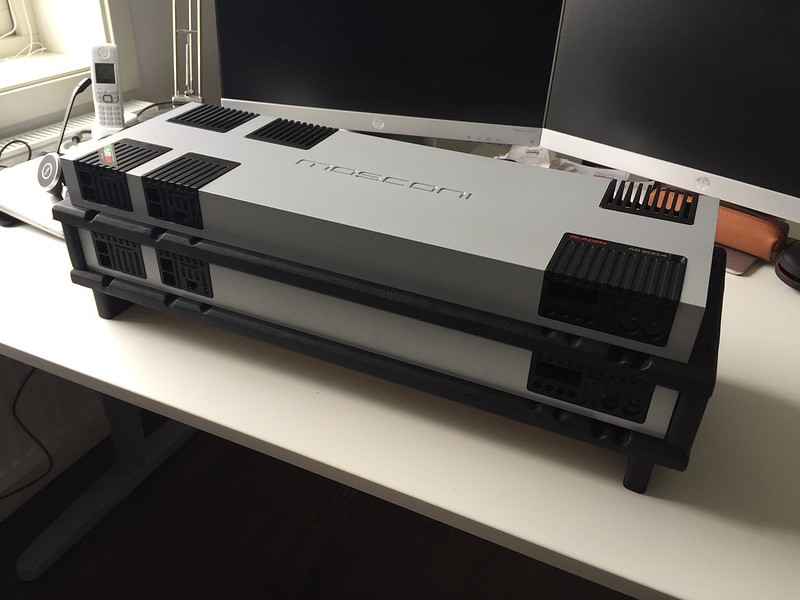 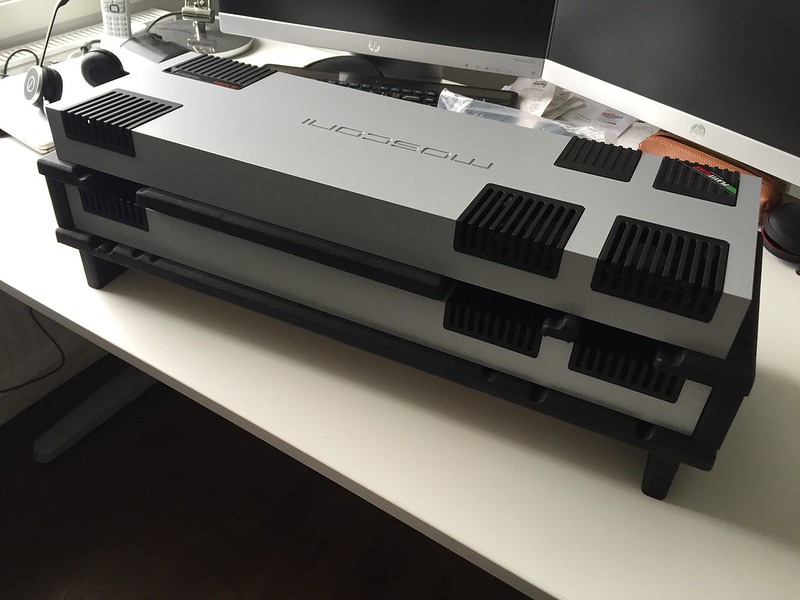 When doing the initial measurements, i realised the storage compartment was not level with the trunk floor, it had a slight forward angle, which I had to compensate for. This can easily be seen on this side shot: 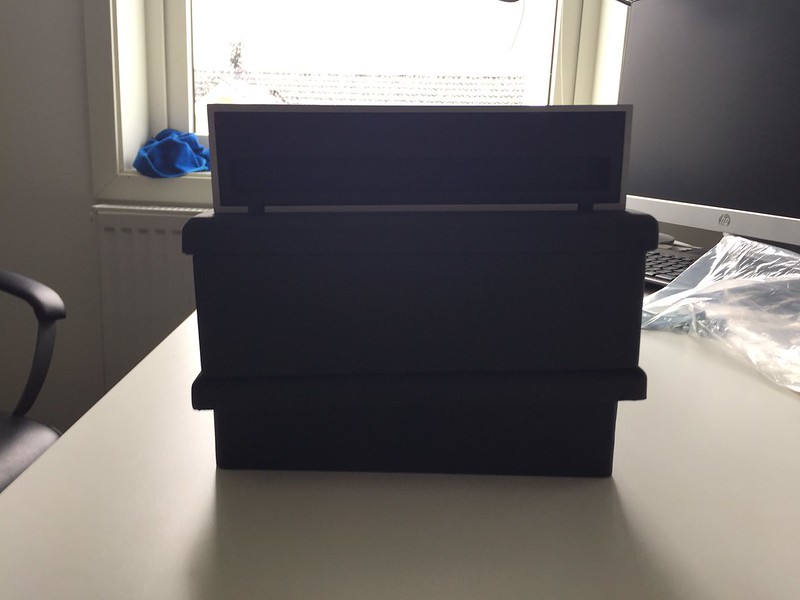 Apart from the amp rack, I also took the opportunity to make a fine adjustment of the sub box to the surrounding panels. I taped off the surrounding area, fitted the box and applied Rage Gold around the edges of the box, will be sanded and upholstered tomorrow if time permits
__________________
|
|
Appreciate
1
F36_CB1K18.00 |
| 08-07-2016, 06:31 PM | #35 |
|
Banned
2221
Rep 5,897
Posts
Drives: 2014 335i Black F30 M Sport
Join Date: May 2016
Location: Portsmouth, UK
|
Looking sleek man, how much is this all costing you lol?
|
|
Appreciate
0
|
| 08-08-2016, 12:54 AM | #36 | |
|
Private First Class
99
Rep 186
Posts |
Quote:
__________________
|
|
|
Appreciate
0
|
| 08-08-2016, 12:37 PM | #37 |
|
Private First Class
99
Rep 186
Posts |
Today's quick update :blush:
Got the sub box baffle sanded. Even though it is going to be wrapped in carpet, it is important with a good foundation for my own peace of mind  I chose to mount a SpeakOn contact to allow to easy disconnect when I need to remove the box. Hotglued both from the inside and the outside: 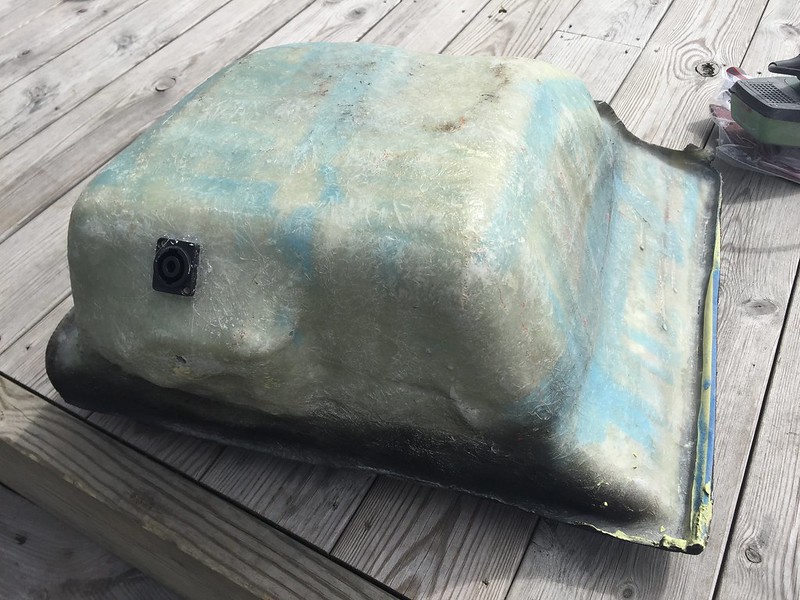 I got speaker cable terminated, techflexed and soldered onto the SpeakOn contact followed by heatshrink tubing: 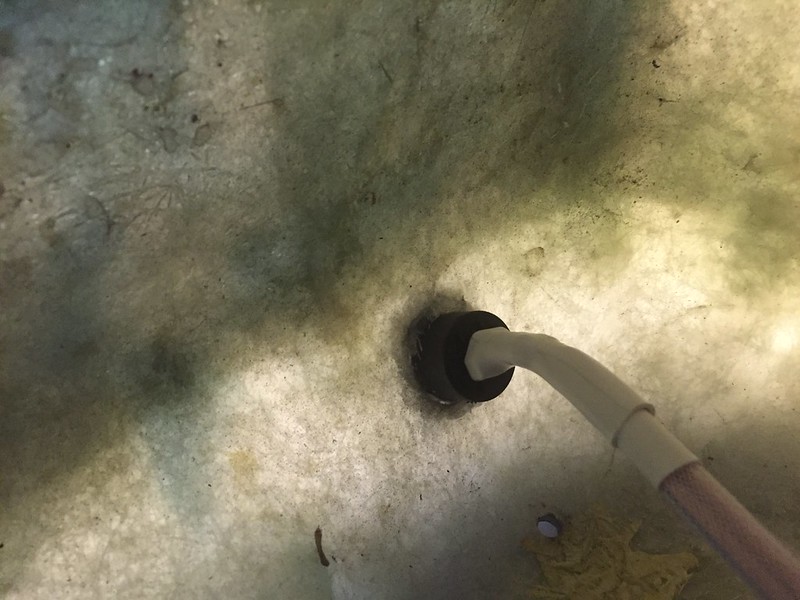 Upholstered in carpet: 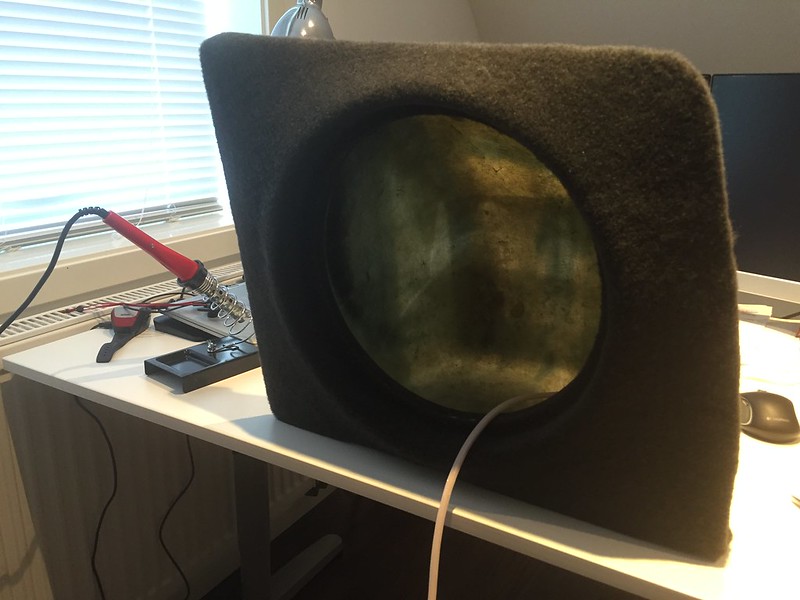 And finally test fitted in the trunk: 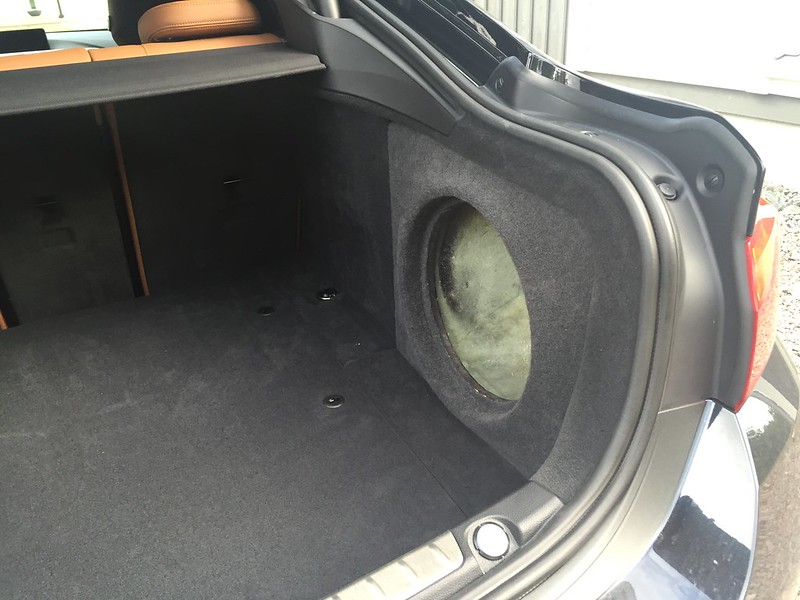 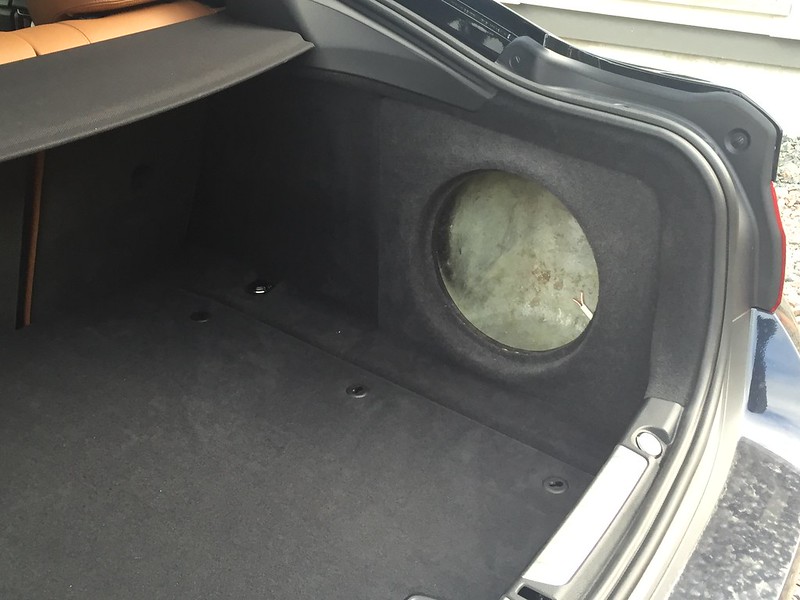 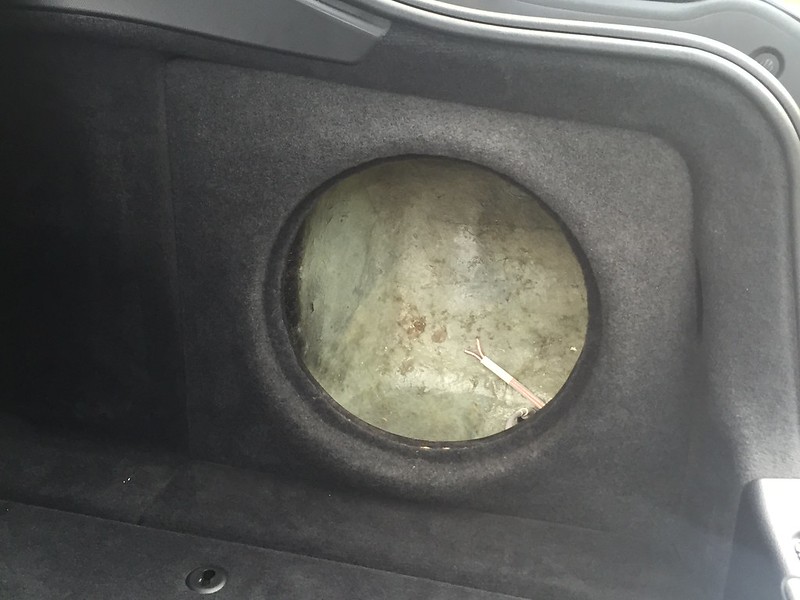 The color match is ok-ish, but the carpet has a different surface structure to it which doesn't matchup entirely with the rest of the trunk panels. Looks alright and considering most of the trunk floor will be wrapped in the same carpet I think it will look ok. If not I can always dye the carpet or simply wrap the other panels in the trunk. I'm very happy about the fitment of the box, it is spot on
__________________
|
| 08-09-2016, 04:33 PM | #38 |
|
Private
 20
Rep 71
Posts |
OUTSTANDING Craftsmanship and attention to detail! Keep up the great work. I wished I had the patience and ability to do the same...but for now I will just enjoy following your build!
 |
|
Appreciate
0
|
| 08-10-2016, 03:01 AM | #39 | |
|
Private First Class
99
Rep 186
Posts |
Quote:
__________________
|
|
|
Appreciate
0
|
| 08-14-2016, 01:58 PM | #40 |
|
Private First Class
99
Rep 186
Posts |
Hi folks!
A bit of an update today, managed to get some work done. Nothing that will actually show as part of the final install - focus on power and ground distribution, relay remote turn on and mounting of processor etc. Started out by getting the panels out of the left side of the trunk: 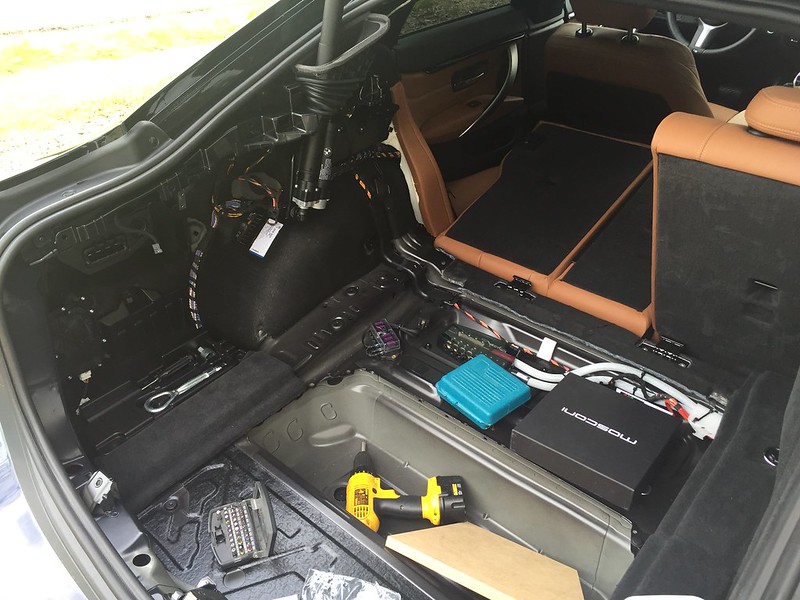 Took some measurements as I wanted to maximise the realestate for the processor mounting as it will also host some additonal distribution. Spent a long time figuring out how to mount the panel for the processor (6to8v8). I extended a bracket down from an existing screw to secure the upper end of the panel. Behind the panel was one of the fastening screws for the shelf upon which I'm placing the panel and I fabricated a coutout in the panel in order to get to it: 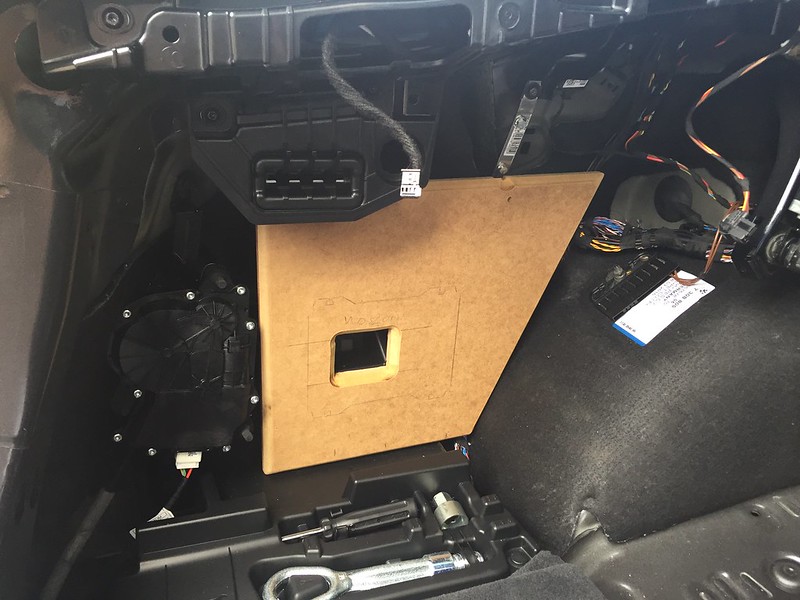 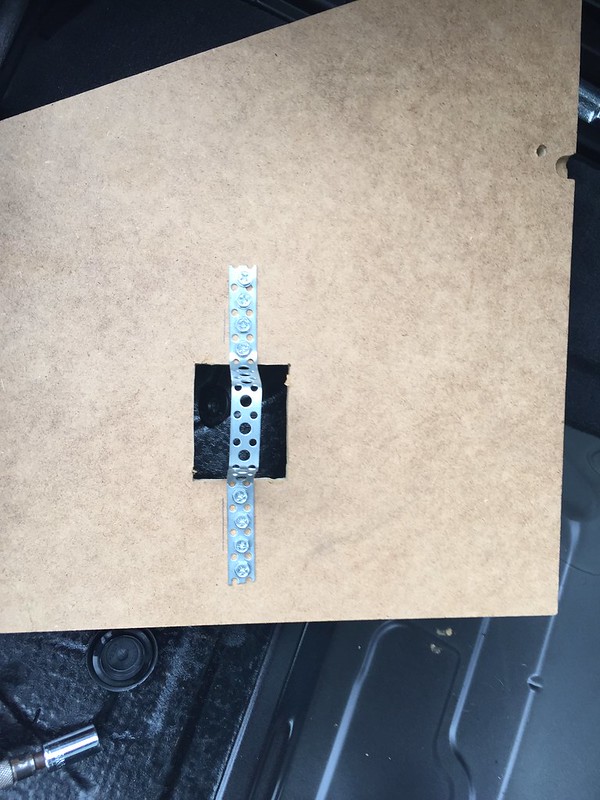 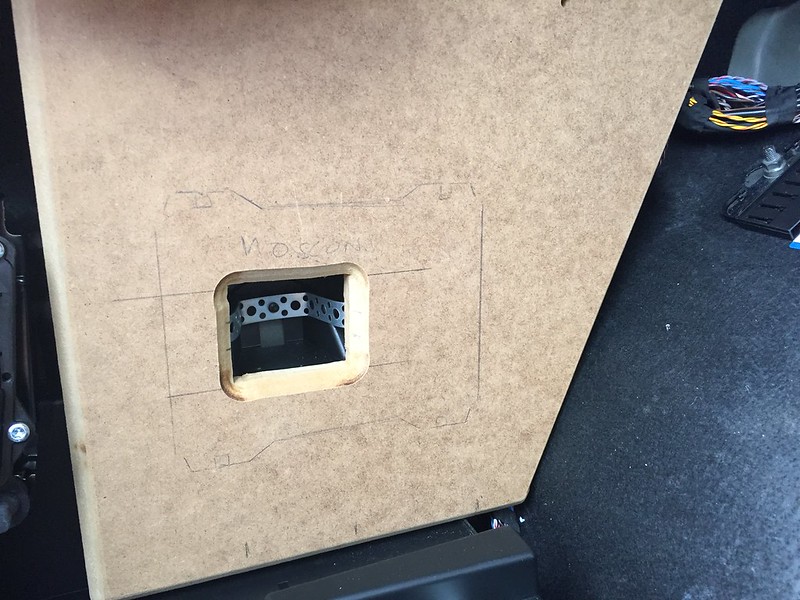 Layout I'm going for: 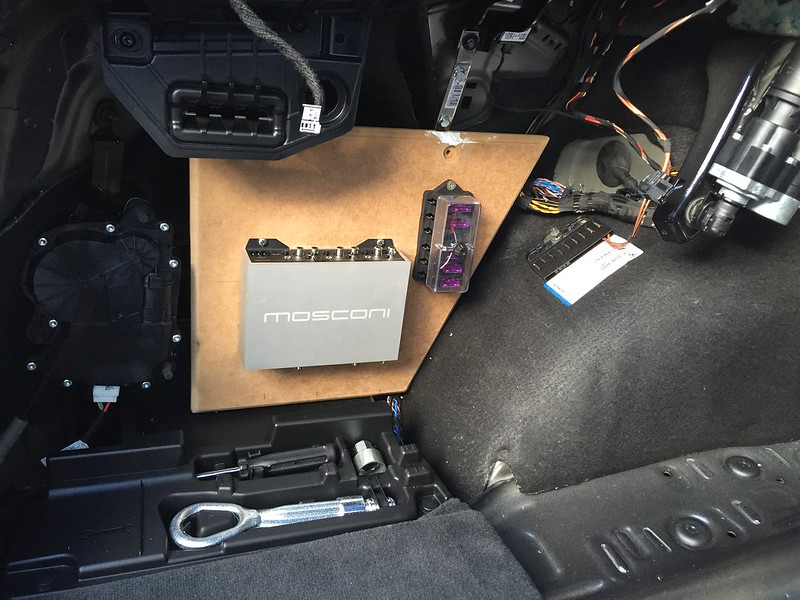 Thought I would try out the Technic Harness this time, provides 4 channel low-level preout and remote. No cutting into OEM cables, just plug-n-play: 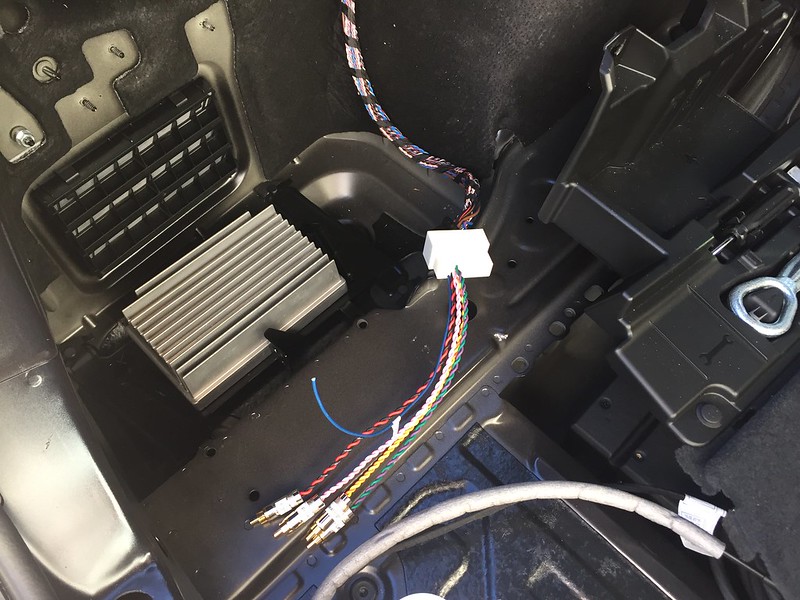 Build quality seems good and the OEM connectors locking mechanism also works: 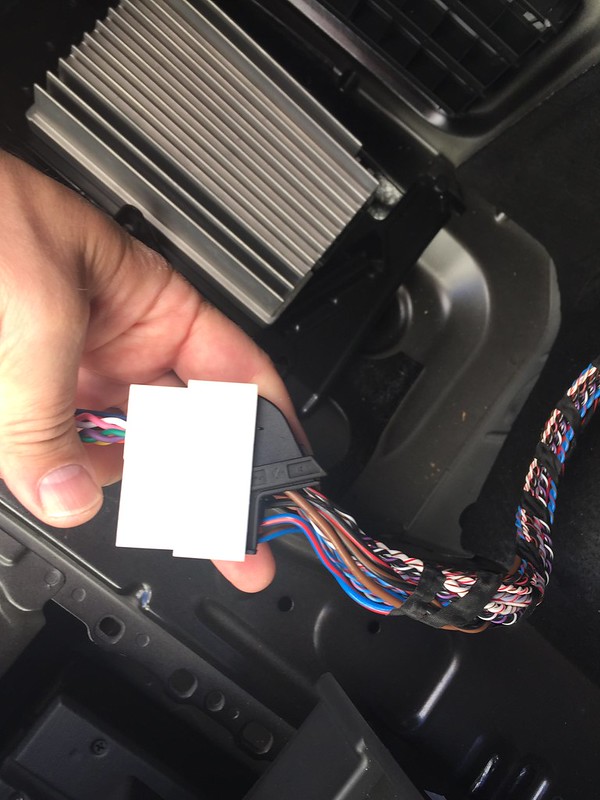 Then I felt a hunger coming on and tossed together a small cable sallad: 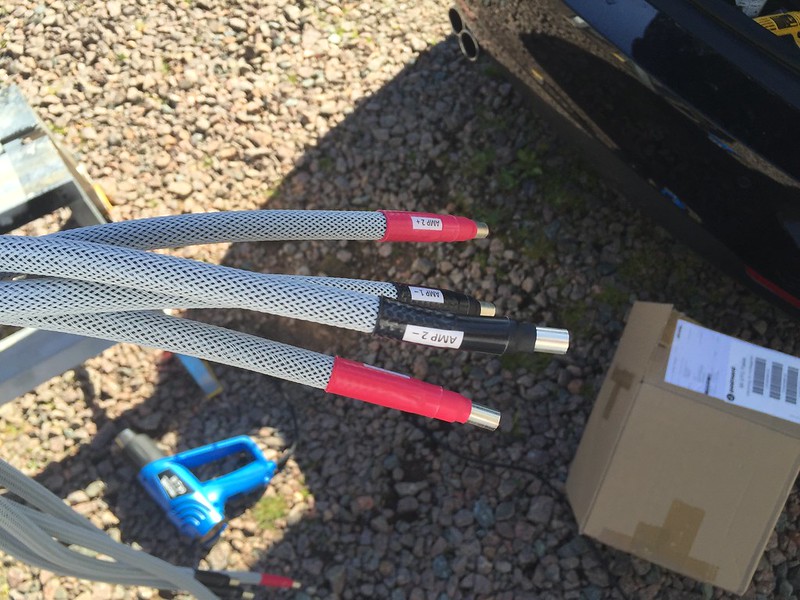 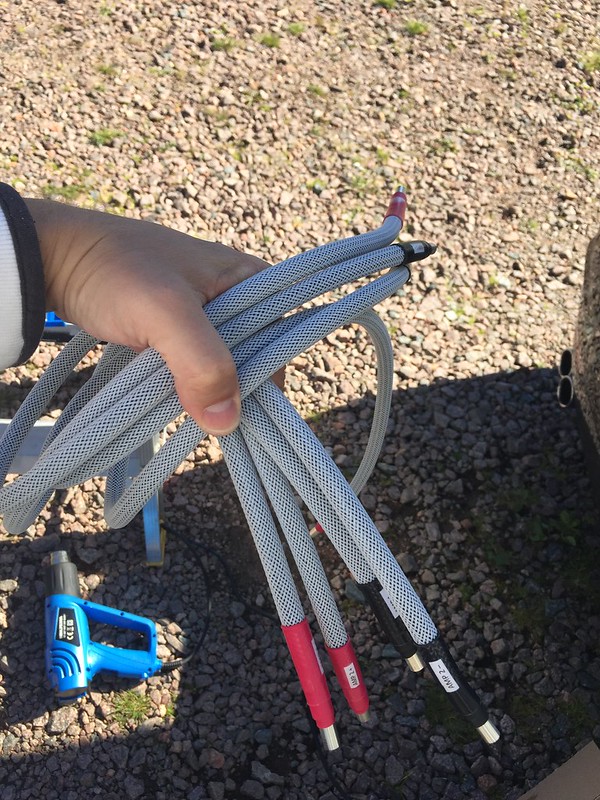 To ensure proper cable management down to the amp rack I shaped a piece of MDF which got wrapped in vinyl and securely mounted using an existing screw and nut, followed by cable tie anchors: 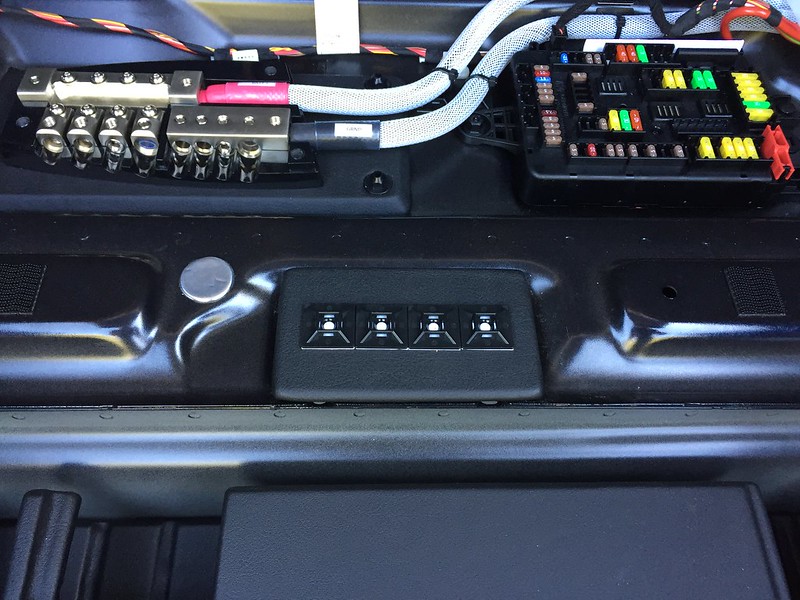 Of course I also wrapped the panel for the processer in the same vinyl, even it nothing of this will be displayed as part of the install: 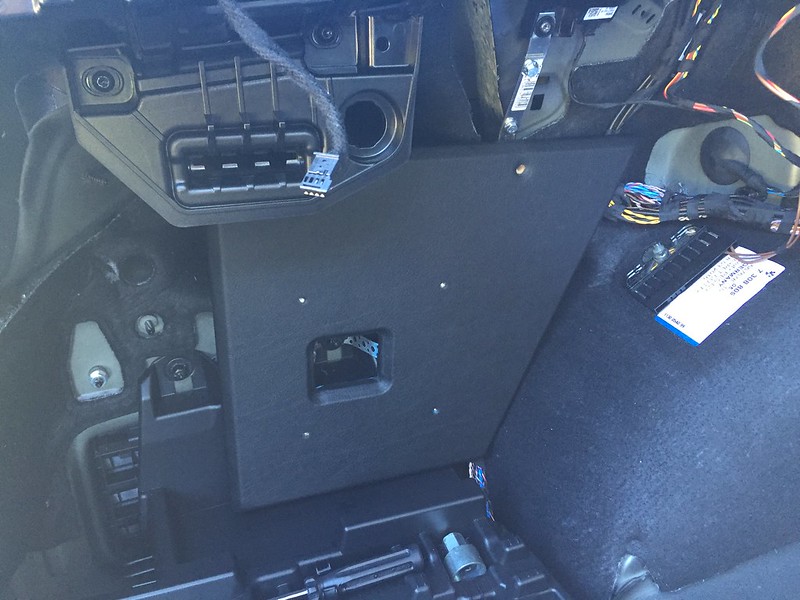 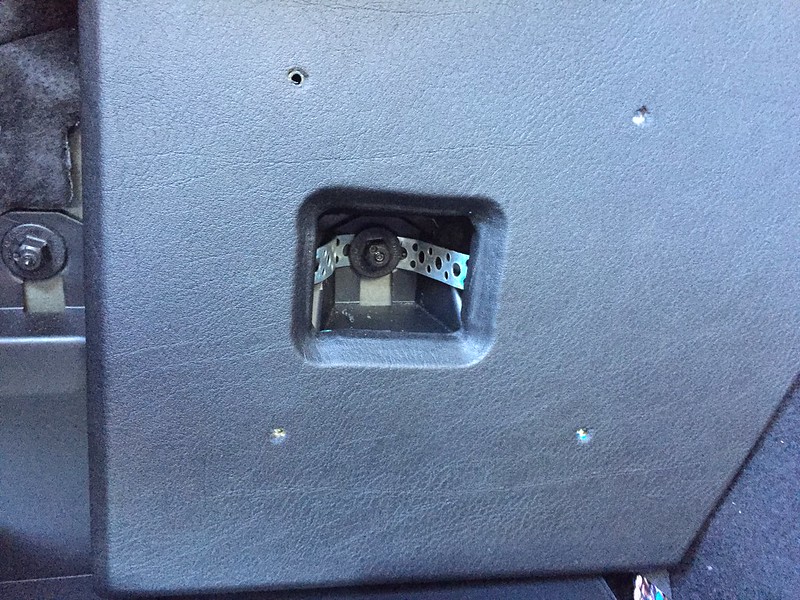 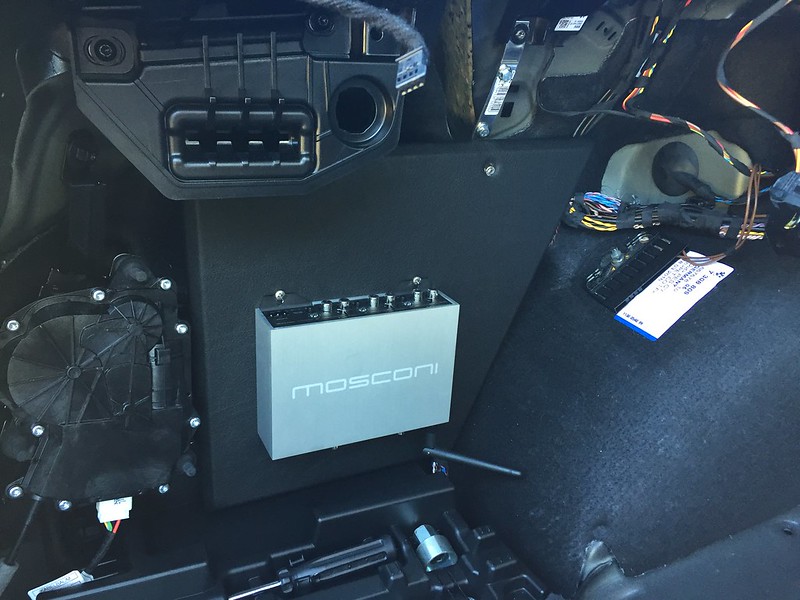 Then I moved on to running power and ground wires, remote wires and mounting relay and fuseblock covering the auxiliary powered stuff: 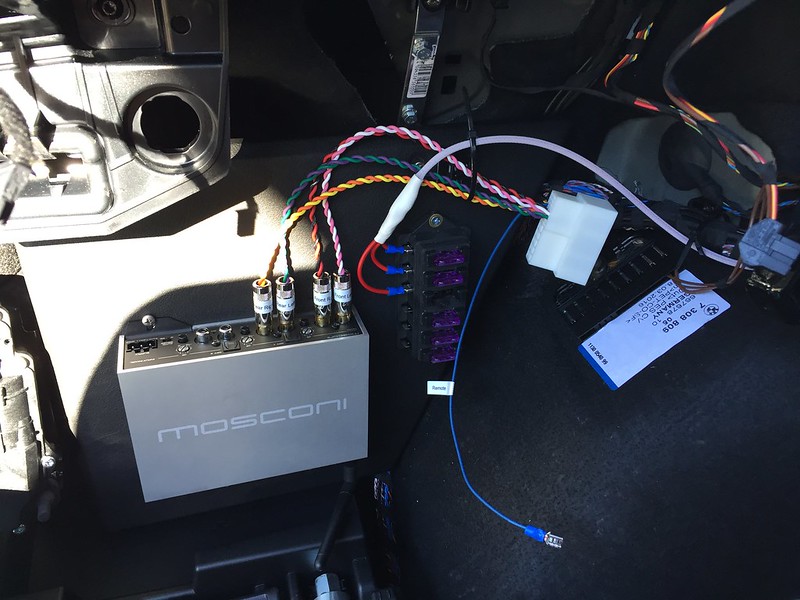 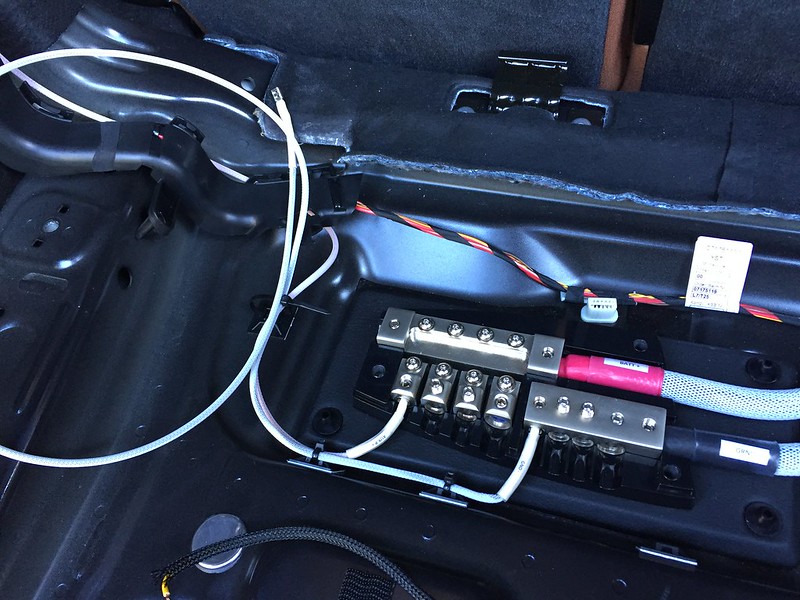 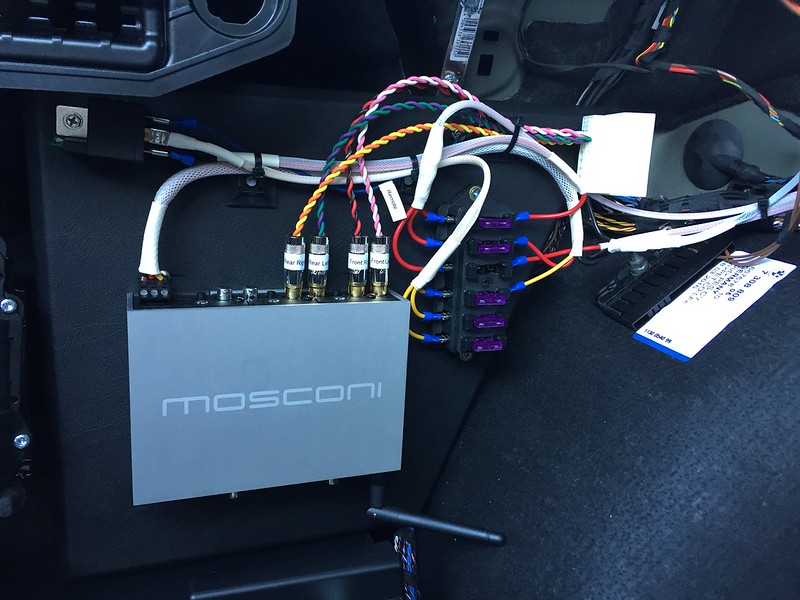 I'm making good progress towards closing this phase of the build, just missing some longer signal cables to run from the processor to the amp rack and the remote turn on leads for the amps. Once this is done, I can mount the amps, start work on covering panels and mount the subwoofer box and finally be out of the trunk.
__________________
|
|
Appreciate
0
|
| 08-16-2016, 01:13 AM | #42 |
|
Private First Class
99
Rep 186
Posts |
Hi folks,
Got started on fabricating and running speaker cables yesterday. Will be using quick connects so that I can disconnect the amp rack if need be. 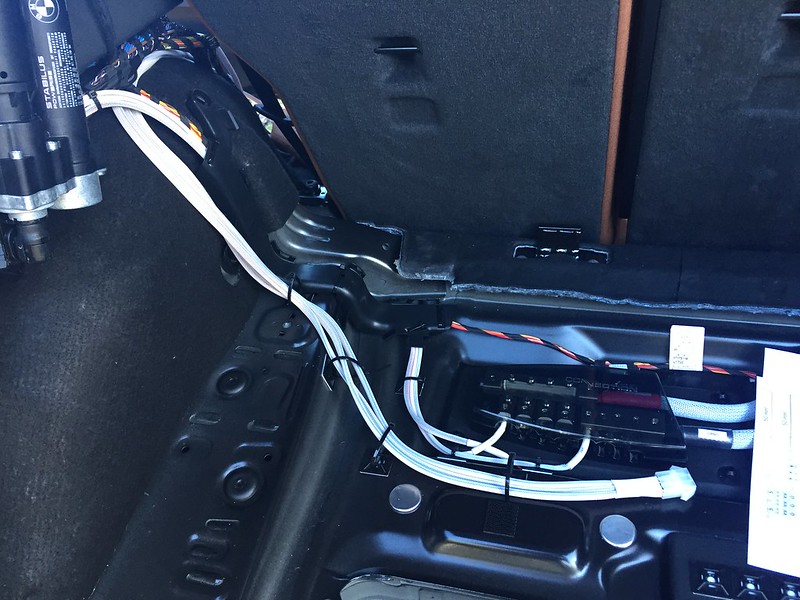 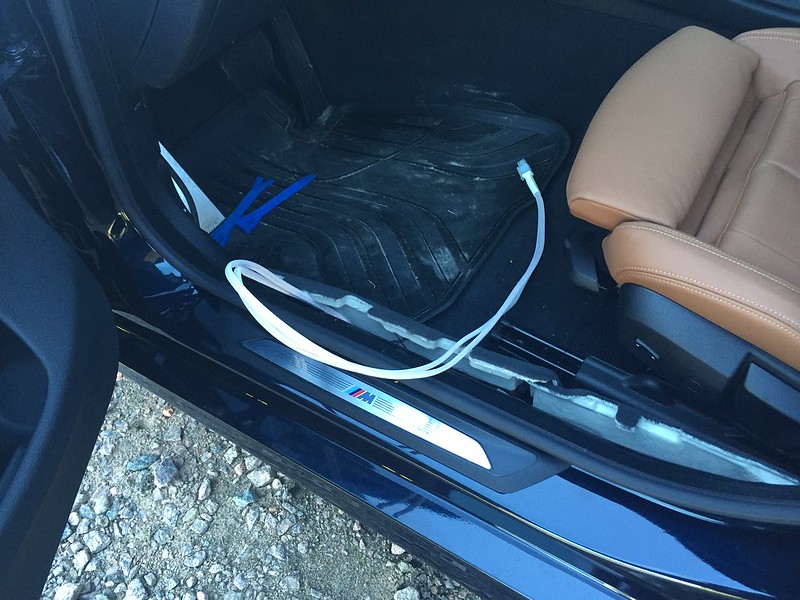 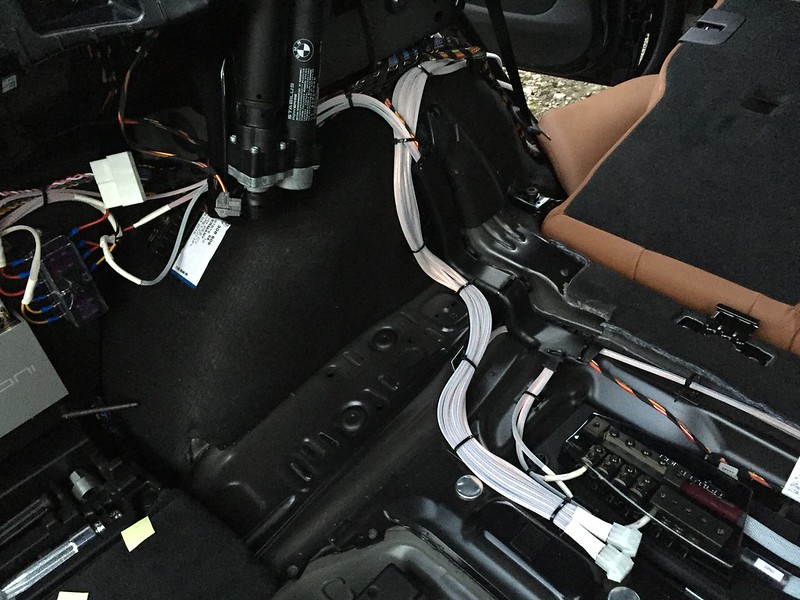 Going to run both lenghts up front and then secure everything using wire strips to the car. I'm also running cables for the DRC and USB for the PC up front while I'm at it
__________________
|
|
Appreciate
0
|
| 08-16-2016, 02:04 PM | #43 |
|
Banned
2221
Rep 5,897
Posts
Drives: 2014 335i Black F30 M Sport
Join Date: May 2016
Location: Portsmouth, UK
|
You must know what your doing, its all very confusing to the untrained eye. But I'm sure when done it will be awesome!
|
|
Appreciate
0
|
| 08-16-2016, 02:37 PM | #44 | |
|
Private First Class
99
Rep 186
Posts |
Quote:
__________________
|
|
|
Appreciate
1
Nelson@BimmerTech271.00 |
Post Reply |
| Bookmarks |
|
|