

BMW 3-Series and 4-Series Forum (F30 / F32) | F30POST
>
DIY | F32 FRONT SEAT REM/INST + Bavsound Ghost Subs installation

| 02-03-2017, 09:44 AM | #1 |
|
Schmollbraten

12512
Rep 1,985
Posts |
DIY | F32 FRONT SEAT REM/INST + Bavsound Ghost Subs installation
Here is what you need:
- T20 Torx insert for speaker cover and speaker rem/inst - T50 Torx Nut for 1/2" wrench for rem/inst of the seat guide tracks - metric 10mm Hexbold nut - a slottet midsize screwdriver - round about 2h time CAUTION: DO NOT DISCONNECT THE RECEPTACLES OF THE SEATS AT ANY TIME! LEAVE IGNITION OFF OR DISCONNECT THE BATTERY SEATS ARE NOT HEAVY BUT WATCH YOUR FINGERS BY RESETTING ONTO BOTTOM Shown as follow is the passenger seat, theres no difference to the drivers side. Pictures showing every time right side front of car, top side middle of car. The instruction is following the picture. 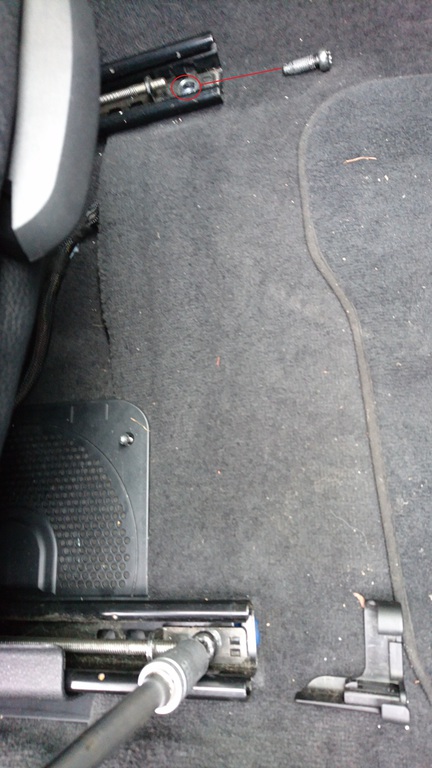 We set up our car with moving the seat electrically back to limit, remove the plastic cap at the outside track and loose the both T50 screws. 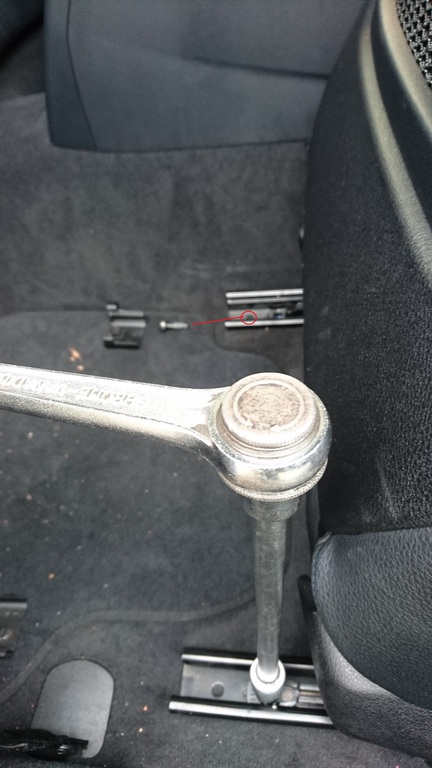 Then tilt the backrest to the front and move the seat to the end forward. Remove the both plastic caps and then the 2 T50 screws. Move the seat back to rear then and tilt backwards. 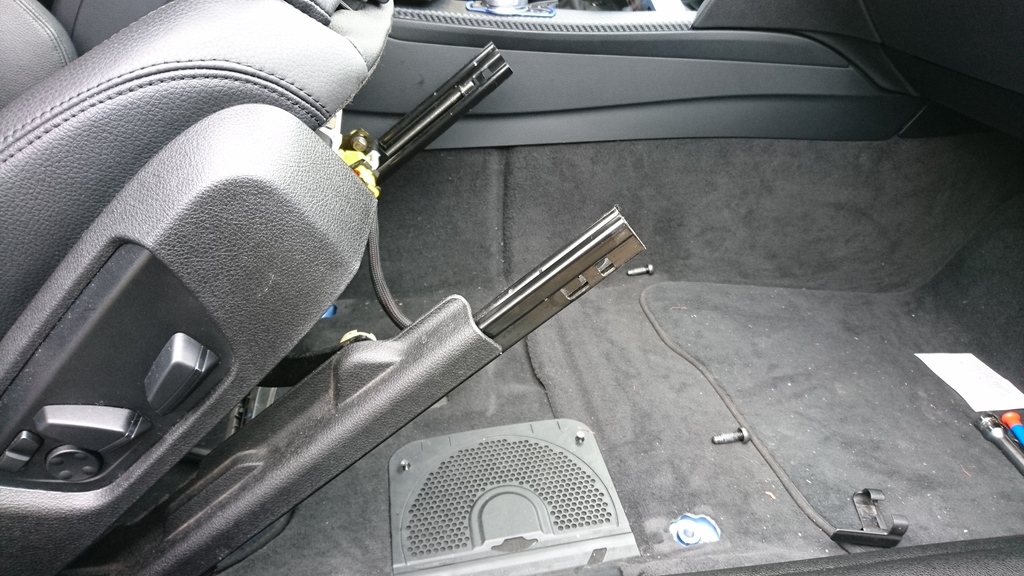 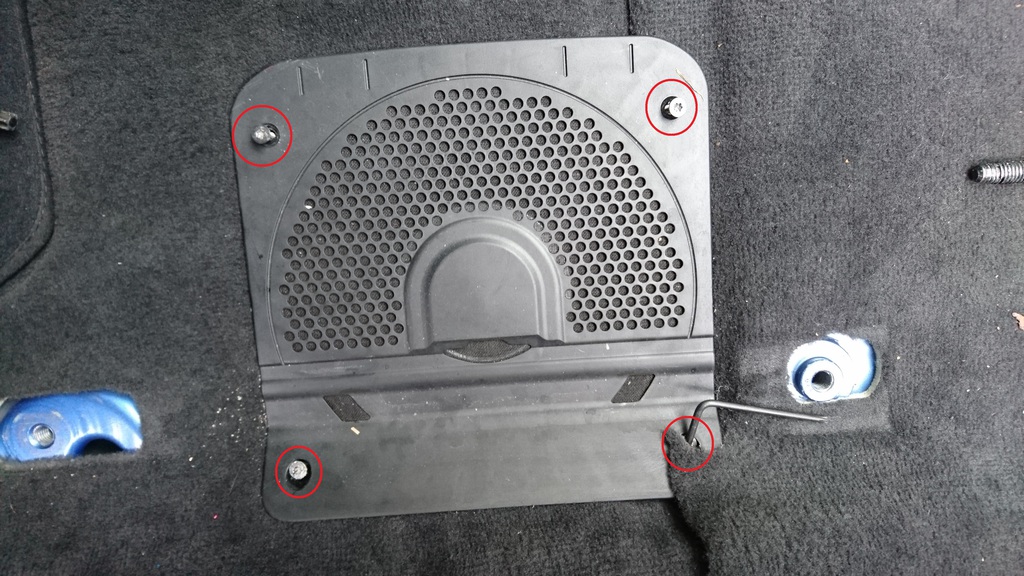 Remove the 4 T20 screws of the speaker cover and take it off 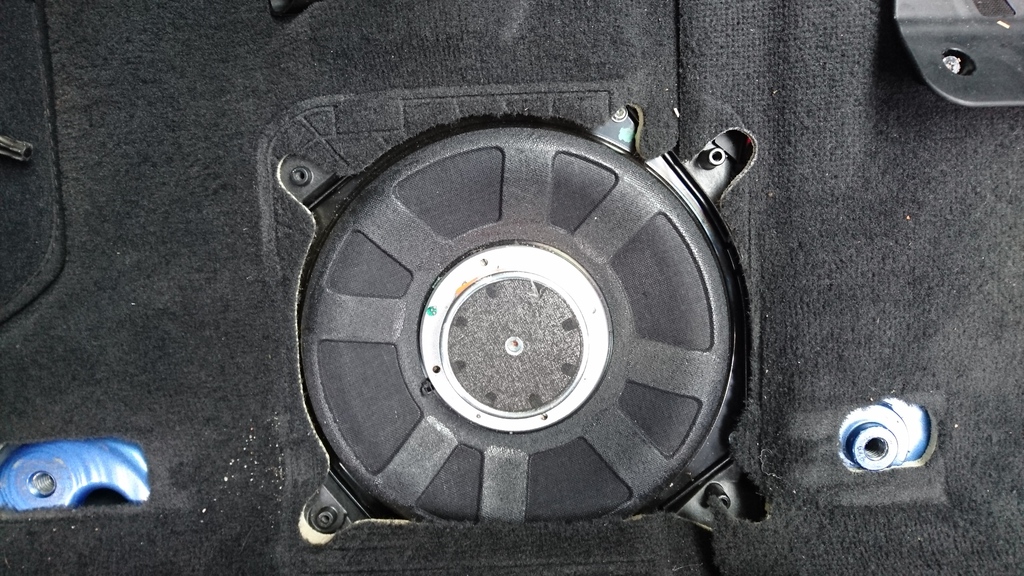 This is the speaker uncovered, resting into the floor 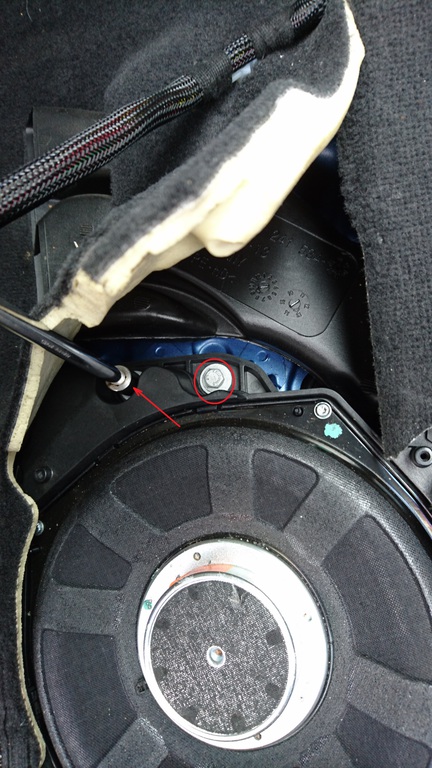 You have to remove the surrounding floor mats a bit to get enough space to remove the speakerassy. The housing is fixed with 2 hex head 10mm screws. 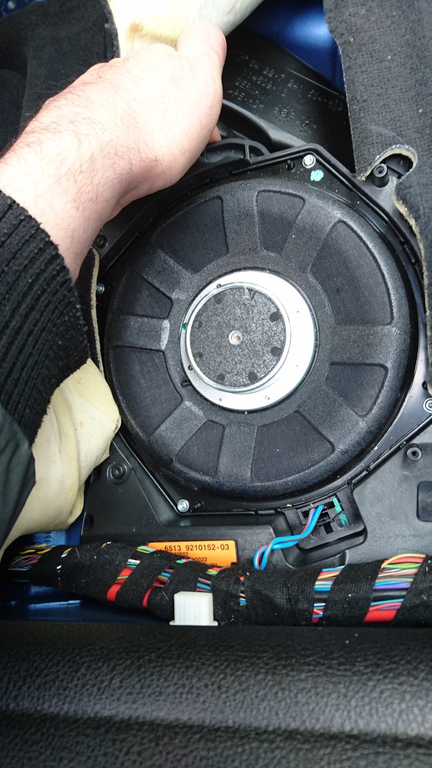 After unscrewing, lift the speaker assy carefully up and obey the harness onto the right side (not shown), its just popped into two holes and could be easy pulled out. 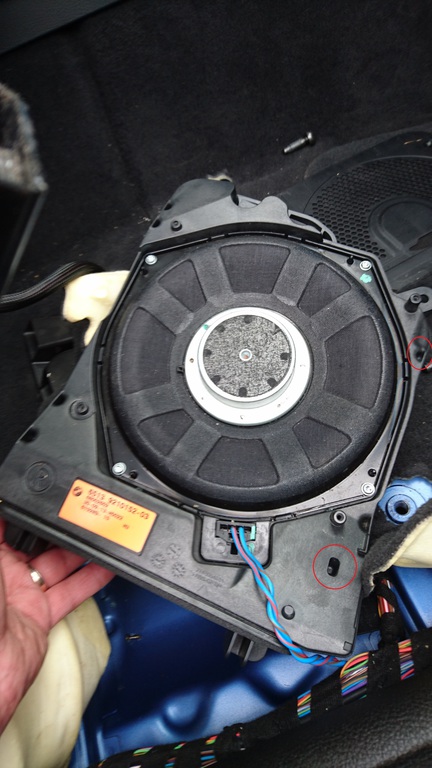 Now we got the assy (speaker and housing) removed and got just the plug left. The two circled marks are the places where the harness was attached. 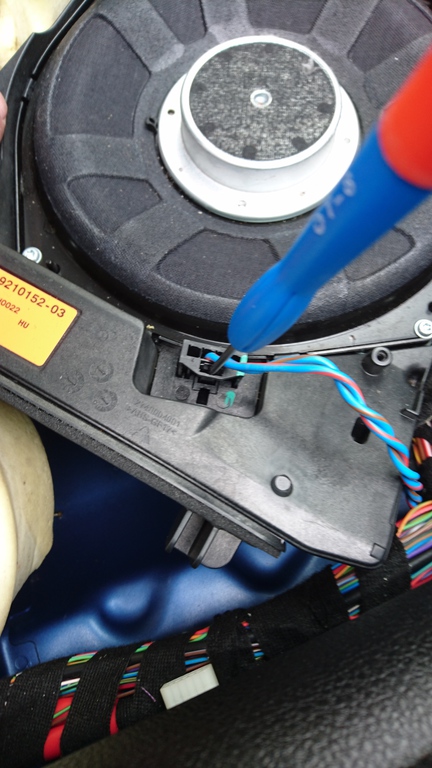 Use the slotted screwdriver to unlock the small stud and bend it inwards, remove the plug. 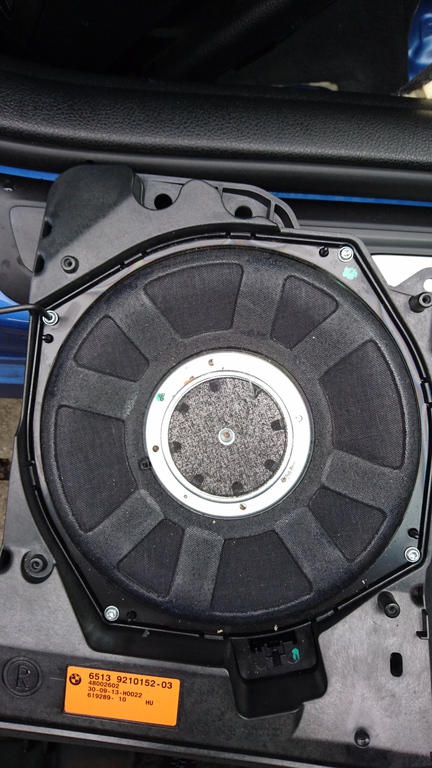 The removed assy. 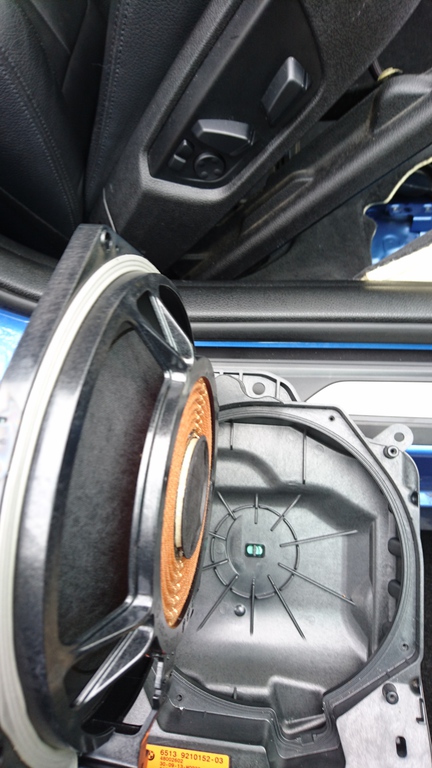 After removal of the 4 silver T20 screws you'll be able to remove the speaker from the housing. 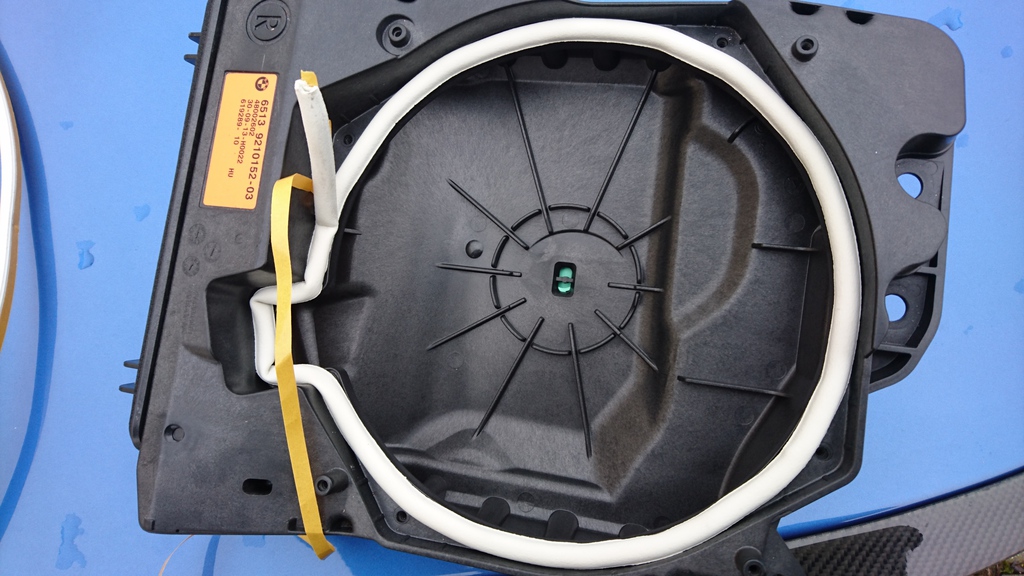 Although Bavsound added some softfoam tape to delete the space between speaker and housing I'd decided to buy D-shaped tape from the hardware shop and installed it like shown. The height of my tape is more and its softer, so I was expecting a better close-in of the new speakers. 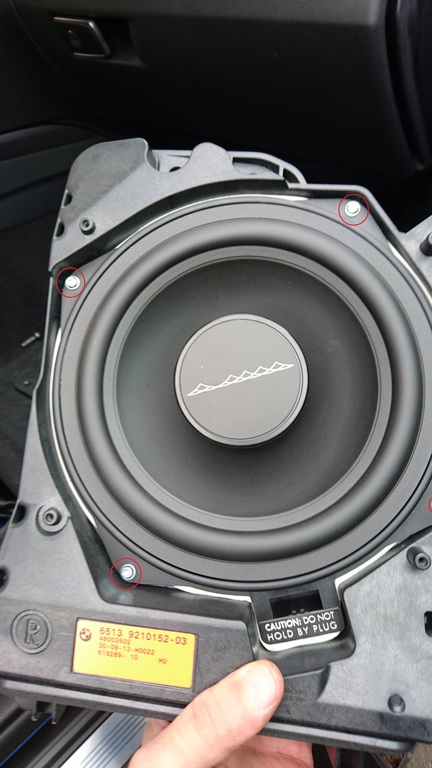 Insert the new Bavsound speaker into the housings and tighten the 4 silver T20 screws. I would suggest, you do this starting into one corner but not really tight at this time, go to the opposite side and tight also the screw. Then jump to another corner and so on until all screws are equally down into the housing and could be final tighten. 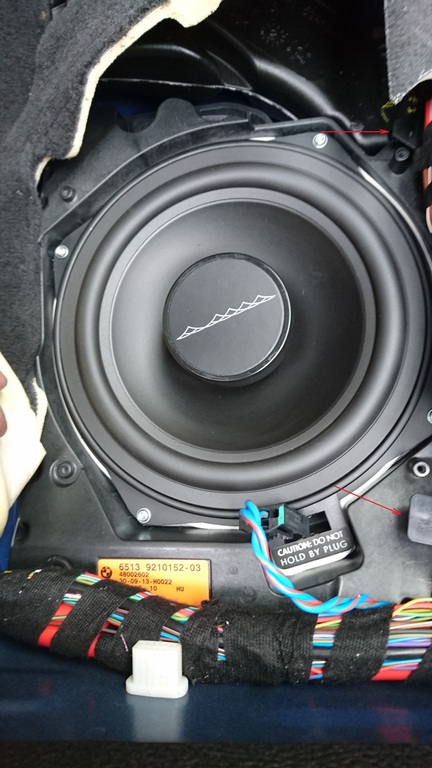 Now replug and reposition the assy at its rest. You would encounter a little necessary moving the mats and housing against each other to achieve enough space to reinsert the housing into its rest. Pop in the harness plugs (follow red arrows) and arrange the harness back to its origin rest. Reinsert the 2 hexbolts and tighten Rearrange the mats and obey the correct position of the floor air blower 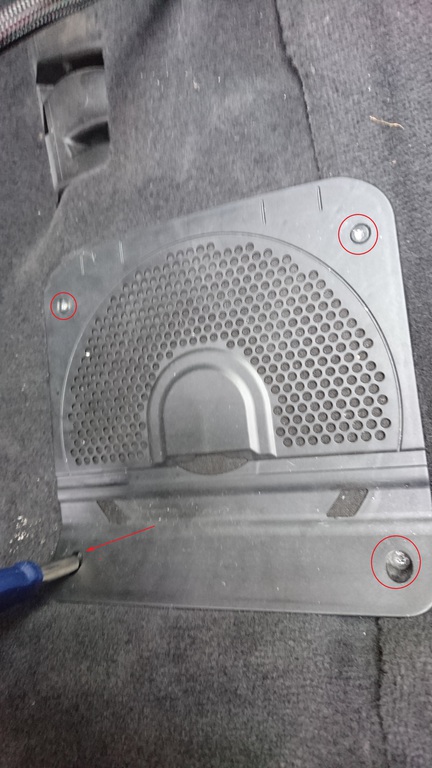 Reinstall the speaker cover with 4 T20 screws Now install the seat vice versa to the removal: Tilt forward to the ground and watch your fingers stay away from the rest, when positioning. Retighten the T50 screws at all 4 places, I would recommend you to insert all 4 screws loose to make the installation more easy and avoid thread damage, finally clip back the caps and you're done. Fire up the music and enjoy 
__________________
Citizen of ///M - Town, where too much is just right Some say, that my scrotum has its own small gravity field and when Im slowing down that brake lights come on at my buttox  Last edited by Dang3r; 02-03-2017 at 10:01 AM.. |
| 03-15-2017, 06:47 AM | #2 |
|
Schmollbraten
12512
Rep 1,985
Posts |
Well, a few weeks had past and the speakers had inflated their almost potential.
Whats to say before/after? At very clean and high-sampled mp3 tracks the quality of the bass is top notch and definitely worth the change. If you're hearing other music, e.g. wma- or asf-files, those are almost muted as before, even the adjustment of more bass couldnt compensate this. Low quality tracks stayed low. For CD or DVD tracks the speakers are working very well, nice depth tones, no snaring at heavier passages, nothing more to say. At a scale of max 5 stars to earn, I would give a very good 4, caused by simple installation, 100% fitment and pricing. The final sound is definitely better, the bases are much more stronger and clearer. Next step would be the change of the tweeters and midrange speakers to enjoy the whole nine inch of sound quality, but at this time I must state, that I wouldnt own my car any longer and this kind of work must remain for the next owner.
__________________
Citizen of ///M - Town, where too much is just right Some say, that my scrotum has its own small gravity field and when Im slowing down that brake lights come on at my buttox |
Post Reply |
| Bookmarks |
|
|


