F30POST
F30POST
2012-2015 BMW 3-Series and 4-Series Forum
BMW Garage BMW Meets Register Today's Posts
BMW 3-Series and 4-Series Forum (F30 / F32) | F30POST > 2012-2019 BMW 3 and 4-Series Forums > Photo, Video, Media Gallery, Journals > tboooe's All Show No Go build..'15 F36 428i GC...last mod 11/15/15
Extreme Powerhouse
Post Reply
 
Thread Tools Search this Thread
      06-09-2016, 09:02 AM   #595
Bols
Captain
Belgium
231
Rep
982
Posts

Drives: F36 AW 6MT
Join Date: Mar 2009
Location: Belgium

iTrader: (0)

Quote:
Originally Posted by Felosenco View Post

Forbes
Which ones did you get? Because there is now a specific part for the 4 series! I believe Tommy used the M4 ones and altered those to quite some extent!

New one should be easier to install.
Appreciate 0
      06-09-2016, 12:05 PM   #596
tboooe
Brigadier General
tboooe's Avatar
925
Rep
3,089
Posts

Drives: F36 428i GC, E36 M3 - gone :(
Join Date: Dec 2014
Location: The OC!

iTrader: (1)

Quote:
Originally Posted by Felosenco View Post
Tommy,

I've got some sills on the way and have plucked up the courage to install them myself, so I have a few questions.


How on earth did you mange to keep the sill correctly aligned and push it up onto the rocker panels at the same time? When I installed my rear spoiler I used some detergent spray so that I could move it around after the adhesive tape was touching the paint. This is probably not the best way to do it in this case as I would be working against gravity and would have to keep constant pressure applied as the detergent dried.


Is there any particular location that the holes should be drilled in the sills? ( I don't think mine are pre-drilled) Is the hole size in the sill also 6mm?


What is the length of plastic rivet required? I found these on eBay, but not sure if 17mm is long enough.

http://www.ebay.com.au/itm/50x-BMW-Push-Fit-Plastic-Rivet-Pin-Clip-Bumpers-Interior-Trim-Panel-Fascia-6mm-/281875156252?hash=item41a1118d1c:gV0AAOSwPgxVOfh f

Thanks in advance.

Forbes
Hi there! You are going to love how the sills look. Here are my suggestions:

1. Aligning the sills - what I did was use a stack of books on both ends of the sills to get them as close as possible to the rocker panels so I could better align them. I also kept the masking on the double sided tape except for a small section as the ends of the sill. Because the sills are flexible, they will sag so that leaves enough space to remove the masking once I get the ends of the sill aligned and stuck to the rocker panel.

2. I am very surprised your sills are not prill-drilled with holes! Are your sills OEM? Anyway, I would just space out the 15 holes evenly on the sills. And yes, the 6mm holes are right though as I mentioned its a very snug fit! I had to hammer in the plastic screw part that is supposed to expand the rivet.
EDIT: I see on your thread that you bought aftermarket sills.

3. The length of the rivet only needs to be longer than the combined thickness of the sill and rocker panel as the bottom part of the rivet closest to the rivet head is all that really expands. The rivets you linked to doesnt look like the ones I have. The part # is 07149193301

Please let me know if you have any additional questions.
__________________
My build thread

2015 428i GC - Alpine White - Coral Red - M Sport

Last edited by tboooe; 06-09-2016 at 12:23 PM..
Appreciate 0
      06-09-2016, 12:08 PM   #597
tboooe
Brigadier General
tboooe's Avatar
925
Rep
3,089
Posts

Drives: F36 428i GC, E36 M3 - gone :(
Join Date: Dec 2014
Location: The OC!

iTrader: (1)

Quote:
Originally Posted by Bols View Post
Which ones did you get? Because there is now a specific part for the 4 series! I believe Tommy used the M4 ones and altered those to quite some extent!

New one should be easier to install.
Right! My M4 ones needed a fair amount of plastic to be cut in order to align correctly. I heard the specific 4 series ones are much easier to install.
__________________
My build thread

2015 428i GC - Alpine White - Coral Red - M Sport
Appreciate 0
      06-09-2016, 03:01 PM   #598
Felosenco
Lieutenant
Felosenco's Avatar
Australia
142
Rep
454
Posts

Drives: 428i M Sport Gran Coupe
Join Date: Feb 2012
Location: Brisbane QLD

iTrader: (0)

Garage List
Quote:
Originally Posted by Bols View Post
Which ones did you get? Because there is now a specific part for the 4 series! I believe Tommy used the M4 ones and altered those to quite some extent!

New one should be easier to install.
I finally found some aftermarket CF ones specific to F36 that are much cheaper than OEM (these were only matt black anyway) here in Oz.

http://www.ebmotor.com/style-real-ca...up-p-2292.html
__________________
2015 428i M-Sport Gran Coupe, Glacier Silver, 6sp Manual, HK Audio
"I fear the day that technology will surpass our human interaction. The world will have a generation of idiots." - Albert Einstein
Appreciate 0
      06-09-2016, 03:12 PM   #599
Felosenco
Lieutenant
Felosenco's Avatar
Australia
142
Rep
454
Posts

Drives: 428i M Sport Gran Coupe
Join Date: Feb 2012
Location: Brisbane QLD

iTrader: (0)

Garage List
Quote:
1. Aligning the sills - what I did was use a stack of books on both ends of the sills to get them as close as possible to the rocker panels so I could better align them. I also kept the masking on the double sided tape except for a small section as the ends of the sill. Because the sills are flexible, they will sag so that leaves enough space to remove the masking once I get the ends of the sill aligned and stuck to the rocker panel.
So the adhesion promoter didn't make the section where you still had the masking on it stick to the rocker panel? I imagine you pushed the sill against the rocker panel whilst aligning the second end?

Quote:
3. The length of the rivet only needs to be longer than the combined thickness of the sill and rocker panel as the bottom part of the rivet closest to the rivet head is all that really expands. The rivets you linked to doesnt look like the ones I have. The part # is 07149193301
I'll check out this part, thanks. I want to get all the hardware organised before the sill turn up, rather than be patient and measure the sills when they get here.
I obtained the details of the 3M tape & adhesion promoter from your very detailed post.
__________________
2015 428i M-Sport Gran Coupe, Glacier Silver, 6sp Manual, HK Audio
"I fear the day that technology will surpass our human interaction. The world will have a generation of idiots." - Albert Einstein
Appreciate 0
      06-09-2016, 03:18 PM   #600
tboooe
Brigadier General
tboooe's Avatar
925
Rep
3,089
Posts

Drives: F36 428i GC, E36 M3 - gone :(
Join Date: Dec 2014
Location: The OC!

iTrader: (1)

Quote:
Originally Posted by Felosenco View Post
So the adhesion promoter didn't make the section where you still had the masking on it stick to the rocker panel? I imagine you pushed the sill against the rocker panel whilst aligning the second end?

I just pushed the sill against the rocker panel at the very ends. At least my sill sagged a lot so I could push the ends up without the middle section touching the rocker panel. I first did the front edge then the back edge. Since your sill is CF I imagine its not as flexible. In that case I think the best thing you can do is align the sill as close as you can with a stack of books then try to only press the front edge of the sill against the rocker panel. With only this portion stuck against the rocker panel you should still have some flexibility to adjust the horizontal alignment at the other end of the sill. Does that help at all???
__________________
My build thread

2015 428i GC - Alpine White - Coral Red - M Sport
Appreciate 0
      06-09-2016, 03:23 PM   #601
Felosenco
Lieutenant
Felosenco's Avatar
Australia
142
Rep
454
Posts

Drives: 428i M Sport Gran Coupe
Join Date: Feb 2012
Location: Brisbane QLD

iTrader: (0)

Garage List
Quote:
Originally Posted by tboooe
Quote:
Originally Posted by Felosenco View Post
So the adhesion promoter didn't make the section where you still had the masking on it stick to the rocker panel? I imagine you pushed the sill against the rocker panel whilst aligning the second end?

I just pushed the sill against the rocker panel at the very ends. At least my sill sagged a lot so I could push the ends up without the middle section touching the rocker panel. I first did the front edge then the back edge. Since your sill is CF I imagine its not as flexible. In that case I think the best thing you can do is align the sill as close as you can with a stack of books then try to only press the front edge of the sill against the rocker panel. With only this portion stuck against the rocker panel you should still have some flexibility to adjust the horizontal alignment at the other end of the sill. Does that help at all???
Yes it does thanks. I'll have a look at the flex when they arrive to see if your method will work for me.
__________________
2015 428i M-Sport Gran Coupe, Glacier Silver, 6sp Manual, HK Audio
"I fear the day that technology will surpass our human interaction. The world will have a generation of idiots." - Albert Einstein
Appreciate 0
      06-09-2016, 03:49 PM   #602
stuart_2994
New Member
0
Rep
20
Posts

Drives: bmw
Join Date: Nov 2015
Location: california

iTrader: (1)

hi guys i just want to confirm before i pull the trigger, m4 side skirt sills would fit on a f36 without cutting it? thanks
Appreciate 0
      06-09-2016, 03:52 PM   #603
Felosenco
Lieutenant
Felosenco's Avatar
Australia
142
Rep
454
Posts

Drives: 428i M Sport Gran Coupe
Join Date: Feb 2012
Location: Brisbane QLD

iTrader: (0)

Garage List
Quote:
Originally Posted by stuart_2994
hi guys i just want to confirm before i pull the trigger, m4 side skirt sills would fit on a f36 without cutting it? thanks
No you will need to trim. F82 is not same profile to F32/F36.
__________________
2015 428i M-Sport Gran Coupe, Glacier Silver, 6sp Manual, HK Audio
"I fear the day that technology will surpass our human interaction. The world will have a generation of idiots." - Albert Einstein
Appreciate 0
      06-09-2016, 03:53 PM   #604
tboooe
Brigadier General
tboooe's Avatar
925
Rep
3,089
Posts

Drives: F36 428i GC, E36 M3 - gone :(
Join Date: Dec 2014
Location: The OC!

iTrader: (1)

Quote:
Originally Posted by stuart_2994 View Post
hi guys i just want to confirm before i pull the trigger, m4 side skirt sills would fit on a f36 without cutting it? thanks
The M4 ones need cutting. You should get the ones made specifically for the 4 series.
__________________
My build thread

2015 428i GC - Alpine White - Coral Red - M Sport
Appreciate 0
      06-09-2016, 04:06 PM   #605
Bols
Captain
Belgium
231
Rep
982
Posts

Drives: F36 AW 6MT
Join Date: Mar 2009
Location: Belgium

iTrader: (0)

Quote:
Originally Posted by stuart_2994
hi guys i just want to confirm before i pull the trigger, m4 side skirt sills would fit on a f36 without cutting it? thanks
I believe these will be the part numbers for regular non M 4 series:

51192361679/51192361680

Atleast that's what it shows when I search for schwelleraufsatz on Leebmann
Appreciate 0
      06-09-2016, 04:57 PM   #606
Robby29
Lieutenant
Robby29's Avatar
United_States
321
Rep
507
Posts

Drives: AP M4 / Z3 2.8
Join Date: Mar 2013
Location: Los Angeles

iTrader: (5)

Quote:
Originally Posted by Bols View Post
I believe these will be the part numbers for regular non M 4 series:

51192361679/51192361680

Atleast that's what it shows when I search for schwelleraufsatz on Leebmann
Those are it! I have them on my f36 and it came with pre-drilled holes.
Appreciate 0
      06-10-2016, 06:15 AM   #607
stuart_2994
New Member
0
Rep
20
Posts

Drives: bmw
Join Date: Nov 2015
Location: california

iTrader: (1)

thanks guys. i will be getting this instead of the m4 version.
http://www.ebay.com/itm/191783509677...%3AMEBIDX%3AIT
Appreciate 0
      06-10-2016, 06:50 AM   #608
syenisch
Captain
syenisch's Avatar
United_States
111
Rep
810
Posts

Drives: 2015 435i Gran Coupe
Join Date: Jun 2008
Location: Winter Garden, FL

iTrader: (1)

Quote:
Originally Posted by stuart_2994
thanks guys. i will be getting this instead of the m4 version.
http://www.ebay.com/itm/191783509677...%3AMEBIDX%3AIT
Duraflex doesn't not have a good reputation as a quality product.
Appreciate 0
      07-02-2016, 11:45 PM   #609
Presario
Major
Presario's Avatar
United_States
413
Rep
1,170
Posts

Drives: 2018 X3 M40i, 2016 435 GC
Join Date: May 2013
Location: SoCal

iTrader: (3)

Tboooe, very impressive GC build! Love all the mods you've done, big and small. Had a blast reading through your journal. Can't wait to see what's next!
__________________
F36 435i * MINERAL GREY * ///M Performance | G01 X3 * PHYTONIC BLUE * ///M40i
Appreciate 0
      08-15-2016, 10:48 AM   #610
CyclingBroStyle
Second Lieutenant
CyclingBroStyle's Avatar
United_States
233
Rep
241
Posts

Drives: '19 330i xDrive M Sport
Join Date: Sep 2014
Location: Washington, D.C.

iTrader: (0)

Garage List
Quote:
Originally Posted by tboooe View Post
UPDATE: 14-02-15 - iND Painted Front Reflectors

Since I am newly single I didnt have much to do today (LOL) so I decided to install my iND painted front reflectors. The whole process took me about 1.5 hours mainly because I took my time. Here are some pointers that I hope helps others:

Tools:
Angled plastic trim removal tool
Hair dryer
8mm socket
Degreaser/cleaner
Finger nails/raw skin

Reflector removal:
After opening the wheel well liner I proceeded to slowly heat the back edge of the reflector. Using my hair dryer on med I heat the area for about 5 mins, constantly moving the dryer. I started on the back edge because that was the only place that made sense and provided room for me to work. There is a plastic lip right at the back edge of the reflector which is why an angled trim removal or flat tool is handy.

Once I noticed a little bit of give in the reflector by pushing on it from the outside I proceeded to use my trim removal tool to get under the reflector edge. So as not to put too much outward pressure on the bumper, I made sure I pressed from the outside against the trim removal tool while also pushing the reflector inward. Once I was able to get the tool under the reflector, I worked the tool downward using it to "cut" the adhesive. Again I provided pressure from the outside of the bumper following the tool downward. Once the back edge of the reflector was loose I worked on top edge.

Using the hair dryer again, I heated up the front edge of the reflector for another 5 mins. This time, instead of working from the inside, I used my trim removal tool from the outside. Starting from the top edge, I used my hand to pull on the reflector from the inside. Once enough of a gap was created, I inserted the tool between the reflector and bumper for the outside. Like before, I slowly worked my way down, "cutting" away at the adhesive. After getting about halfway down I could use my hand from the inside to pull away the reflector from the bumper completely.

With the reflector removed I spent a fair amount of time making sure I removed all the left over adhesive. I did this using my degreaser, finger nails, and fingers, rubbing the adhesive away. Once I was satisfied that all the adhesive was gone I thoroughly cleaned the area.

1.5 hours later the car looks much nicer! One thing I noticed is that the painted reflector does not "look" to sit as flush against the bumper as compared to the stock reflector. I think this is an optical illusion caused by the body color reflector making the seam between the reflector and bumper more obvious. Also the Alpine White makes the shadow cast by the reflector edge more obvious too.
so I just installed them on my Msport 428 and the I noticed that the corners aren't fitting almost as if the curvature is off did you have the same issue?
__________________
Current: MY2019 330i xDrive M-Sport w/Lasers - Portimao Blue
Previous: MY2013 328i xDrive Sport Line - Sapphire Black | MY2016 428i xDrive M-Sport - Mineral Grey
BMW CCA #522637 use me as a referral for BMW CCA
Appreciate 0
      08-15-2016, 11:11 AM   #611
tboooe
Brigadier General
tboooe's Avatar
925
Rep
3,089
Posts

Drives: F36 428i GC, E36 M3 - gone :(
Join Date: Dec 2014
Location: The OC!

iTrader: (1)

Quote:
Originally Posted by Cyclingbrethren View Post
so I just installed them on my Msport 428 and the I noticed that the corners aren't fitting almost as if the curvature is off did you have the same issue?
No I did not. Where did you get the reflector from? Mine from iND supposedly used the OEM BMW part as the base for the paint so the fit was as expected.
__________________
My build thread

2015 428i GC - Alpine White - Coral Red - M Sport
Appreciate 0
      08-15-2016, 11:12 AM   #612
CyclingBroStyle
Second Lieutenant
CyclingBroStyle's Avatar
United_States
233
Rep
241
Posts

Drives: '19 330i xDrive M Sport
Join Date: Sep 2014
Location: Washington, D.C.

iTrader: (0)

Garage List
Quote:
Originally Posted by tboooe
Quote:
Originally Posted by Cyclingbrethren View Post
so I just installed them on my Msport 428 and the I noticed that the corners aren't fitting almost as if the curvature is off did you have the same issue?
No I did not. Where did you get the reflector from? Mine from iND supposedly used the OEM BMW part as the base for the paint so the fit was as expected.
Got them from INd but something isn't right I have to shave off part of the surrounding plastic to make it fit and im pretty sure I installed them correctly... because you cant install them upside down they wont fit or is it possible I installed them upside down so it should have been fairly straight forward
__________________
Current: MY2019 330i xDrive M-Sport w/Lasers - Portimao Blue
Previous: MY2013 328i xDrive Sport Line - Sapphire Black | MY2016 428i xDrive M-Sport - Mineral Grey
BMW CCA #522637 use me as a referral for BMW CCA

Last edited by CyclingBroStyle; 08-15-2016 at 11:26 AM..
Appreciate 0
      08-15-2016, 12:19 PM   #613
tboooe
Brigadier General
tboooe's Avatar
925
Rep
3,089
Posts

Drives: F36 428i GC, E36 M3 - gone :(
Join Date: Dec 2014
Location: The OC!

iTrader: (1)

Quote:
Originally Posted by Cyclingbrethren View Post
Got them from INd but something isn't right I have to shave off part of the surrounding plastic to make it fit and im pretty sure I installed them correctly... because you cant install them upside down they wont fit or is it possible I installed them upside down so it should have been fairly straight forward
Interesting. I wonder if the paint thickness was the issue? I hope it looks good after your mod and install? If not, have you contacted iND?
__________________
My build thread

2015 428i GC - Alpine White - Coral Red - M Sport
Appreciate 0
      08-15-2016, 01:57 PM   #614
CyclingBroStyle
Second Lieutenant
CyclingBroStyle's Avatar
United_States
233
Rep
241
Posts

Drives: '19 330i xDrive M Sport
Join Date: Sep 2014
Location: Washington, D.C.

iTrader: (0)

Garage List
Just emailed them INd responded in seconds absolute GRADE A customer service they are sending me a replacement, on that note I will say their products are worth every penny!
__________________
Current: MY2019 330i xDrive M-Sport w/Lasers - Portimao Blue
Previous: MY2013 328i xDrive Sport Line - Sapphire Black | MY2016 428i xDrive M-Sport - Mineral Grey
BMW CCA #522637 use me as a referral for BMW CCA
Appreciate 0
      08-19-2016, 01:25 PM   #615
vanm3
Second Lieutenant
vanm3's Avatar
Canada
106
Rep
220
Posts

Drives: BMW F80 M3
Join Date: Aug 2016
Location: Vancouver

iTrader: (0)

Quote:
Originally Posted by ocauto View Post
Here is the part number I found...

63217160897

They cost about $11 from the dealer

went to the dealer and bought the exact part number...doesnt fit a 4series...
Appreciate 0
      08-19-2016, 01:53 PM   #616
vanm3
Second Lieutenant
vanm3's Avatar
Canada
106
Rep
220
Posts

Drives: BMW F80 M3
Join Date: Aug 2016
Location: Vancouver

iTrader: (0)

Quote:
Originally Posted by tboooe View Post
UPDATE: 21-02-15 - Weisslicht White LEDs for front turn signals

Install literally took 5 mins. Unlike some others I didnt have any issues re-aligning the bulb base in the socket. Overall the quality of the LEDs seemed on par with what I received from Horizon LED in UK at about half the price. However, Horizon did not have an offering for the front turn signal so I had to bite the bullet and buy the Weisslicht. The LEDs came in two small zip lock bags. The only thing that worried me was that both LEDs rattled quite a bit when I shook them. Not sure what was causing this but I was concerned that they were damaged in shipping. Luckily, they both worked.

These lights are very bright and a cool white. Below is a video I made comparing the stock amber to the Weisslicht. The only other lights I want to change is the reverse and the amber signals in the side view mirror. Horizon says they are getting the reverse ones in soon. Sadly I dont think there is any solution for the side view mirror signals!

Weisslicht LEDs:


Compared to stock amber bulbs:


Comparison in headlight housing (I know I need to redo the Lamin-X film):


Comparison video:


All LED video:

Can you show us a video or a photo of the led corner lights in night time with your headlights running?

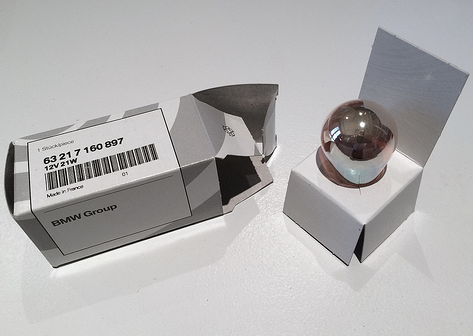
very interested in getting the bulb
Appreciate 0
Post Reply

Bookmarks


Posting Rules
You may not post new threads
You may not post replies
You may not post attachments
You may not edit your posts

BB code is On
Smilies are On
[IMG] code is On
HTML code is Off


All times are GMT -5. The time now is 03:31 AM.


f30post
Powered by vBulletin® Version 3.8.11
Copyright ©2000 - 2024, vBulletin Solutions Inc.
1Addicts.com, BIMMERPOST.com, E90Post.com, F30Post.com, M3Post.com, ZPost.com, 5Post.com, 6Post.com, 7Post.com, XBimmers.com logo and trademark are properties of BIMMERPOST