

BMW 3-Series and 4-Series Forum (F30 / F32) | F30POST
>
My VO F30 M Performance Edition

| 12-08-2016, 12:26 PM | #45 |
|
Private First Class
 102
Rep 116
Posts |
There's roughly 200 M performance edition in 2014 all colors combined. My dealer told me some of them have been damaged in Halifax due to bad weather. I don't know what's the exact count, but I'd be interessed to know.
Nice car OP, we don't see much VO, I think I've seen once in Québec city. |
|
Appreciate
0
|
| 12-09-2016, 01:16 AM | #46 |
|
New Member
14
Rep 18
Posts |
-This is what I was told by someone at the Maxbimmer site:>>>>>
28 - 2013-2015 BMW 335i xDrive Sedan (3B93) - NA painted in Valencia Orange Metallic (B44) with Black Dakota Leather (LCSW) interior were built for the Canadian market. 6 manual, 22 automatic. 27 of those 28 cars are M Performance Edition (KA449) None were built for the US market. No idea how many were exported to US later on. |
|
Appreciate
0
|
| 12-09-2016, 02:16 AM | #47 |
|
Second Lieutenant
 149
Rep 240
Posts |
Congrats on your purchase val3ncia.
As a little update, I've been having issue with the PDC system going haywire, and a intermittent Camera System failure code.. Dealer updated all the software on the car.. Fingers crossed that hopefully it fixed the issue. Also, the car developed a pretty severe growl emanating from the drivetrain.. Turns out my rear differential decided to leave the party early. So the dealer has one on order. I still love the car tho  |
|
Appreciate
0
|
| 12-09-2016, 02:34 AM | #48 | |
|
New Member
14
Rep 18
Posts |
Quote:
These are all good reasons for why I am going to purchase the extended warranty here in the US (Canadian CPO will not transfer to US so it is not being sold w/ one) can you send a pic of your car? curious to see pics of the color out in the wild... |
|
|
Appreciate
0
|
| 12-09-2016, 03:24 AM | #49 |
|
Second Lieutenant
149
Rep 240
Posts |
I'm not too worried about the troubles, the car still puts a smile on my face.. However I'm glad the extended warranty was included in the sale. I don't think these cars have a typical differential problem, it just might be the luck of the draw.
I haven't been taking too many photos recently because on Vancouver Island we only have two seasons.. Rain or Construction.. Unfortunately we're into the rain season. I'm lucky if I get one day of dry weather a week to do a quick wash. |
|
Appreciate
0
|
| 12-09-2016, 07:19 AM | #50 | |
|
Private First Class
102
Rep 116
Posts |
Quote:
|
|
|
Appreciate
0
|
| 12-10-2016, 11:02 AM | #51 | |
|
Major
 
1394
Rep 1,062
Posts
Drives: 2022 M8cs
Join Date: May 2016
Location: Canada
|
Quote:
|
|
|
Appreciate
0
|
| 12-10-2016, 05:36 PM | #52 | |
|
Second Lieutenant
149
Rep 240
Posts |
Quote:
 |
|
|
Appreciate
0
|
| 12-12-2016, 12:36 AM | #53 | |
|
Major
1394
Rep 1,062
Posts
Drives: 2022 M8cs
Join Date: May 2016
Location: Canada
|
Quote:
|
|
|
Appreciate
0
|
| 12-12-2016, 12:38 AM | #54 |
|
Major
1394
Rep 1,062
Posts
Drives: 2022 M8cs
Join Date: May 2016
Location: Canada
|
You haven't had your car up to Prince George have you? Saw one in the theatre parking lot one eve. Parked mine beside it. Your rare colour and all.
|
|
Appreciate
0
|
| 12-12-2016, 03:26 PM | #55 | ||
|
Second Lieutenant
149
Rep 240
Posts |
Quote:
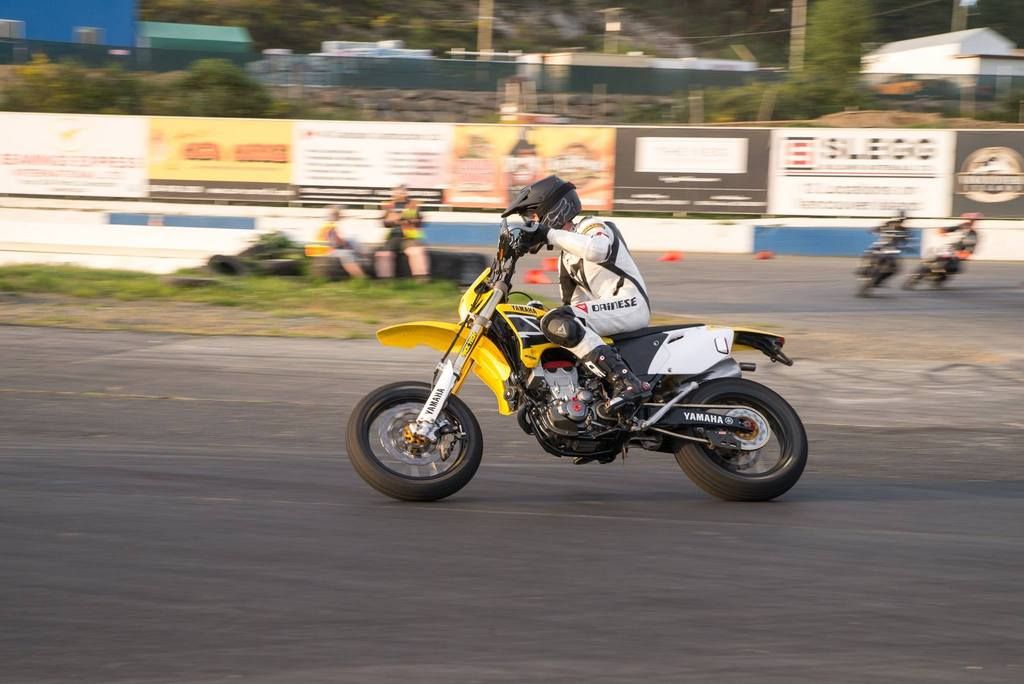
 She's 1 of 4 in Canada, 2017 Husqvarna (KTM) FS450 Supermotos... I'm so ridiculously excited to pick the thing up. I actually had to submit a race result resume to Husqvarna for them to authorize me to purchase it.. haha..  Quote:
|
||
|
Appreciate
0
|
| 12-12-2016, 04:07 PM | #56 | |
|
New Member
14
Rep 18
Posts |
specific production numbers
Quote:
http://www.maxbimmer.com/forums/show...157862&page=98 Good luck |
|
|
Appreciate
0
|
| 12-12-2016, 07:35 PM | #57 | |
|
Major
1394
Rep 1,062
Posts
Drives: 2022 M8cs
Join Date: May 2016
Location: Canada
|
Quote:
That's a great little bike you'll have. And too funny about the credentials to buy it. You wouldn't want a squid on that bike. Bad advertising. With the Aprilia, people just automatically thought I was fast. Unfortunately that wasn't the case. 2nd overall as a novice in supermoto but my fat ass 229 lb frame too much for the 70 hp or so it pulled. No pipe on it as noise restrictions at Mission. Good luck with the racing and maybe you will make it over to Mission to run your 335 at a lapping day? |
|
|
Appreciate
0
|
| 12-12-2016, 09:31 PM | #58 |
|
Second Lieutenant
149
Rep 240
Posts |
Haha.. yeah, last year I started in Novice, then bumped myself up to Intermediate B after two races. Then finished the season in 2nd overall. Next year I'm bumped up again to Intermediate A, so it's time for a 215 lbs, 63 HP factory built supermoto.
I've been thinking about doing a lap day or two in Mission.. there's lots of the local Vic Supermoto guys going there all the time. |
|
Appreciate
0
|
| 10-05-2020, 11:22 PM | #60 |
|
Second Lieutenant
149
Rep 240
Posts |
05/10/20 update: Brembo Low-Met pads and rotors.
Soo.. I completely forgot that I had started this thread.. So, why not put my updates here to keep a constantly evolving history of the car. Plus, it provides me a place to document what I've done or doing to the car. I've got a lot of updates in store in the very near future.
Quick update, "Creamsicle" has approximately 96,000 km on her so far. She's payed off, definitely out of warranty, and to tell you the truth, that really doesn't bother me. She's been a great car so far in the almost 5 years of ownership. However, lately I've been trying to go through the car to clean up any bumps, scrapes, niggles and/or service related concerns that are common to daily driven vehicles. She's far from being a show car, but I don't want it to be a s*@t pit either. I like to take care of my kit. First out of warranty maintenance related concerns.. The OEM brake pads, rotors and fluid had served their time. Well actually, the front brake pads were still at around 25%; however, rear pads and all four rotors were at their limit. So, because I'm not made of money; I couldn't shop through the dealer. I wanted to keep the car faithful to the build specs so I wanted to maintain the 2 piece rotor design. One thing I definitely didn't want was any "farkled-out" rotors (drilled, slotted), because quite frankly, they're annoying to deal with on a daily driven vehicle and IMHO aren't worth the money on the street. Also, I didn't want to sacrifice initial bite in the pursuit of lower dust; so ceramic pads were also out. I ended up deciding that Brembo aftermarket was the route I would take. Heck, it's probably the same stuff that's in a different box from OEM anyways. I went with some 370/345 Brembo plain 2pc rotors, Brembo low-met brake pads, and because I had it on my my parts shelf already, some Motul RBF660 fluid. Rotors, well they look like the BMW rotors that came off car; except newer. So far they've been great. Brembo low-met pads: HOLY HELL the initial bite comes on hard; they're a lot better than the OEM pads. When you're braking hard, they're about equivalent to the OEM pads. I'm happy to see they bedded in quickly on the new rotors, and so far aren't showing any signs of dusting.. Motul RBF660: I've raced with this stuff in all my bikes. It's the only brake fluid I'll trust with my life.. That being said, I highly doubt I'll EVER reach those temperatures in the car.. after all, I don't track the car because bikes are so much cheaper/easier to fix. Ok, sorry, too much text. So here's a couple pictures. Rear rotors  Front rotors  and, because I haven't shown my current curbed winter wheel setup (rep 666's) ")  Last edited by zibbit; 10-06-2020 at 03:29 AM.. |
|
Appreciate
0
|
| 10-05-2020, 11:52 PM | #61 |
|
Second Lieutenant
149
Rep 240
Posts |
21/09/20 Truck Power socket
Ok, not exactly today's mod (happened late last month). But, I was mad that my car only had one power socket in the car. So I added the factory trunk power socket option.
 Not very much of a writeup, but if you look at the pictures I'm sure you'll get the gist of what I was doing. List of parts I used;
 Power lead (red wire) goes from pin 162 of the rear fuse box to the center pin of the power socket. You have to remove the blue connector from the backside of the fuse box to be able to slide the BMW/VW pin into the appropriate spot. Ground lead (brown wire) goes from the chassis ground almost immediately above the amplifier to the outer pin of the power socket. You'll see a group of 4 brown wires going to one stud on the inner fender liner; attach it there.. Hence why it's so much shorter than the power wire. Un-heated 3/8" shrink tube was used to cover both leads between the power socket and the chassis ground providing abrasion resistance. After that, I secured the power lead using small zap straps to the existing harness. I left plenty of slack on the shrink tube section to make it easy to connect the wire harness to the power socket when the trunk liner wasn't fully installed. Wire harness essentially chases the amplifier wiring to the trunk bulkhead, then continues down to the floor of the truck using the existing harnesses as a guide. Hole in the trunk liner was cut using a new/sharp #11 Excel blade using a template I created. I'll add the template to the bottom of the post in case someone else needs it. Just print it full size on any printer and attach to the panel using masking tape. Last edited by zibbit; 10-06-2020 at 03:31 AM.. |
|
Appreciate
1
BWbimmer276.50 |
| 10-06-2020, 03:14 AM | #62 |
|
Second Lieutenant
149
Rep 240
Posts |
Third bigger recent upgrades to the car. These ones added a little functionality, color and updates to the interior.
First one was a heated F80 tri-stitch M steering wheel with the matching leather wrapped split spoke covers. I think it pairs well with my Alcantara wrap job that I did a few years ago.    Next two larger interior upgrades/updates came in the form of a F80 center console knee-pad and a F80 sliding center console lid. I was very excited to install both, and boy does it ever spruce up the interior and make the car so much nicer to drive longer distances. Being shorter (5'6") my right elbow always floated in never never land when I had cruise control set, so I'd always have to torque my body to rest my right arm. Now, that's no longer an issue. Plus the knee pad sits in the perfect spot when you've got cruise control set and you're resting your knee against the console. No more hard plastic against you knee cap.  |
|
Appreciate
0
|
| 10-08-2020, 01:43 PM | #63 |
|
Second Lieutenant
149
Rep 240
Posts |
01/10/20 Mirror housing replacement, part 1 of 3
Let the madness continue..
Picked up a set of aftermarket 6pc M4 mirror housings for the M2/F30 off of eBay from a vendor called bulbxpert. I'm sure most of you know which ones I'm talking about; however, if you don't, they look like this:  I will say right out of the box; for the price, the fit and finish was very good. That being said, I had two niggles with the mirrors that I had to address before installing on my car.
The first item was relatively "easy" to deal with. I bought a pint of color matched B44 Valencia Orange automotive paint, a quart of 2K clear coat, a Pro-Tek 2500 mini HVLP gun and a bunch of various painting supplies (PPE, sandpaper, thinners, etc). This should've been a straightforward job; rough the surface with a grey scotchbrite pad, wipe down, spray the color, spray the clear, let dry... Well I can tell you this, spraying automotive paints out of a HVLP gun is a WHOLE different ball game than airbrushing models with acrylics. Lesson #1, and #2: Acrylics dry from the substrate outwards, where solvent based automotive paints dry from the outside going towards the substrate. So acrylics can be laid on thick, solvent based paints cannot. Have you ever heard of a term called "solvent pop" before? Yeah me neither. I didn't know that if you never allowed the base layer enough time to fully kick or you put the clear coat on too thick could cause this issue.. The result, you end up with a million tiny little bubbles just below the dried clear coat surface. Only way fix the problem is to remove the paint you just just applied. Needless to say those two lessons caused me to strip/reshoot the mirror caps twice.  Lesson #3: MAKE SURE that the bucket you're using to wet sand with is SPOTLESSLY clean. I.e., don't do that brake job on your car, use a bucket to wash the wheels and brakes, then later in the evening decide to finish-up wet-sanding the part you're planning on painting the next day using the same bucket as the brake job. If you do, get ready for your part to be covered in fish eyes. As you've already guessed, only way to fix the situation is to remove all the contaminated paint, re-sand the surface, then re-reshoot. So add another strip and respray.  Lesson #4: Mottling. Ever hear of that term before? Me neither, until now. This is the bane of any painters existence when they're shooting metallics because you don't know you have a problem until it's too late to correct. If your gun pressure is off (too high or low), if your spray technique isn't perfect (too fast, too slow, not enough overlap, not at 90˚ to the panel), if the paint mix is off, or if your "drop coat" was too light.. all can cause this issue to crop up. You might ask, "when will you know if you have a mottling issue?" You get to find out AFTER the clear has dried that you now have a tiger striped or darker non-metallic streaks in the base coat. Then you might ask, "how do you fix the issue?".. well guess what, you now have to reshoot the base coat which requires removing the clear if you don't want your panel to be 10 inches thick. Add another strip, and reshoot.  Lesson #5: Edge mapping.. If you're like me, and you had to apply paint five different times by now cause you kept screwing up, but you're too stubborn to stop trying.. you might've sanded into the substrate material in a couple spots. Well, I'm going to tell you a little secret; learn from my mistake and just remove all traces of paint and take the part back to bare plastic and/or metal and start from scratch. Save yourself the time and effort. Because if you don't, the thinners in the primer you just sprayed over the top of those bare spots could and probably will cause edge mapping to occur. Add another strip and respray to the list.  In case you've lost track of what painting attempt I was at, I'm now on my seventh attempt at spraying the mirror caps. This time, I started with bare plastic, sprayed some plastic bumper primer, sprayed the base coat, then sprayed the clear. Did it turn out perfect? No. Is it good enough for an outdoor spray job on a daily driven vehicle? You betcha it is.  Primer on  Base & clear on  After a wet sand and polish to remove dust spots and a little orange peel in a few spots  Comparison to car in full daylight   You might ask, total cost for the respray to this point: $130 cad and ~15 hours worth of work fixing my mistakes. haha Next up, camera mounting... Last edited by zibbit; 10-08-2020 at 08:06 PM.. |
|
Appreciate
3
|
| 10-08-2020, 10:58 PM | #64 |
|
Captain
336
Rep 963
Posts |
interested to see these installed. first time i've seen the multi piece housing style swap to the M mirrors
__________________
2018 Azurite Black F80 M3 ZCP
2019 Phytonic Blue G05 X5 2013 Glacier Silver F30 335i (sold) |
|
Appreciate
0
|
| 10-09-2020, 10:36 PM | #65 | |
|
Second Lieutenant
149
Rep 240
Posts |
08/10/20 Mirror camera mounting
Quote:
General disclaimer, I'll give you an idea what I did to mount the mirror cameras on in the new mirror covers. Is it the only way to do it; No. Is it the best way to do it; No. Is it how I did it; Yes. Do so at your own risk. Doner parts: RH lower housing (51-16-7-284-132) LH lower housing (51-16-7-284-131) F01 bumper camera mount (51-11-7-203-825) For starters, the OEM lower mirror cover is ~2.5mm thick, and the aftermarket lower cover thickness is ~3.5mm thick. After studying both lower covers and how the factory cameras were basically wedged into place inside the mirror, there's not a lot needed to hold them into place. I mean let's be real for a minute.. The front bumper cameras are essentially held into place with two-sided tape. Ok, so how I did it; Coles notes version. Carefully cut-off inboard camera mount along yellow dotted line. Using a very sharp knife cut the bracket away from the base is as flush as you can to the profile of the lower housing. Make absolutely sure you retain the aft edge where the pin steps. For the horizontal cut where the screw mount is, use something like a razor-saw to make the incision straight. Doing so made sure I had three alignment reference points. Now, you'll be left with a piece that looks like the lower picture.  Mark where the two pieces sit in relation to each other on the new lower housing. Apply an ABS/Acetone (25:75) glue or slurry to all contact edges of both parts. Join both parts and let them sit to cure for a few hours. Re-enforce the glue joints however you see fit (applying more slurry, using heat, anything basically).   Now comes the pass or fail point. Using how the factory mounted and angled the camera as a guide, you've got to figure out where the hole needs to be drilled through the lower cover. I did this using a the spare F01 bumper camera mount to provide a rough guide as to where the hole needed to be. Good luck. Final hole size is around 17.5mm (11/16") for a snug fit around the snout on the camera. Cross your fingers you got it right.. mount the camera using the one lug you glued on. If the hole is in the correct spot, the camera essentially won't need a screw to hold it into place; but put one in anyways.   If you never screwed up too badly.. it's time for the fit test.     Before anyone asks what the alignment is like.. Not much worse than it was from factory lol  I'm pretty sure I could play with the alignment at a later date to get it perfect.. but for now: "It's not just good.. it's good 'nuff for gov'n work." That being said, I'll probably 3D scan everything, then CAD up a proper mounting solution in the near future. Stay tuned Last edited by zibbit; 10-10-2020 at 02:04 AM.. |
|
|
Appreciate
1
aps335.50 |
| 10-23-2020, 02:58 PM | #66 |
|
Second Lieutenant
149
Rep 240
Posts |
100k milestone update.. Yesterday had to get the rear diff pinion seal replaced. Decided the dealer was the best option due to the special tools required.
  ..and what comes hand-in-hand with hitting that milestone;
Last edited by zibbit; 10-23-2020 at 03:05 PM.. |
|
Appreciate
0
|
Post Reply |
| Bookmarks |
| Thread Tools | Search this Thread |
|
|


