

BMW 3-Series and 4-Series Forum (F30 / F32) | F30POST
>
Gladen 201 Speaker Upgrade Kit (all pic's on 1st post)

| 06-13-2014, 10:37 AM | #1 |
|
Captain
 
131
Rep 664
Posts |
Gladen 201 Speaker Upgrade Kit (all pic's on 1st post)
Well after quite a bit of researching and weighing up the pro's and cons of a cheapish set up amp and speaker upgrade.
there wasn't a lot of difference in price once you factor in all the extras like wiring looms, adapters for standard speakers ect... so i decided to go for a whole hog kit. i'm not certain how much of the work i'm prepared to do myself yet. i may do all of it with some guidance regarding settings and identifying wires. or may get a local audio specialist to do some of the more technical parts. but most of that is taken care of by the quadlock loom. and i'm happy enough removing trim panels ect... as i replaced the whole interior of my last E90. and the brushed aluminium trim of this one. so here are the goodies i received today from edd at monster audio design. a Gladen 201 speaker kit with door mids and tweeters and underfloor subs. a Mosconi 120.4 DSP 4 channel amp at 120w per channel that has a digital processor built in. i particularly like the usb and bluetooth connections for PC and android apps. https://play.google.com/store/apps/d...P_6to8_control with an amp wiring kit, speaker wire, sound deadening kit, and quadlock wiring loom from the HU to the amp in the boot. which should fit in the left hand corner just nicely. when i swap the oem deep tray for a shallow tray (part no 51477245912). and i've also ordered the door seals (parts no 51337323507 & 51337323508) for fitting the tweeters was £50 ish iirc. just need to see if i need any oem connectors for the door speakers. i'm bit busy for the next couple of weekends, but hope to get all the other parts and get it all fitted by the end of the month. http://www.monsteraudiodesign.co.uk/...one-120-4-dsp/ 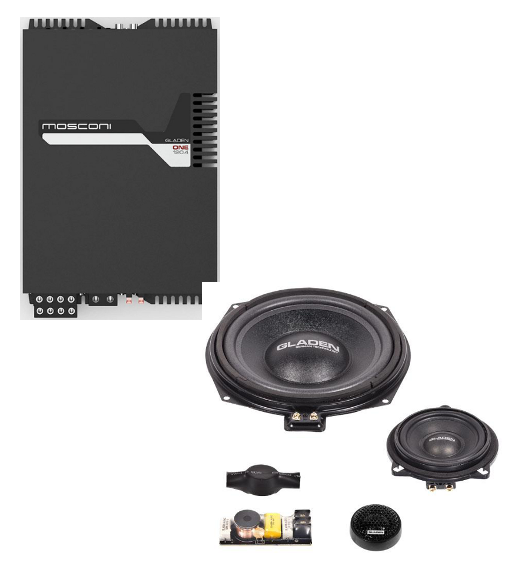 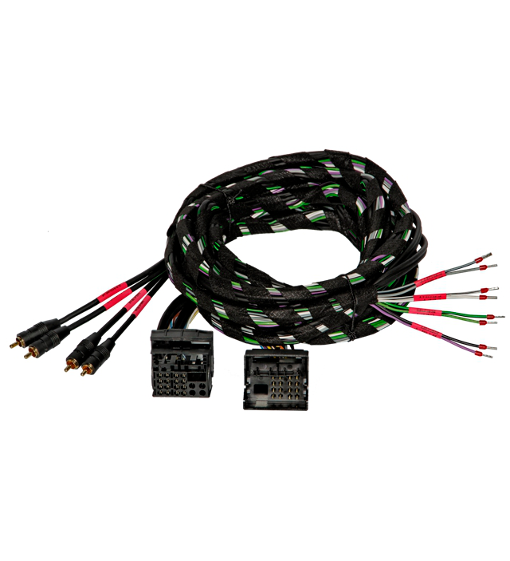 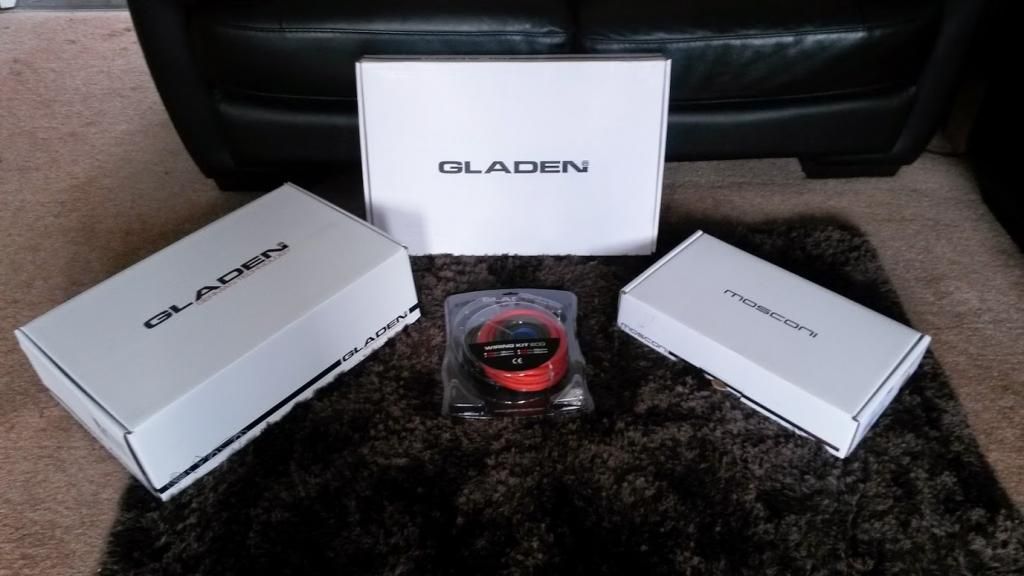  INSTALLATION Well due to time limitations i had to try and break the job down into bite sized pieces, while still driving my car to work the next day... i make no excuses for some of the work being a bit 'heath robinson'  but i'm perfectly happy with some of the compromises, though some better alterations will be done when the rest of the parts i ordered turn up. Day one: 2 hrs..ish made an mdf base primed and sprayed it black, and fixed it down with some flexible bond seal adhesive. making cut outs for the slot pins fixed to the floor. i thought about using the oem metal tray for fixing the base but believe that space will be an issue as the amp is a snug fit height wise. i'm siting the amp on in the LH corner of the boot under the floor where the existing deep storage tray is, this will be replaced with an oem flat tray from bmw with the amp underneath. this is the best location for the amp as there is a ventilation grill right next to it. the rear trim panels are held in by the luggage loops (torx bit) and a few plastic push pins start at the boot lock striker trim and work inward. there is a tricky push pin right in the upper back corners, which is easy to miss. the rest are easily visible. i managed to fit the base without completely removing the LH trim, by just enough to work in leaving it connected at the back. or else you need to remove the back seat. L/H boot storage 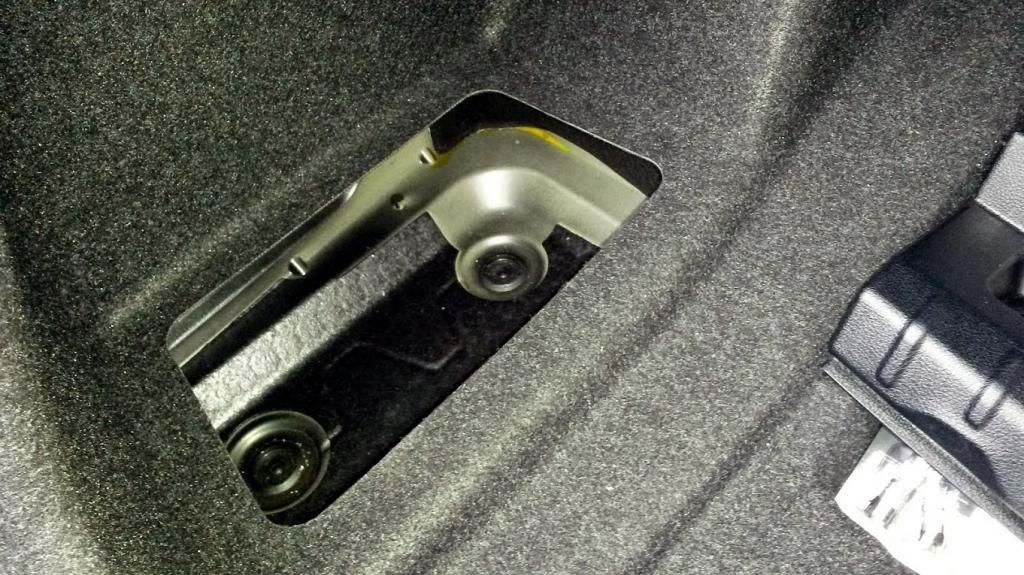 Boot trim removed 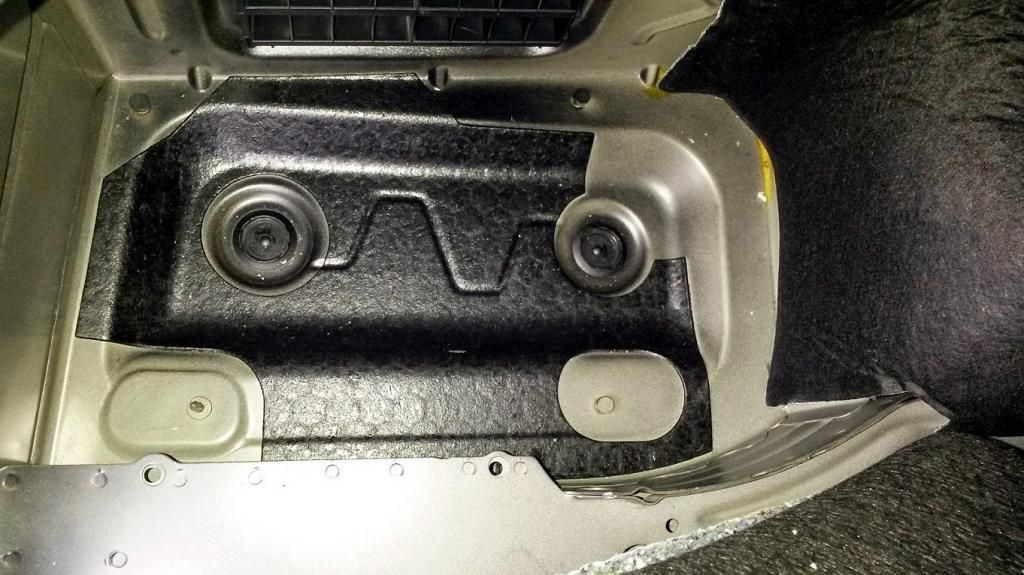 MDF amp mounting board 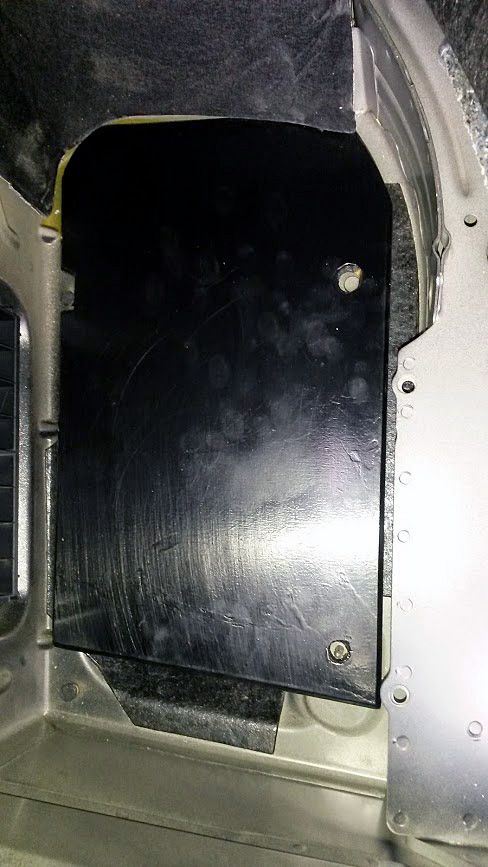 Day two: 3hrs to start with i installed the quadlock loom from the HU through to the boot, this is done on the passenger side to avoid interference as much as possible the main power cables that run on the RH side. also removing the upper and lower dash trim panels, HU, trim panel under the glove box, LH foot well trim panel, front door mucket trim, lower b pillar trim, rear mucket trim, rear seat trim, rear seat complete, and the left and right rear luggage trim panels. and also ran the power wires to the battery and earthing points, and the under seat woofer wires to the rear foot wells. plus there are quite a few places with empty cable run slots in the boot if you have the base model. particularly across the boot floor left to right for the RH woofer wire and power connection. it sounds like a lot to do but the trims come off pretty easy and just snap back in place, with a few that have the odd bolt or plastic push pins holding them in. also don't forget the quadlock loop as i did, and had no bluetooth or phone telematics until it came a couple of days later. 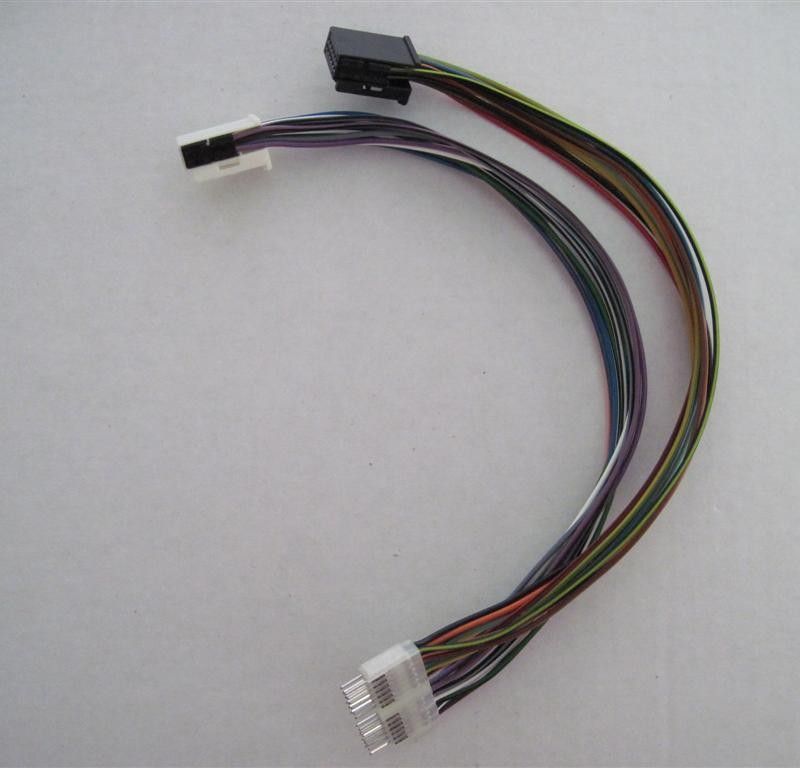 one extra cable i ran was a 5mtr usb lead from the amp to the glove box so i can connect the laptop direct to the amp from inside the car, or you could just use the mosconi bluetooth adaptor. http://www.ebay.co.uk/itm/2808248512...84.m1497.l2649  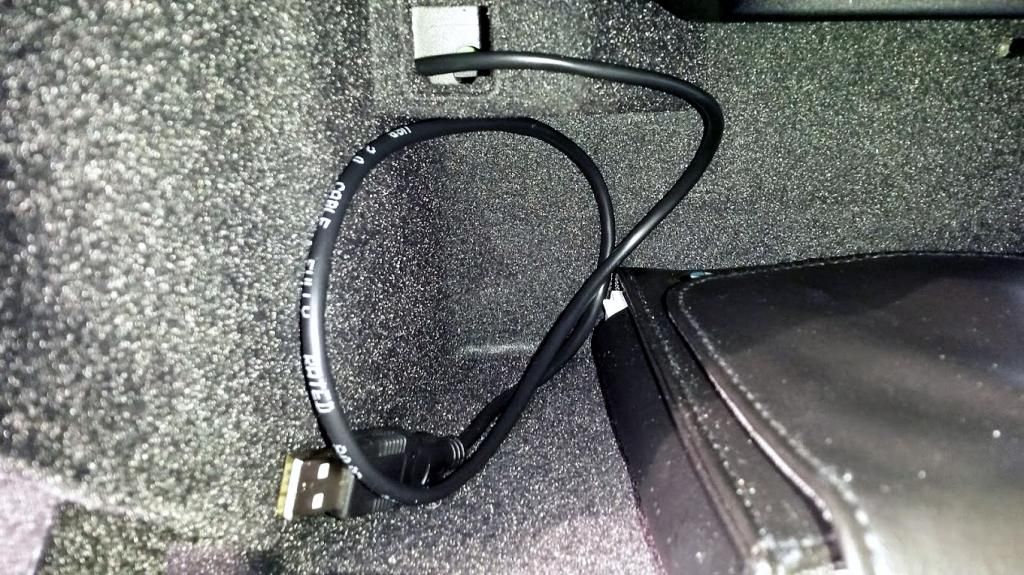 most of the trims pull off easy by hand, but you need to use a trim removal tool to remove the clips from the body work, and re-attach them to the trim for re-installing. you tube has lots of easy to follow video's of trim removal which help. so here's a few pics of that part. Removing luggage hook 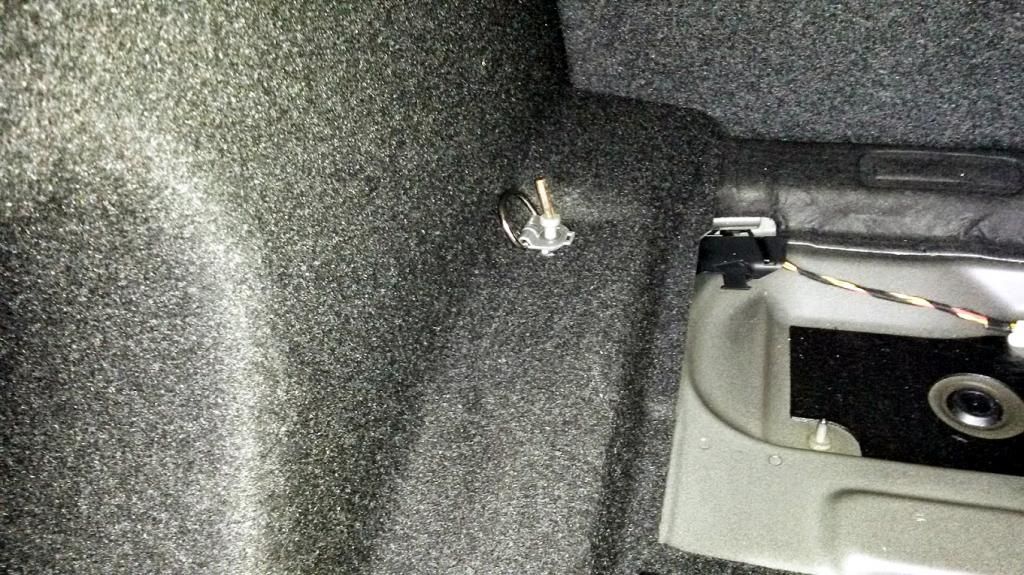 Removed dash upper trim panel unclip from left, carefully with fingers so as not to break the thin left hand edge. pulls straight off clips 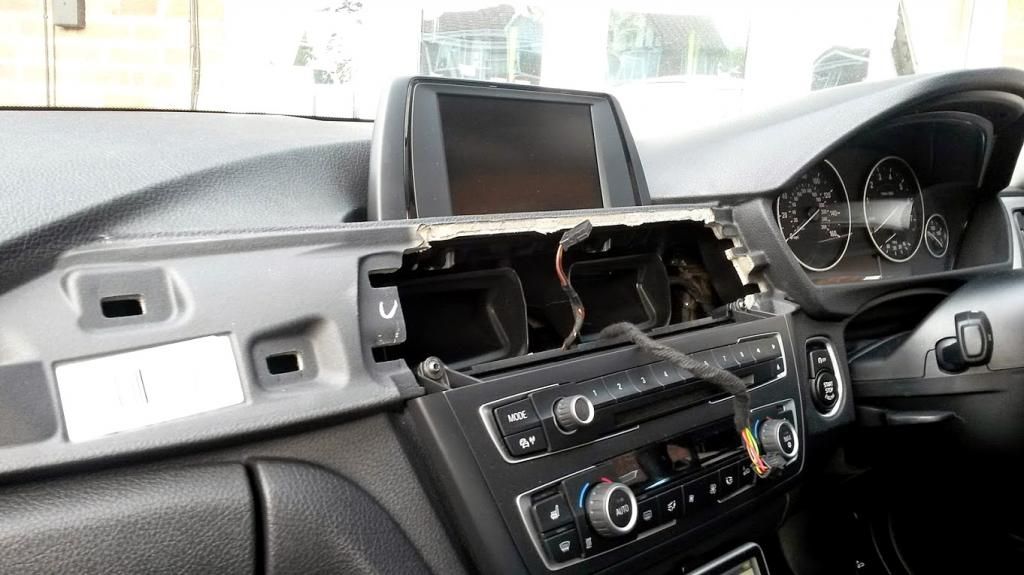 lower dash trim panel, unclips easily pressing in from top and pull forwards and down. 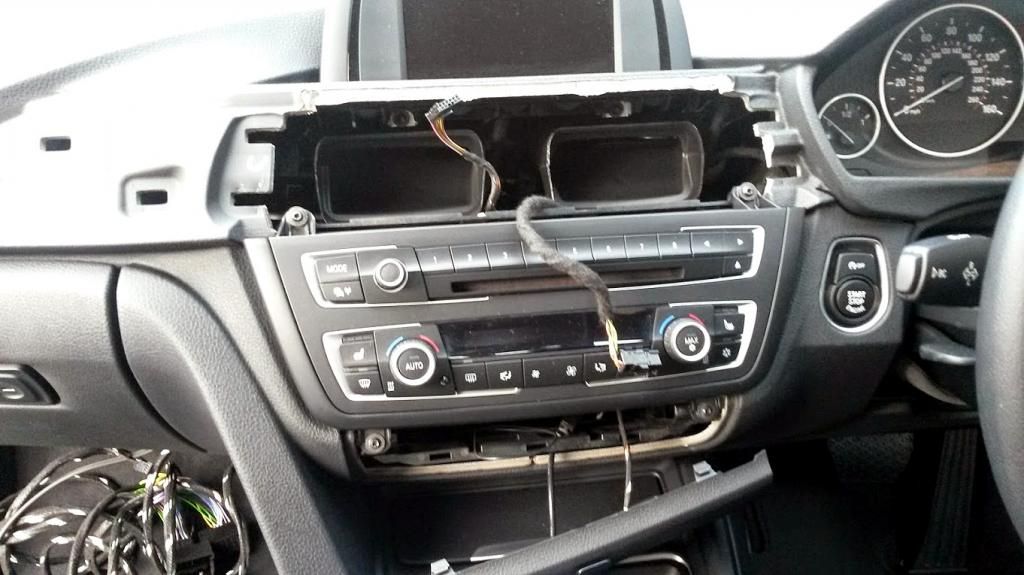 HU controls remove simply 4 x torx screws, then another 2 torx screws for the HU it's self. 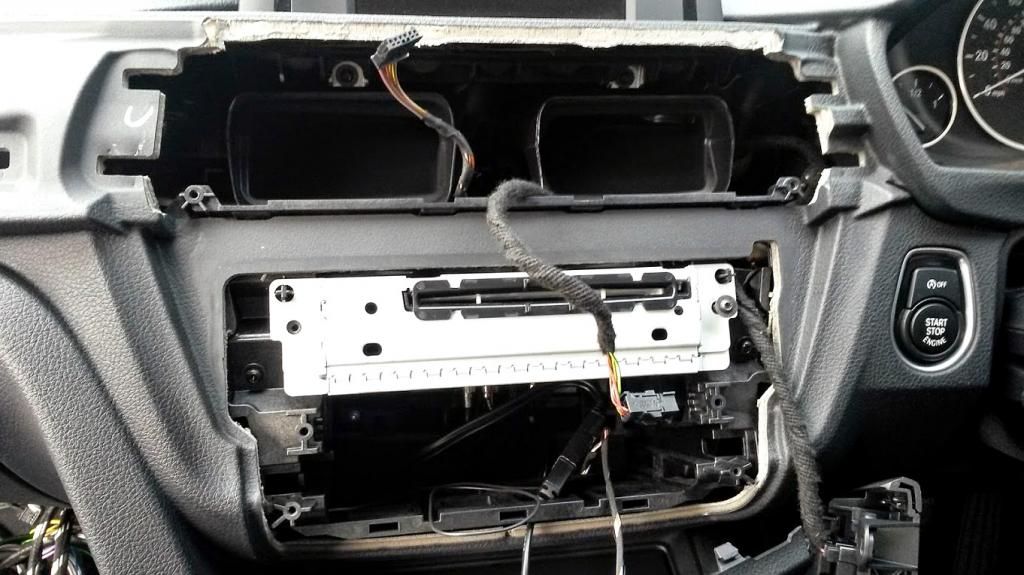 HU space cables routed to bottom left, a nice big gap for them to run through. 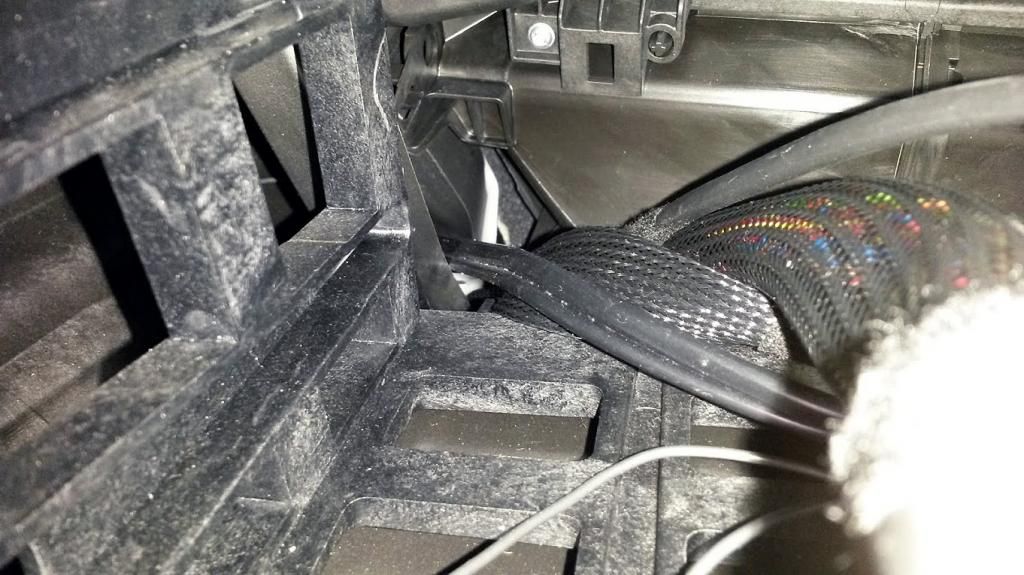 under glovebox trim panel remove 2 x bolts on each front corner, and it unclips by pulling forward, there are locating slots at the back that it just slides out of. new loom can be routed around edge cable tied to existing loom. 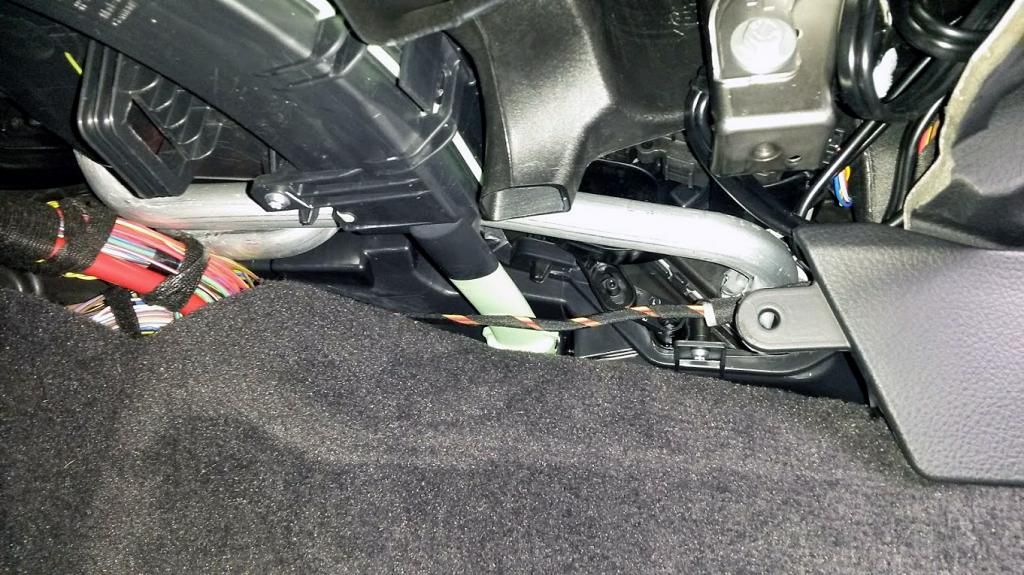 quadlock connector on back of HU 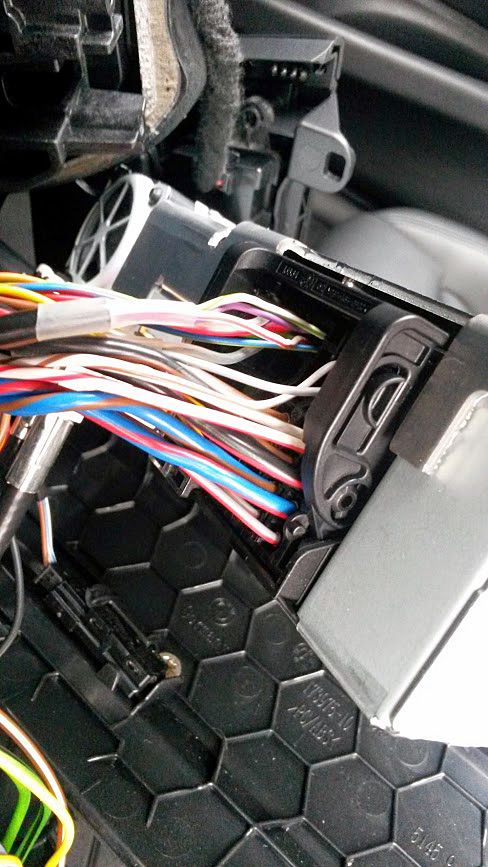 mosconi quadlock loom connectors 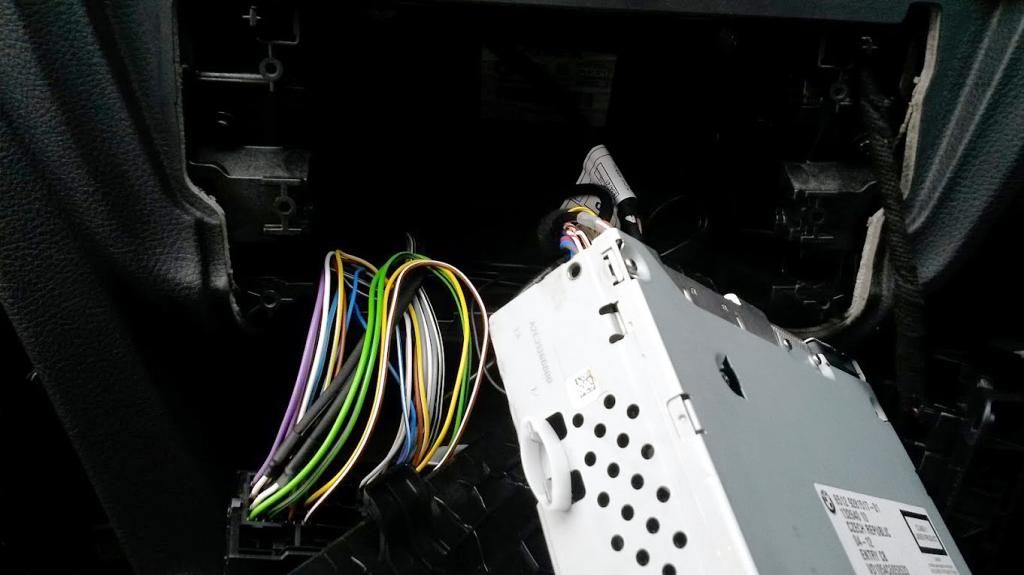 routing loom under glovebox 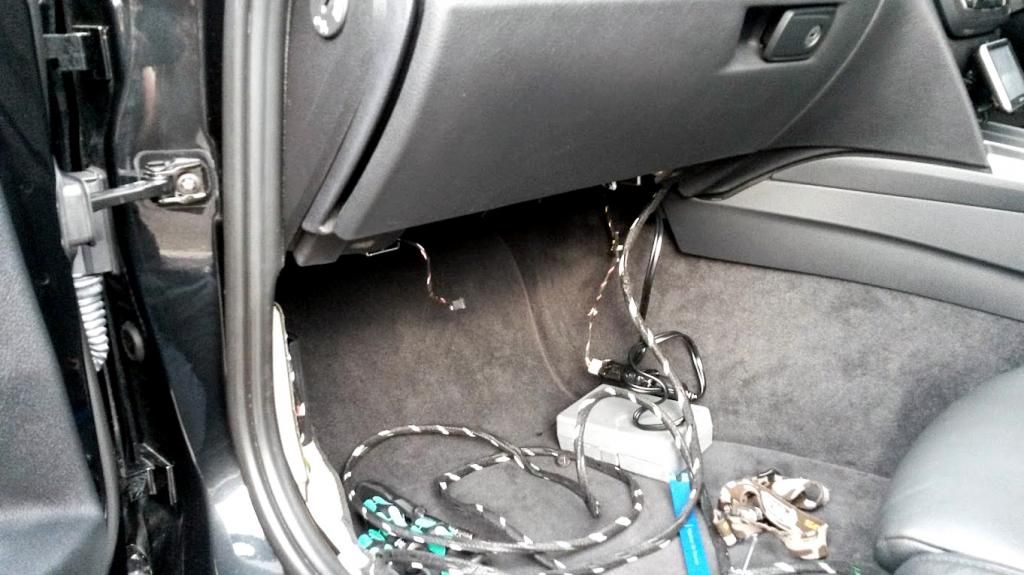 left hand foot well trim panel removed, 3 x pull clips mostly they stay on the car and need to be removed and attached to the panel again for re-fixing 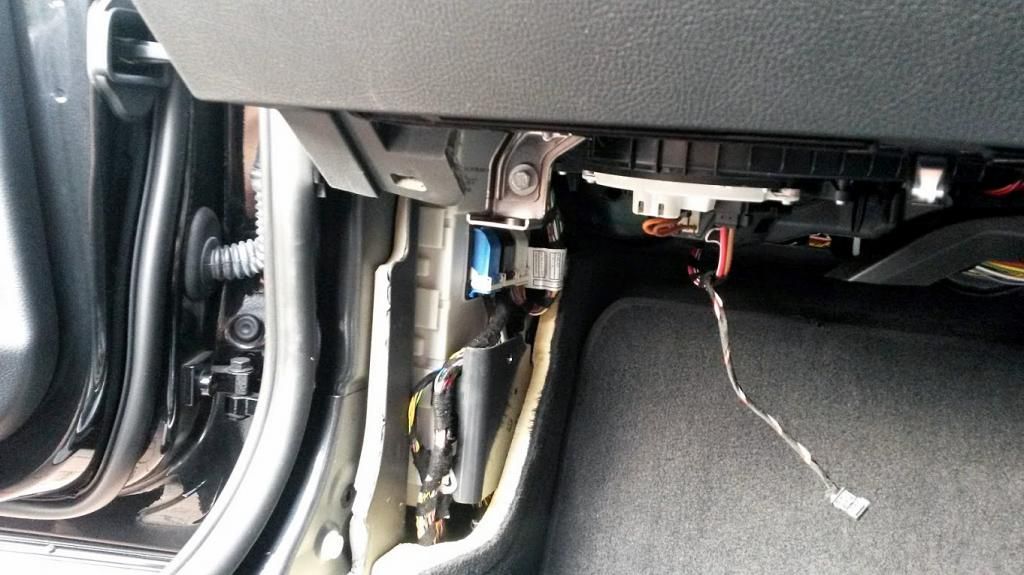 passenger mucket trim panel removed, re-fix same as above. 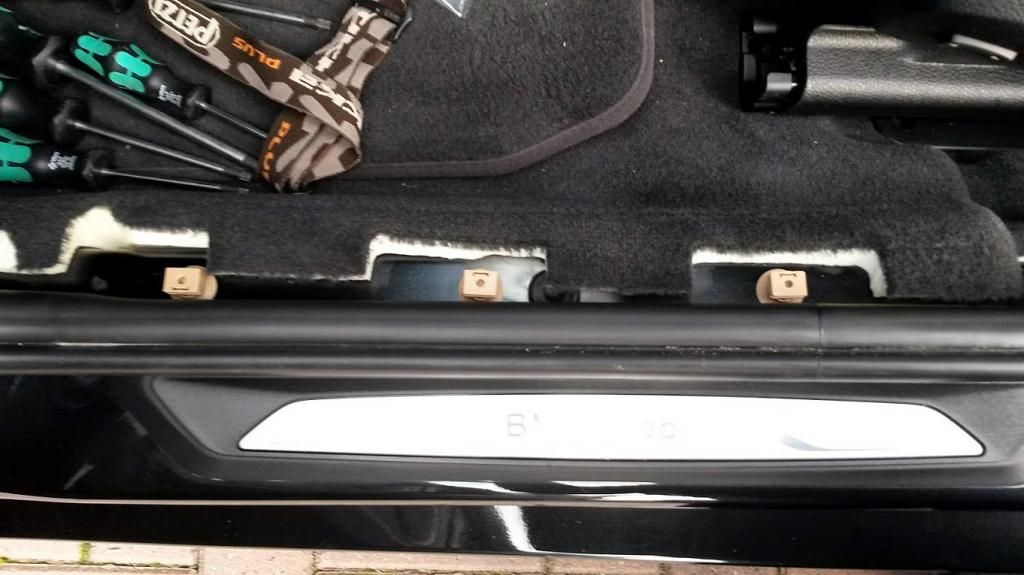 quadlock loom routed under carpet and cable tied to existing loom. 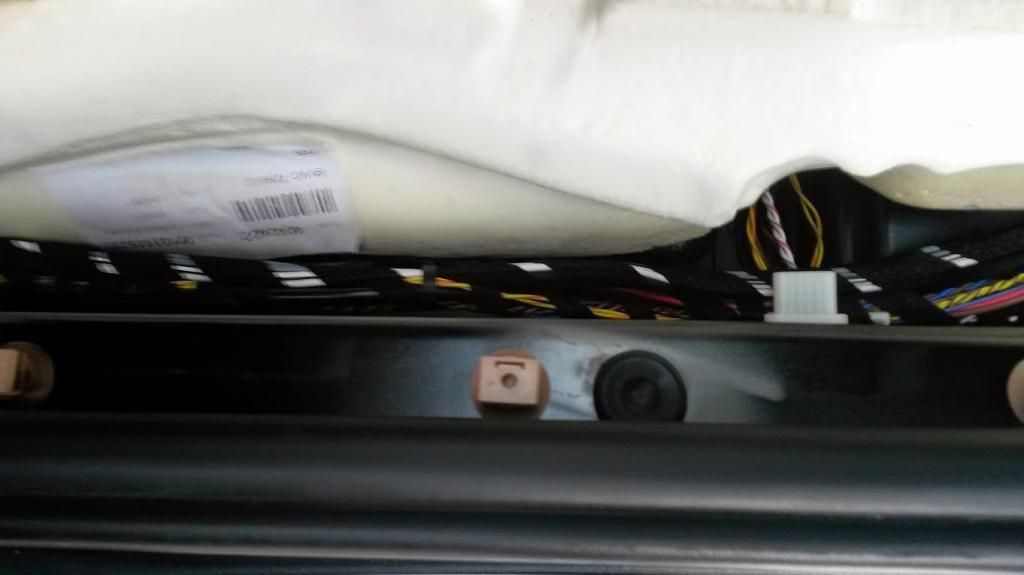 left hand passeger footwell loom routed under existing loom, quite tight here as there are lots of oer cables and juction box. 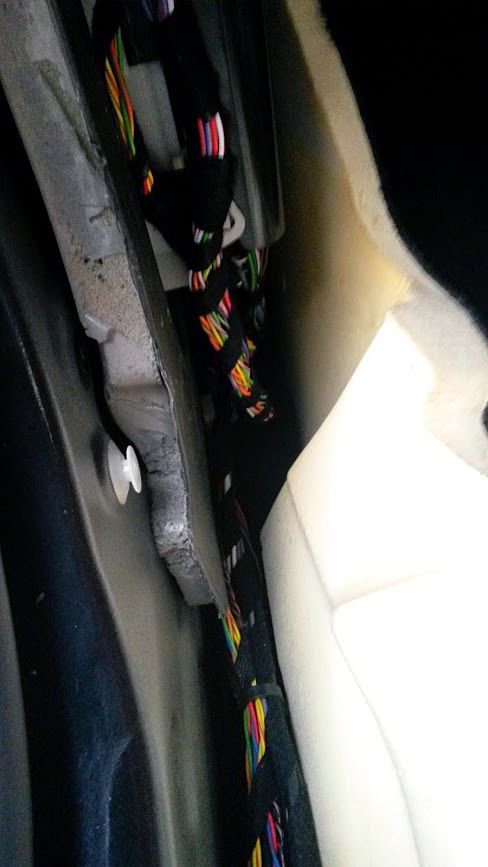 loom progressing to rear passeger footwell 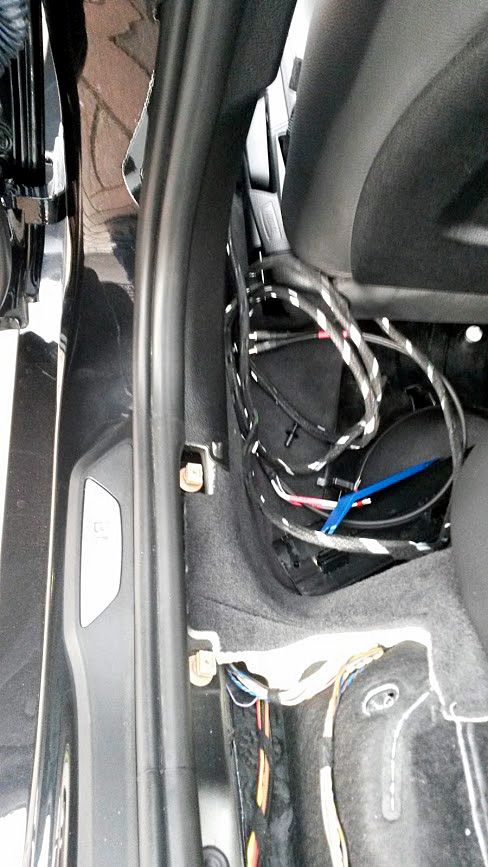 door b pillar trim removed, 2 x clips at bottom. trim then slides down out of top trim.  door b pillar trim showing clips re fixing same as before re-attach clips to panel first. 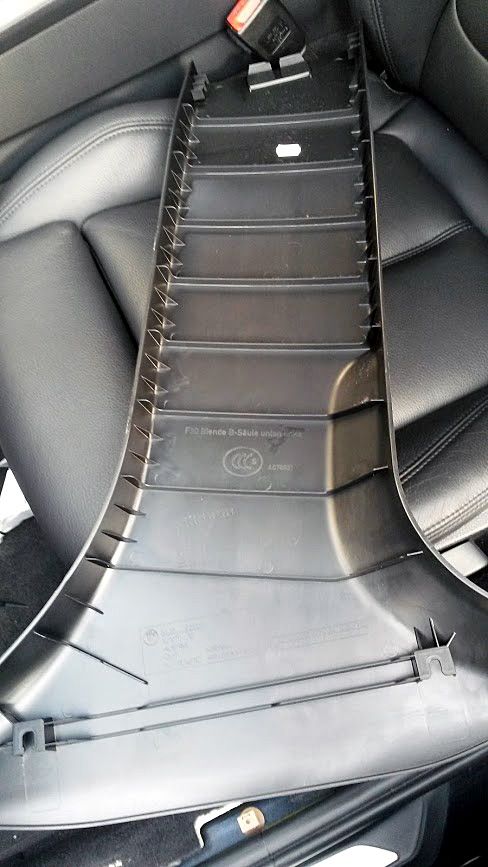 clips re attached 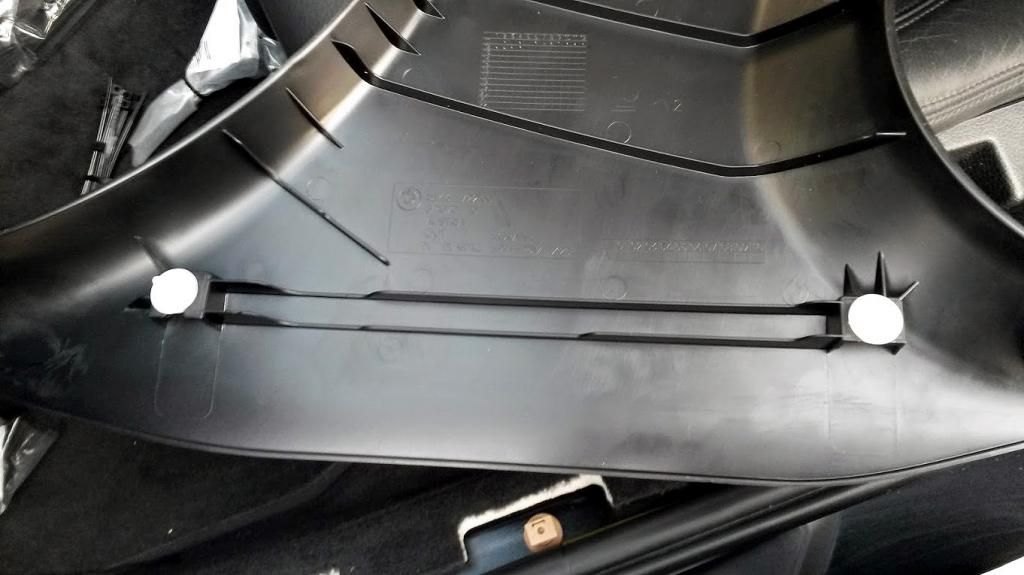 b pillar trim top clip slides out 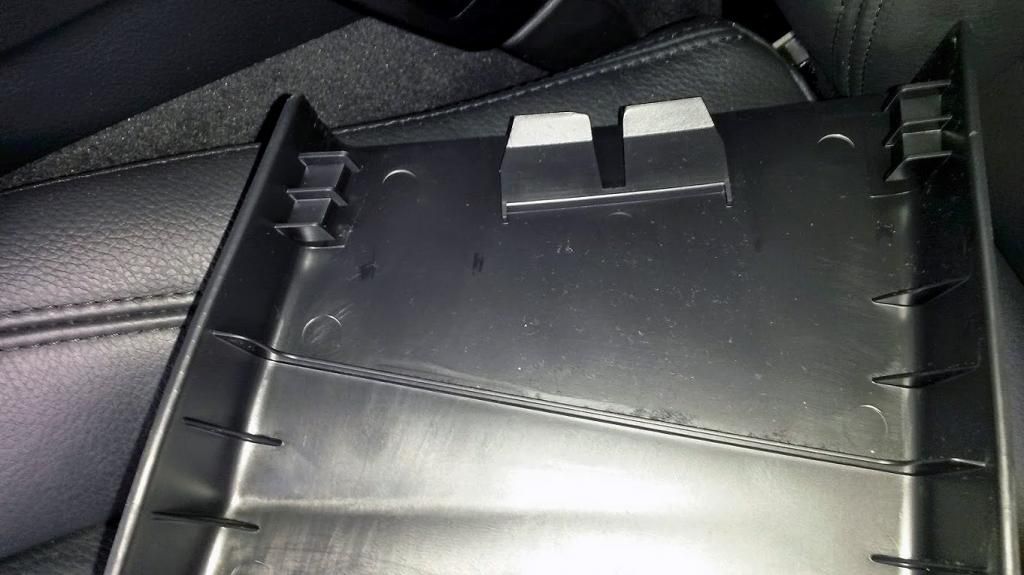 rear seat trim unclips by lifting up, re-fix thesame as before.  removing 2 x torx screws for seat back, seat bottom just lifts up off clips and is then removed.  seat back lifts up off clips and comes free  seat back clips 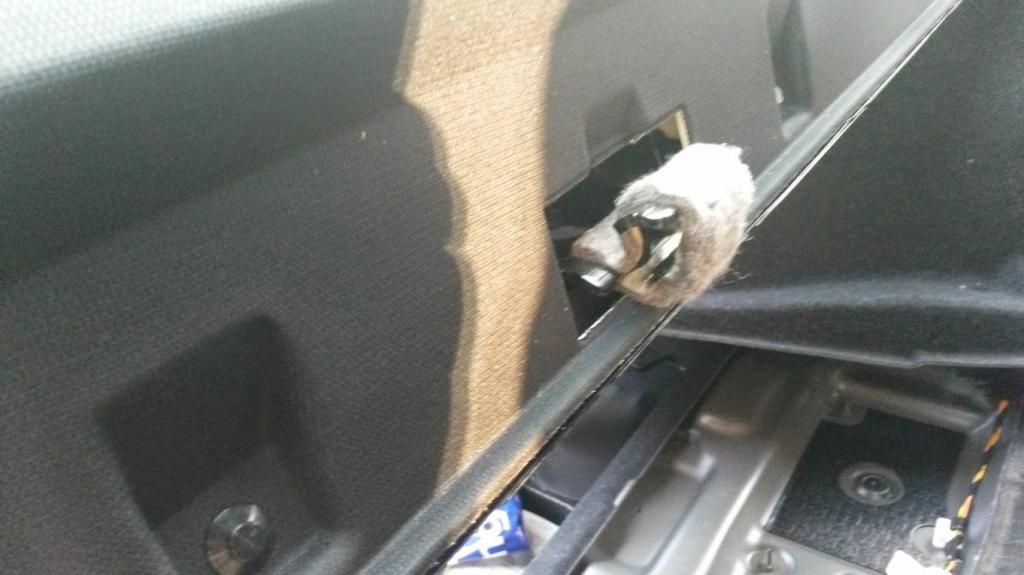 hidden push pin for rear boot trim panels.  loom routed under rear seat bolster, and cable tied to existing. 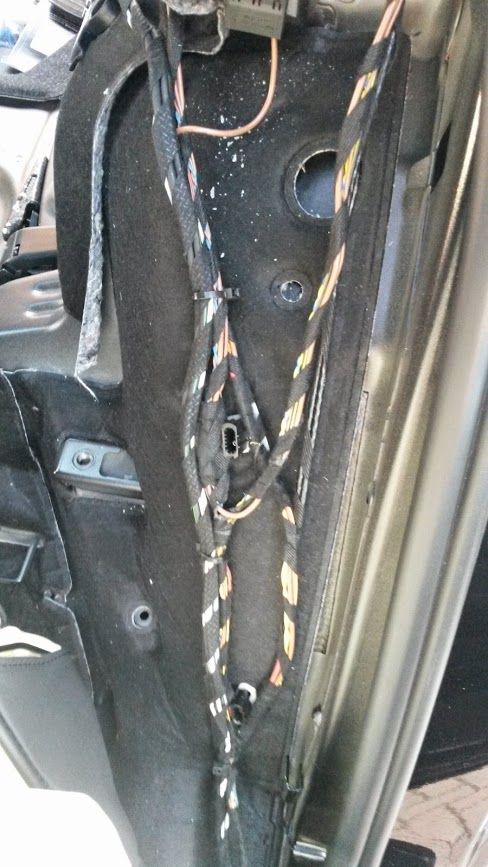 woofer wires routed down empty clips on boot cable covers 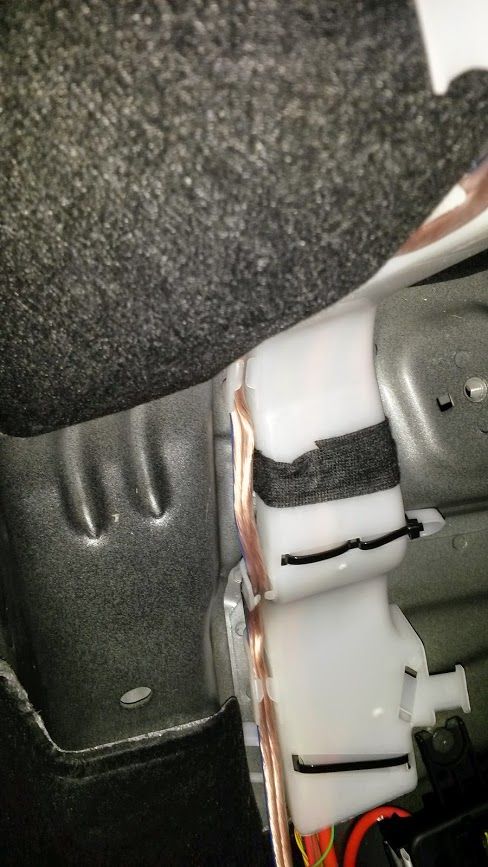 power and woofer wires routed under boot floor and held with cables ties, and cable tie self adhesive bases. 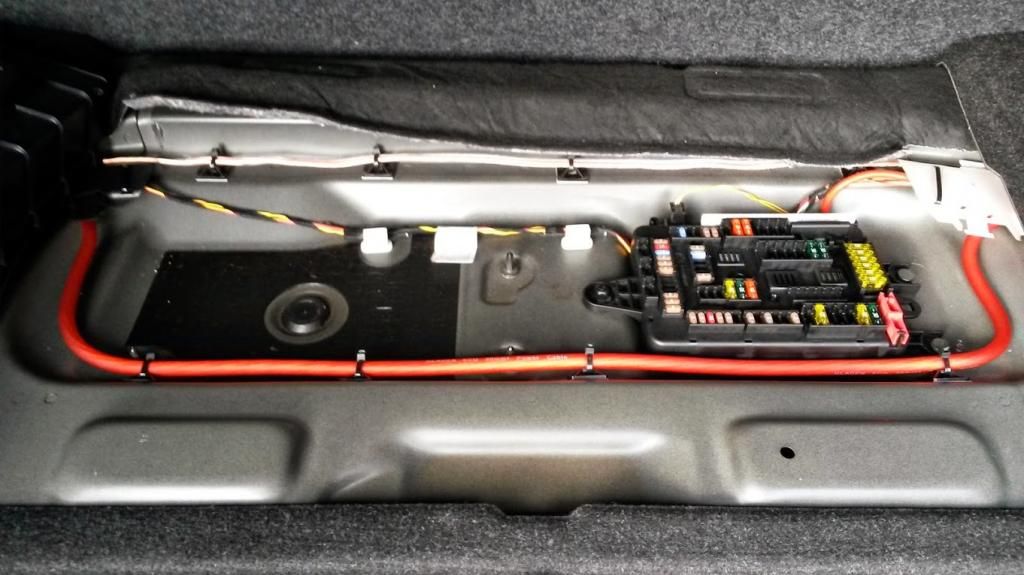 power cable and inline fuse fixed to existing lug by power connectors. 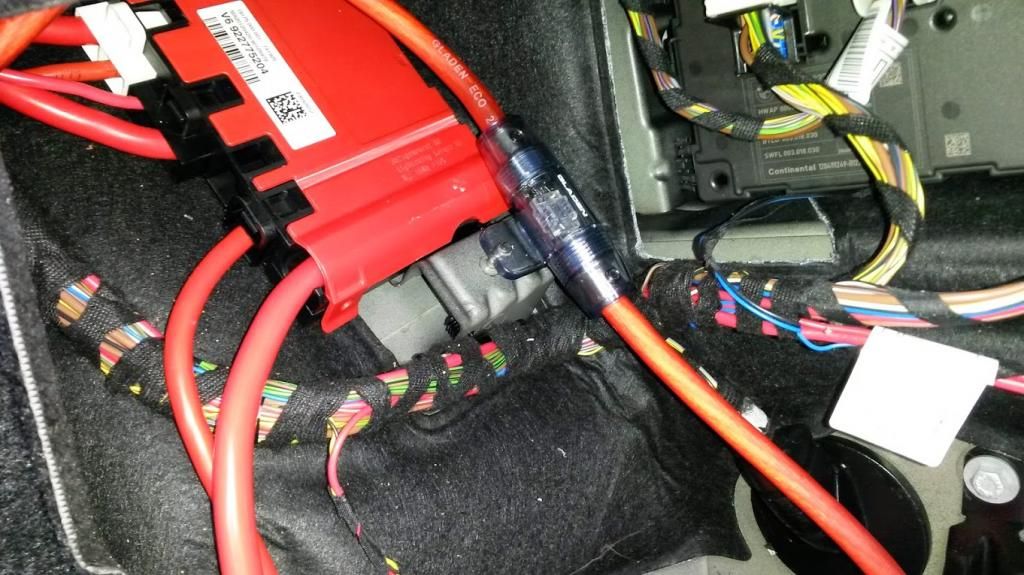 mosconi 120.4 dsp amp in left hand boot storage. a nice fit with enough room to get cables around. and the amp's fan blows straight at the boot ventilation exit. 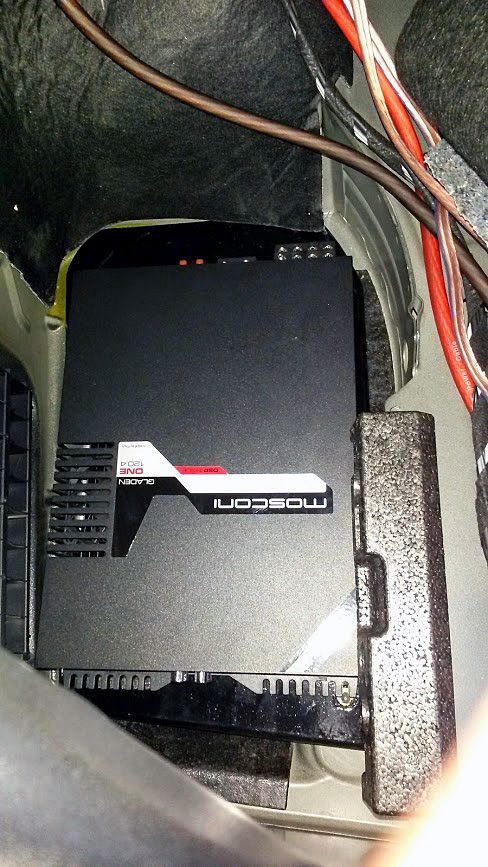 Day three: 1hr-ish i used the time this evening after work to make all the amps connections. and then mount the amp to the base board. i also used a couple of strips of deadening foam on the board to cushion the amp in place. the HU speaker outputs from the loom simply plug into the RCA connections on one end. and the 2 pairs of front speaker wires are already crimped with ferrules ready to connect to the amps front outputs. i also bought some crimp ferrules from maplins for the woofer wires to keep the connections clean and tidy, and stop any stray strands of wire. the gladen amp wiring kit came with the positive and negative cables in 4 AWG with uninsulated ferrules, so again no stray strands of wire. and lastly plugged in the 5 mtr usb lead i ran from the front passenger glovebox. at the time my loom tape had not yet arrived, well even when it did it was not proper loom tape and i had to re-order it from elsewhere... but now it's here when i have a few spare minutes. i'll pop the trim off and wrap the cables as well as it will look neater. after i had finished fixing the amp down, and refitting the boot trim panels, i added the oem flat tray replacement for the deep tray. and you'd never know there was an amp there part number for storage tray: (20 - Storage tray, flat - 51477245912)  amp connections with enough length on cables to remove while amp while still attached. 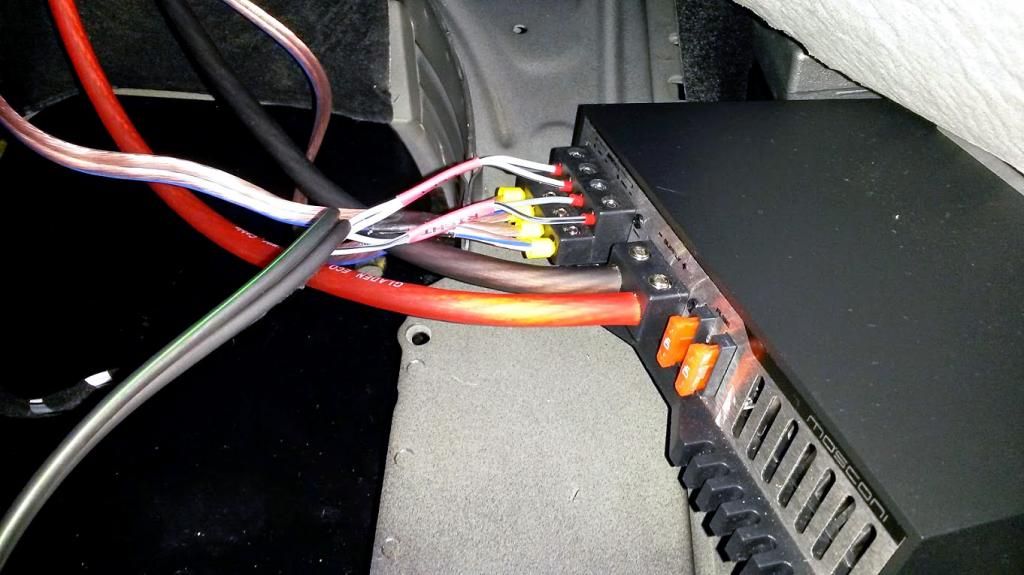 amp fixed in position 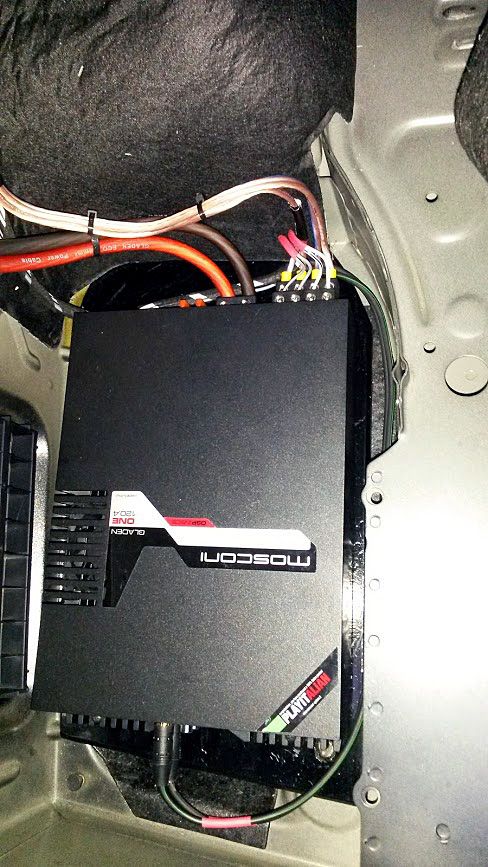 amp under boot trim panel 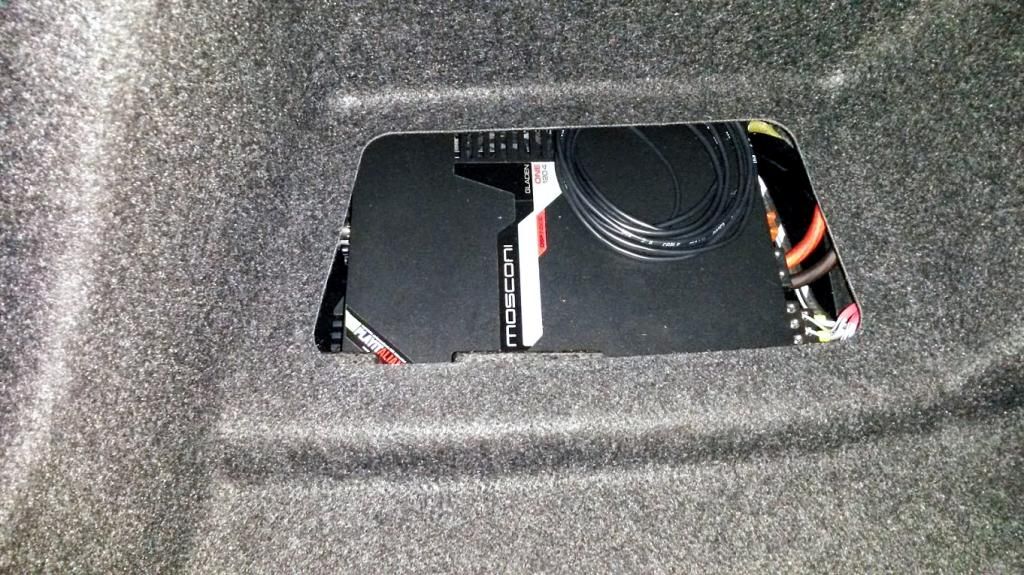 oem flat storage tray 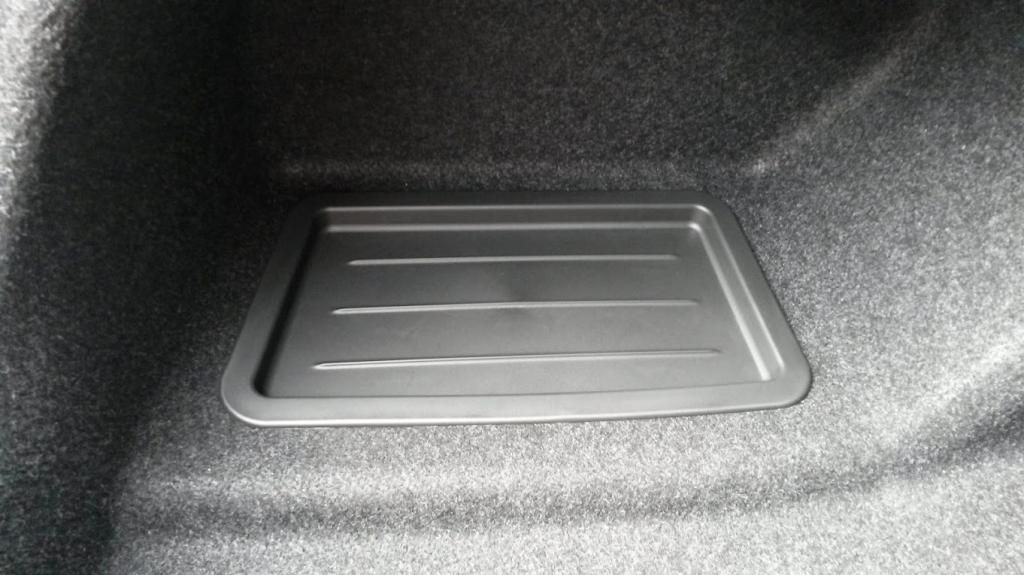 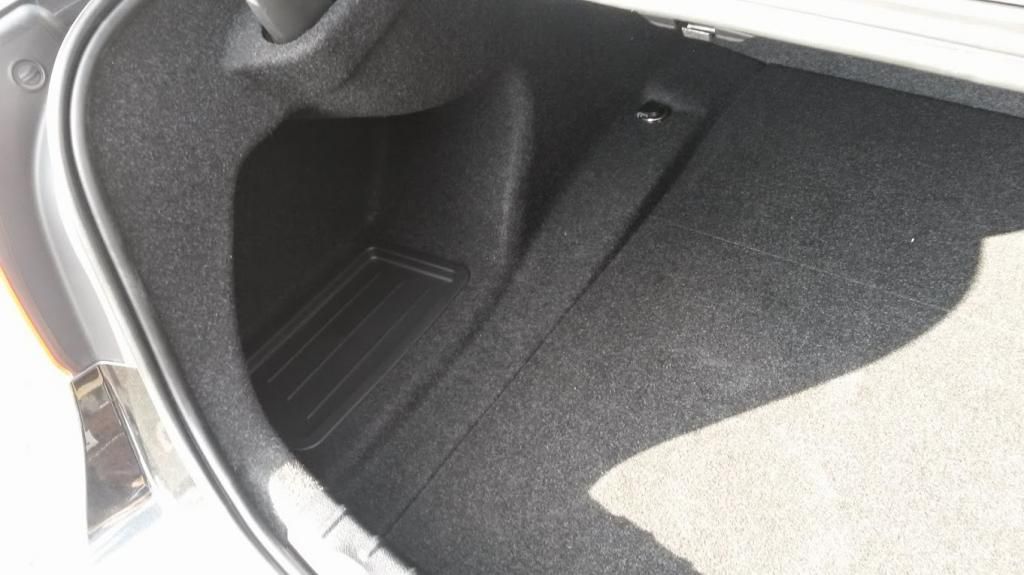 Day four: 3hrs i finally got round to fitting some of the speakers! i took a few hours toil off work, to get a head start on the floor woofers. and started with the seats, easy enough job, held in place with 2 x T50 torx front and back just slide the seat either way to gain access. i didn't disconnect the seat wiring, as there is more than enough slack to tilt the seat back out of the way if your careful. then removed the 4 torx screws holding the cover plate on, to reveal the woofer. unclip the 4 wire speaker connector which you need to add jumpers to as it feeds the front door speakers. positive to positive/negative to negative. then there are 2 bolts together on the centre console side to undo and the whole speaker with mounting box lifts out. it's a bit of a job removing the oem woofers in one piece as they are glued in. and some of the casing gets a little bent but nothing terrible. i found it easier to start with the end furthest from the speaker connectors and work around prising the speakers out. which i did get out in one piece. this and the deadening took most of the time. removing seat bolts 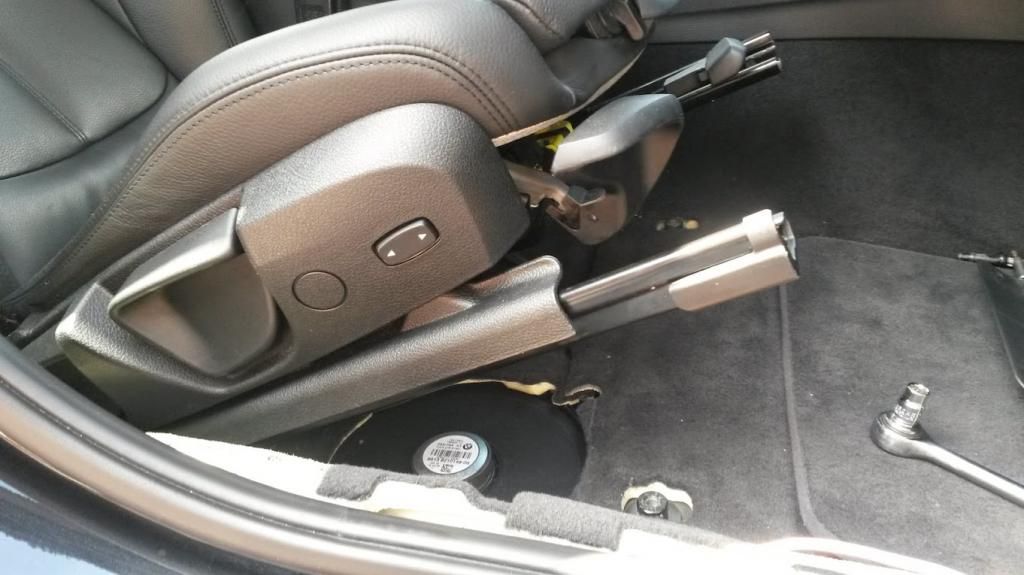 woofer covers 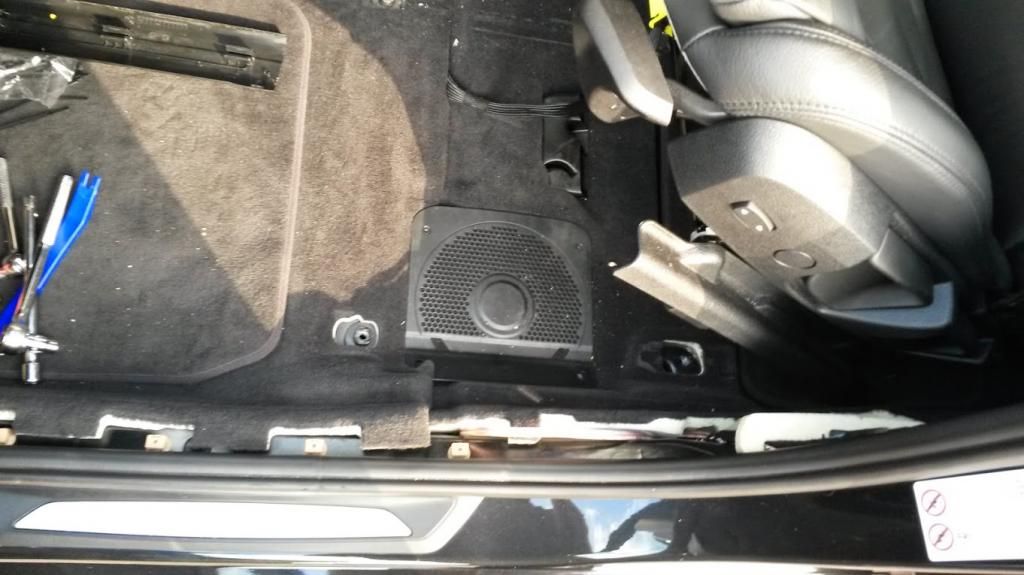 oem woofer 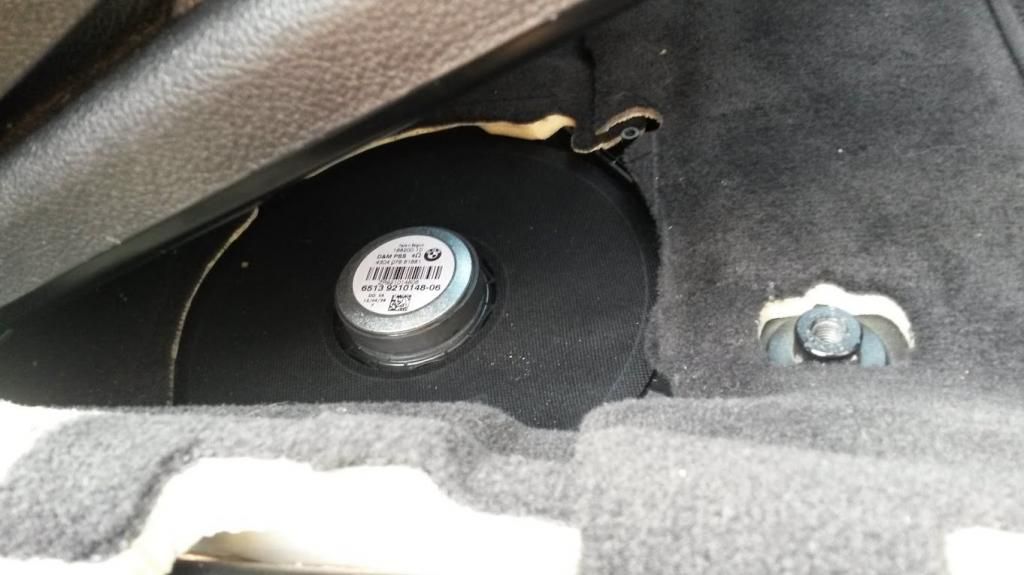 speaker connector 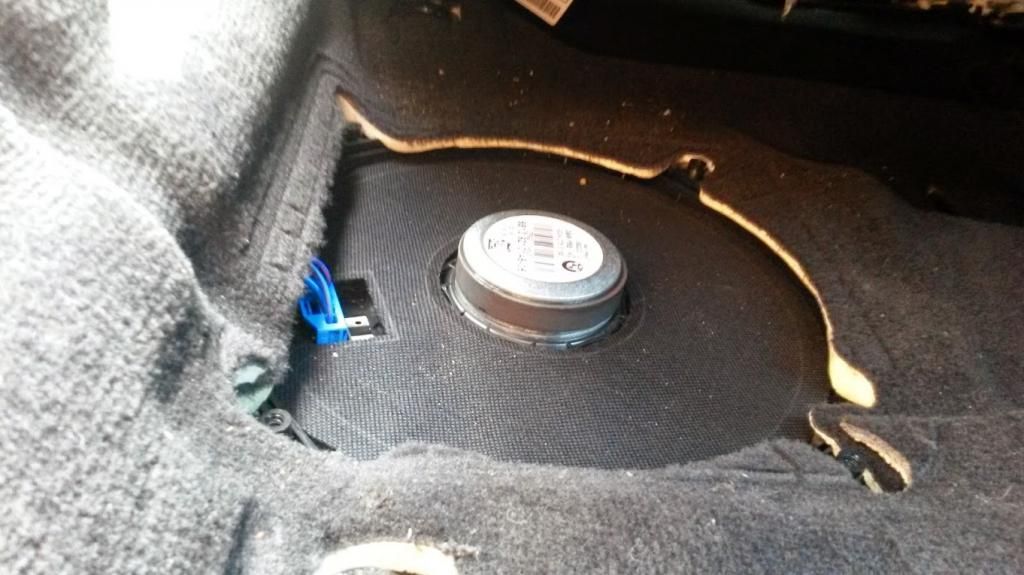 moving woofer connector to door mucket trim area.  oem woofer removed 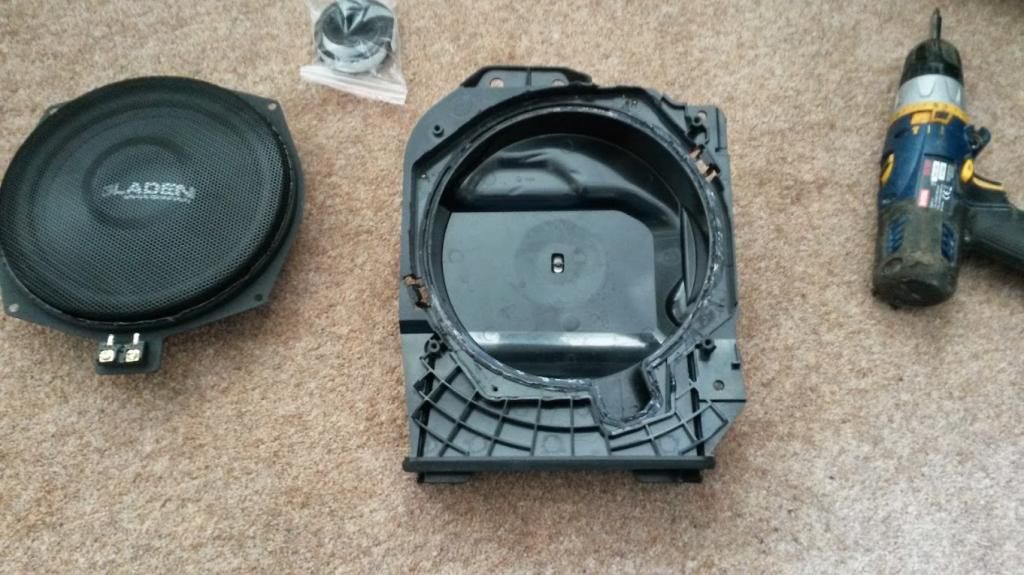 silent coat deadening fitted (i later removed deadening from the little sloped area that is near bare connections on back of speaker) 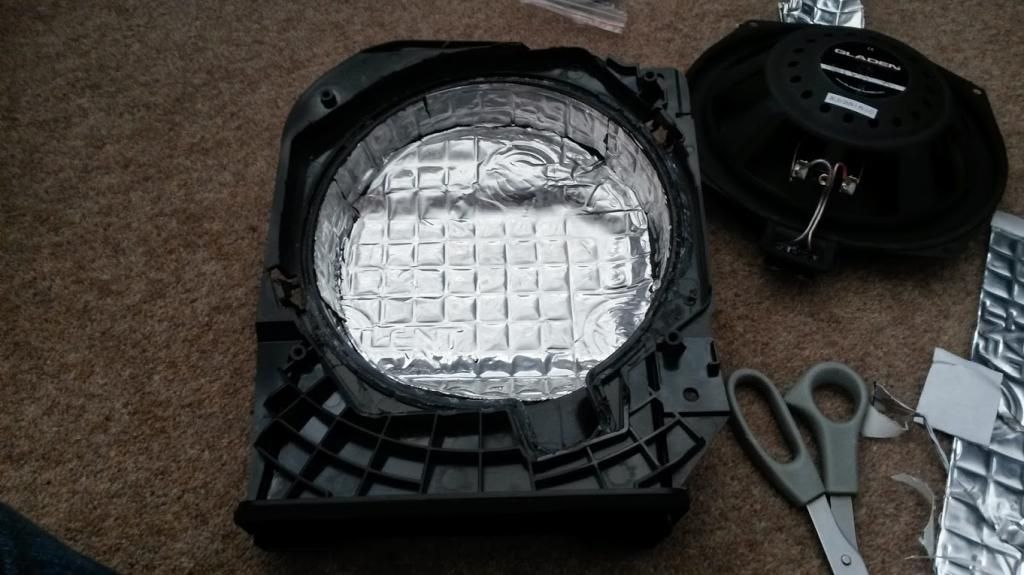 woofer fitted ready for installing (i used some of my own short self tapping screws to fix down the speaker that didn't come with the kit.) 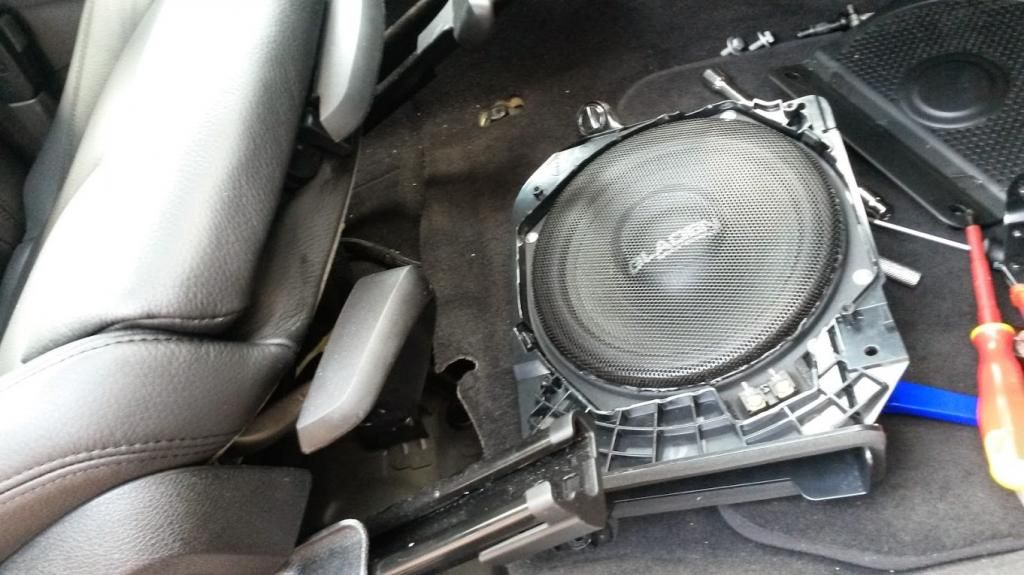 woofer back in place, (there is a ducted side nearest the door that needs to locate in the chassis of the car, think that acts as the resonance box) 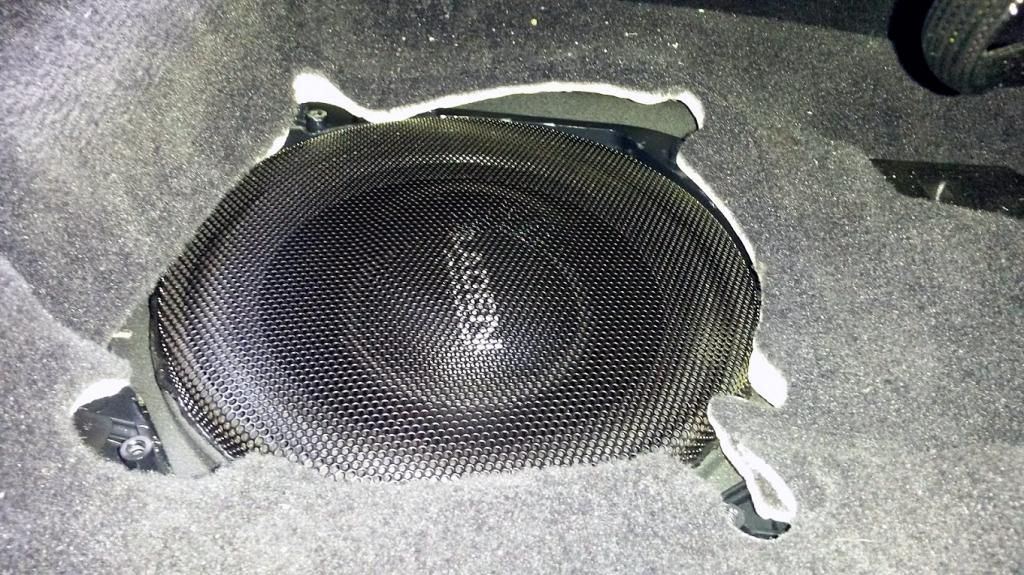 there is also a small adhesive felt disc to fit on the underside of the top cover to prevent possible vibration with the speaker cover underneath, though i found ample clearance. 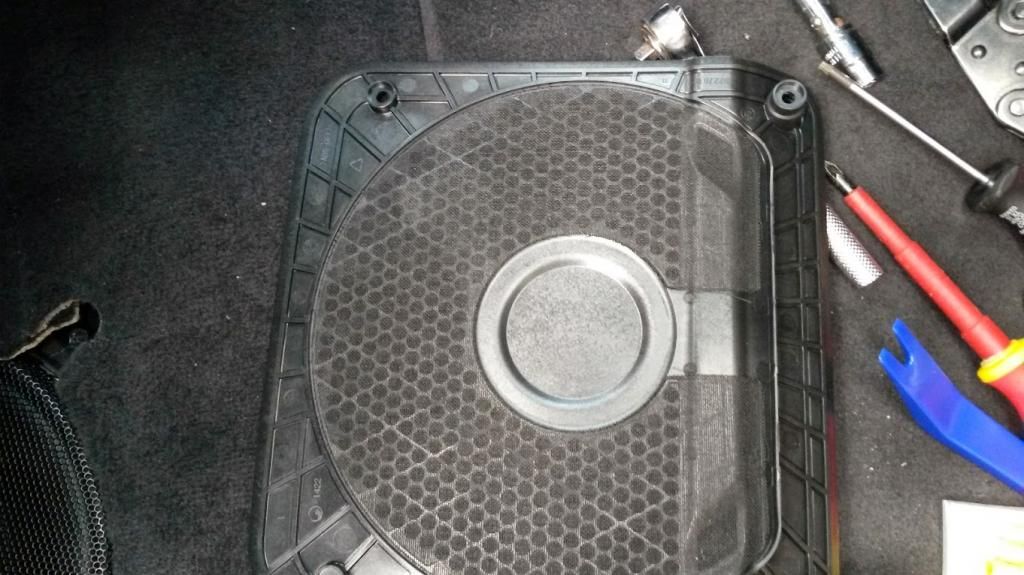 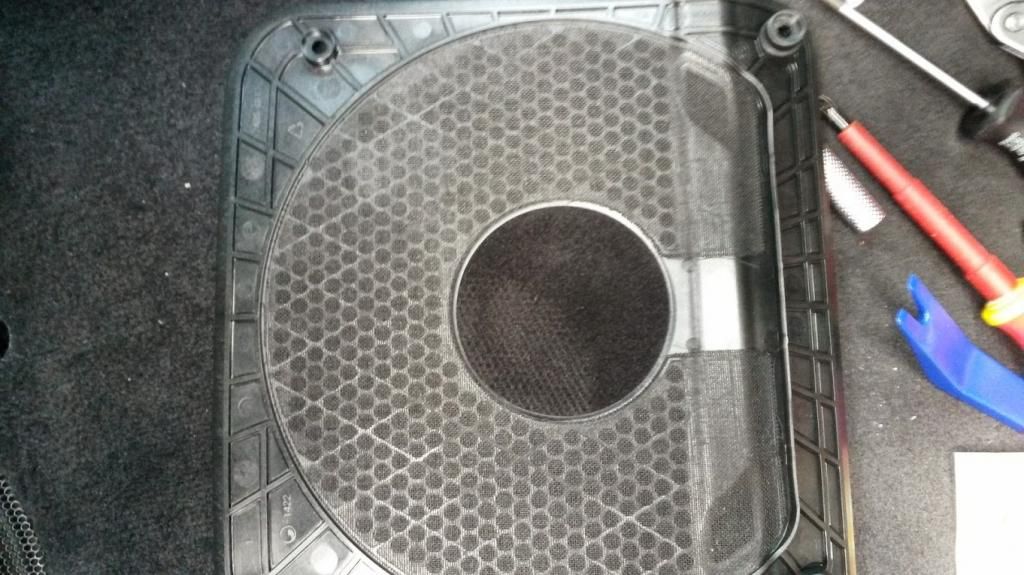 woofer connector 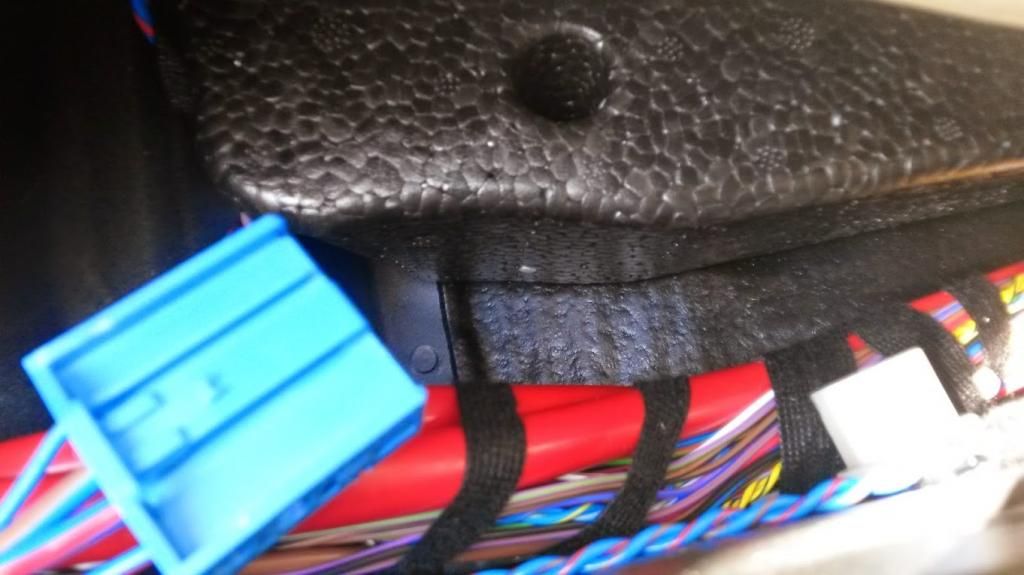 woofer connector end view. 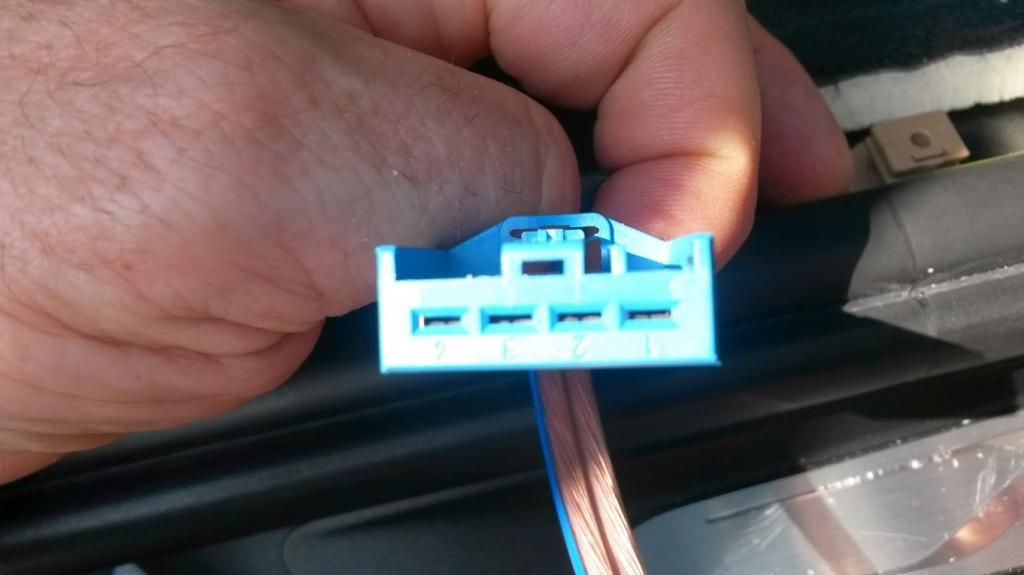 i made my temporary speaker jumpers from two forked crimp connectors, that fit perfectly and tightly into the slots. and then insulated them with tape. 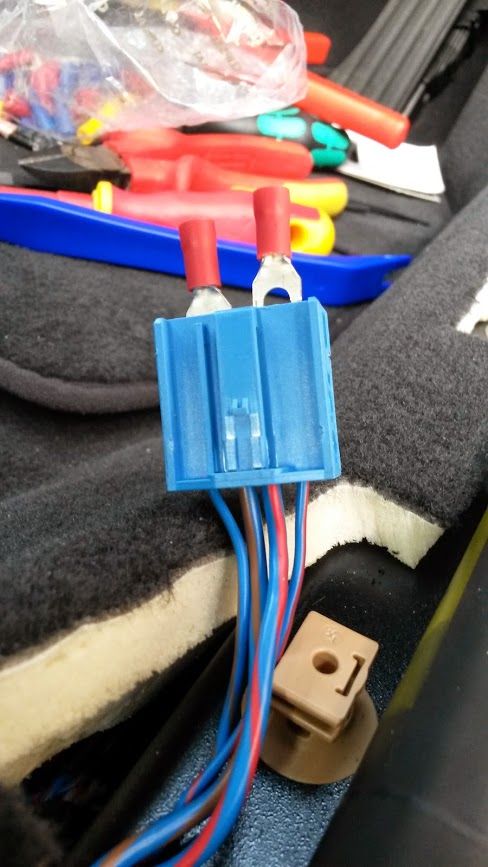 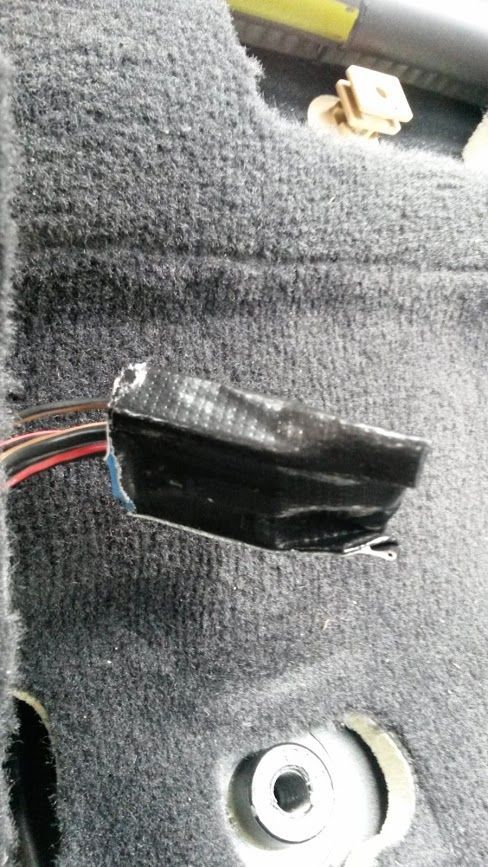 there are also some existing push fit wiring loom brackets attached to the woofer casings. remove with a trim tool. 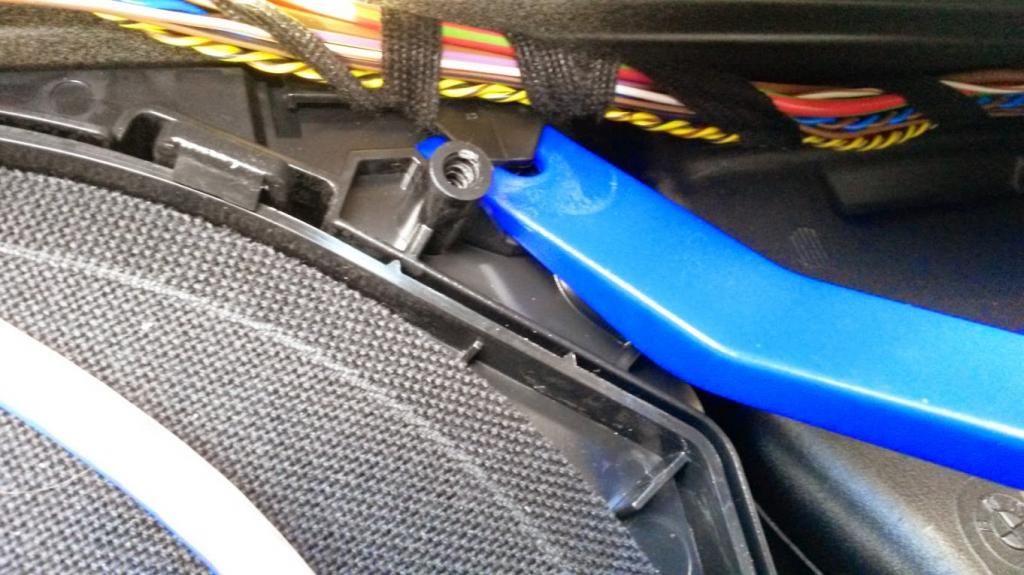 re-fixing woofer casings to chassis 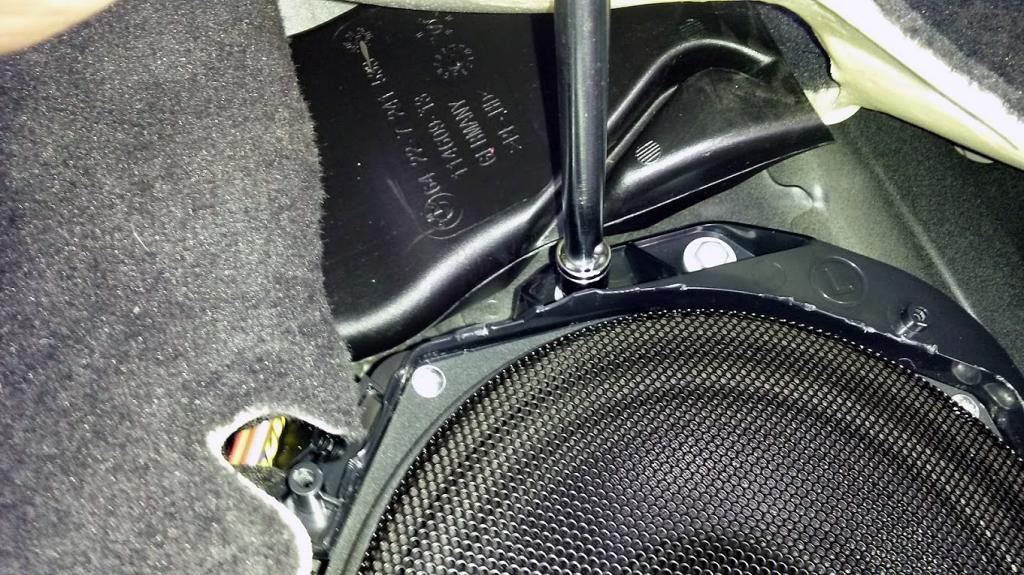 new woofer wires crimped and connected 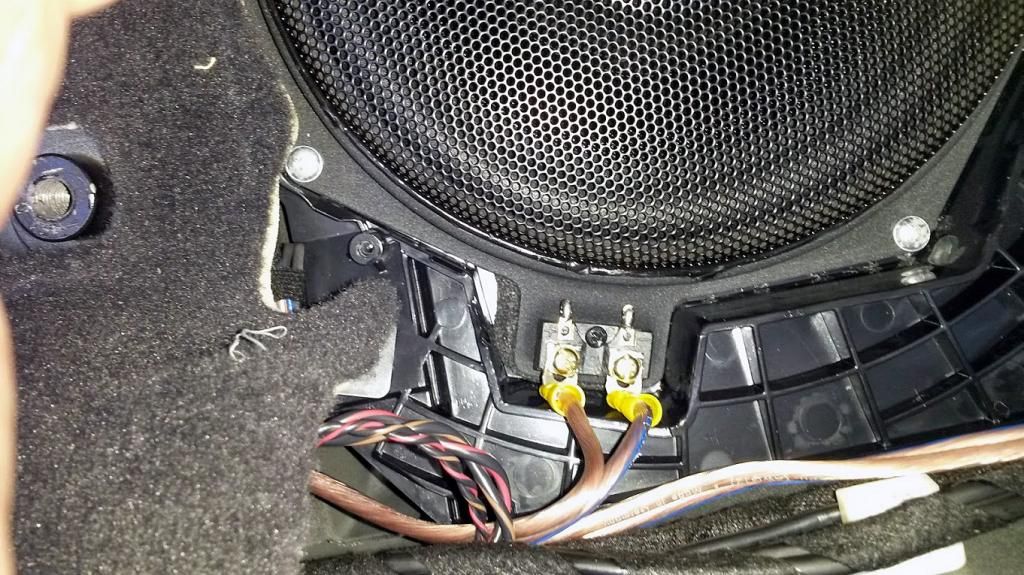 door mucket 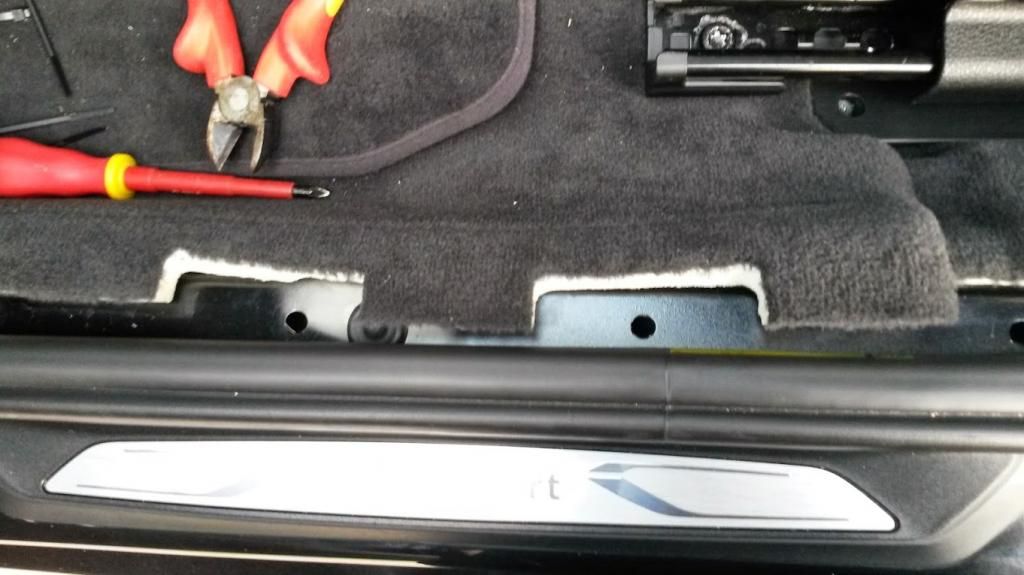 door mucket trim ready for re-installing 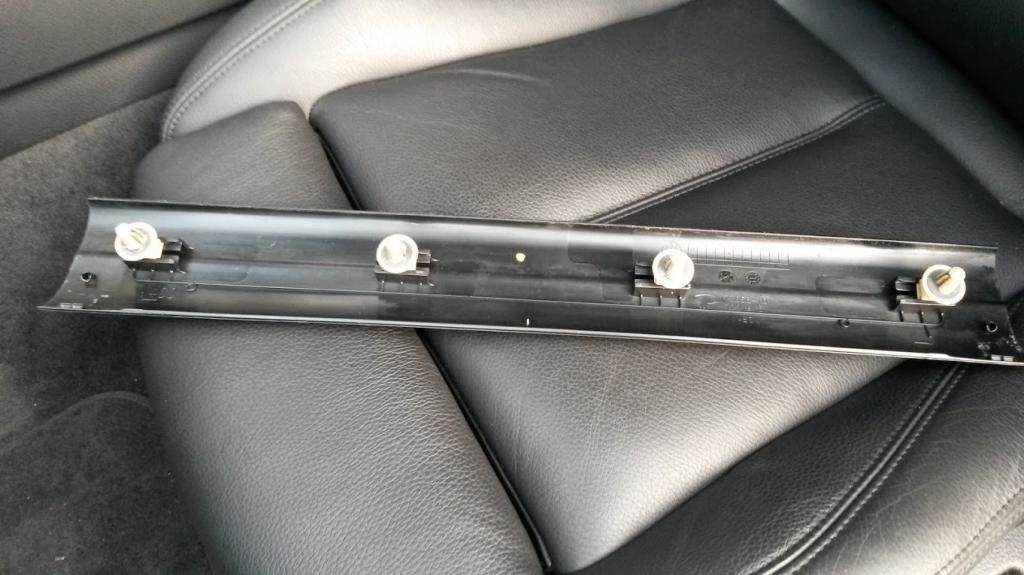 Day five: 8hrs the longest day.... this was the saturday at the end of a week of evenings, and i was determined to get it finished and working today, even if it meant revisiting some areas as it turned out, like the doors that need looming tape, and better crossover mounts. as i won't have the time to sort that out until the back end of july... which just leaves the door mids and tweeters to fit... there is a good video from bavsound on removing door trims on you tube. to add some detail to this the door handle trim covers are held in by 2 retainer lugs, but the bottom one has a spring clip in front of it so you should star your removal there, lifting the top out last. 2 torx screws to remove in under the handle, carefully prise the window control up from the front end as the locating lugs are at the back. and then carefully prise the door trim panel off starting at the front top corner as in the video. and moving down to the front bottom corner the same. the front bottom corner is the stiffest and you only want to pull it a short distance so brace the hands that are pulling. the rest then come off one by one remembering to get your fingers close to the clips so you don't distort the panel. tip.. you can get spare clips for a few pence each just in case you break one, but i didn't. the top of the door panel doesn't lift off as stated in the video, just pull it towards you and the trim should stay in place on the door. just don't lose the thin rubber washers on the door side of the clips. replacement is the same as all the other panels locate the clips to the trim panel then replace to the frame. there are 2 or 3 wires to unclip but they come off and re-attach easily. as in the video next i removed the door sails which just peel off easily, see how they fit on the glass side of the door for replacement and how they sit in the rubber trim. tweeters sit in the new sails easy just pop them in and put the foam cover on top. i removed the stock speakers which were really puny. and peeled off the foam door sealing cover, this has a sticky mastic glue that will come away cleanly if you remove it in small fast movements,(don't rip the foam cover) if you pull it slowly it will come away too but with sticky strands everywhere. then i deadened the interior door panel with silent coat, and added some gladen foam isolating around the speaker mount. the total clearance between the door glass and speaker is only about 40mm but the gladen speakers are clear of the door glass. the crossovers caused me some grief trying to think of a good way to mount them. but after wasting a fair amount of time on it it decided to stick them in place for now with gorilla tape (duct tape but much stronger), and think about going back to them at a later date. after a little wiring conundrum, the instructions said one thing, and the pcb and wiring said the opposite. basically gladen use a stripped wire to annotate positive. and transparent for negative. i did a temporary job connecting the front speaker wires with forked crimps and tape, as i was waiting for the oem connectors to come into stock at bmw. another job i will re-do properly when i sort the loom tape and cross overs. i replaced the door trim panels, connected the positive 12v power lead to the battery (after disconnecting the battery negative) and powered up the system, i followed the set up procedure for speaker input sensitivity then connected the laptop to the amp (following that procedure too.) and uploaded the amp settings .gas file i got from edd at monster audio. there was a small problem with the left speakers out put which was caused by the round RCA connectors to the amp not making good contact. a few twists fixed that. one first set up the bass woofers were quite stiff and thumpy causing the exterior door sills to resonate a little, but the woofers soon loosened up and this stopped, may be something that could do with damping in the future...? i've not yet to played with the equaliser settings ect.. but the sound is such a massive improvement on the base UK system it's amazing! i love driving to work now especially with the good weather we're having atm. it's put a big smile on my face driving to work with my favorite sounds blaring out anyway here are the last of the install pics.... lower door handle clip 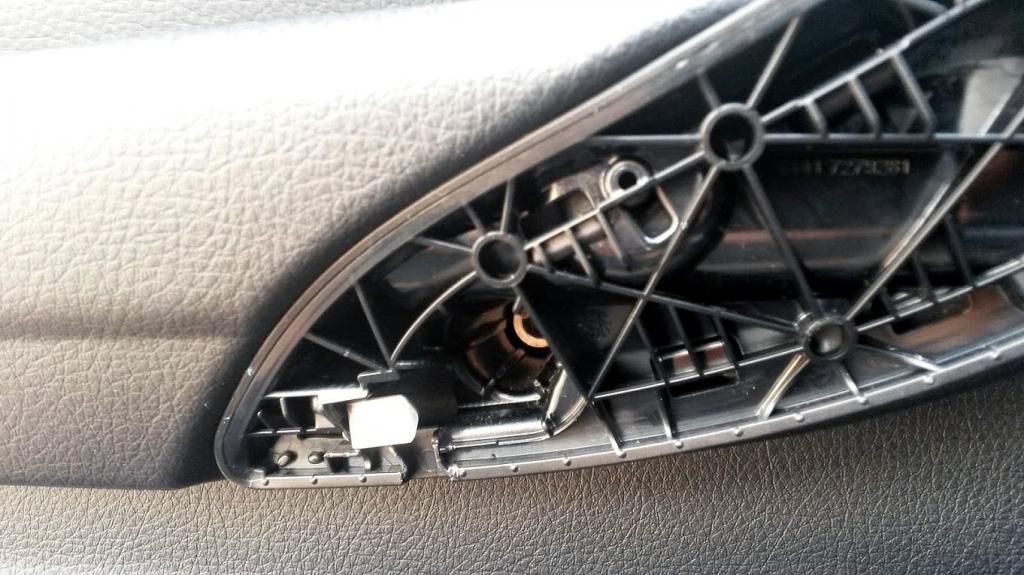 door handle clips 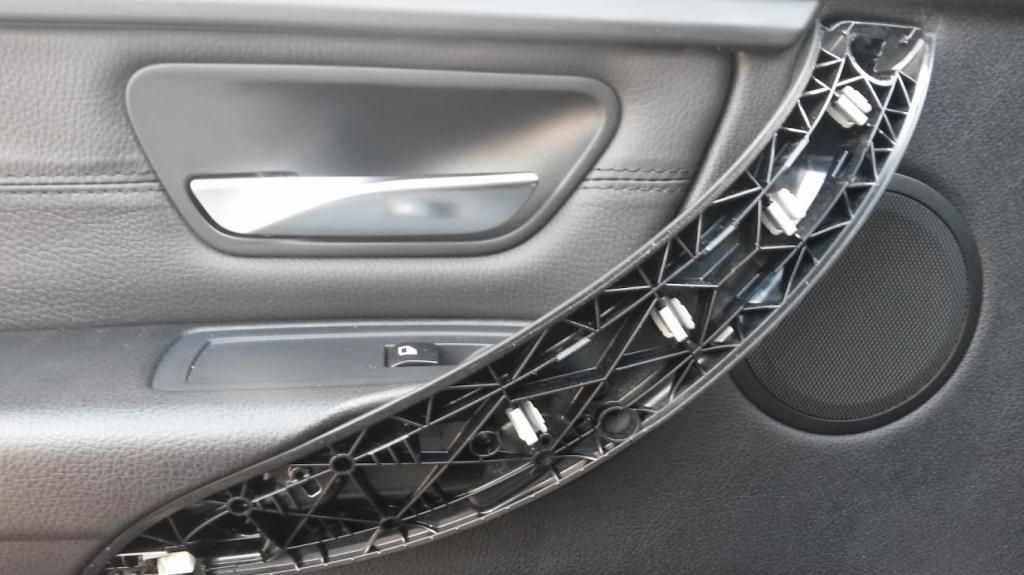 door card removed 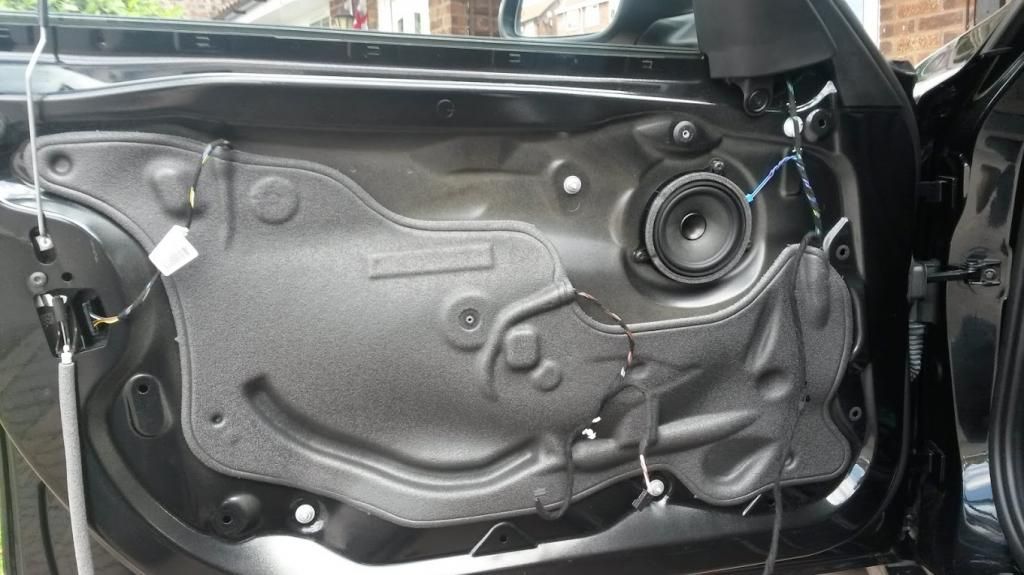 oem door mid speaker 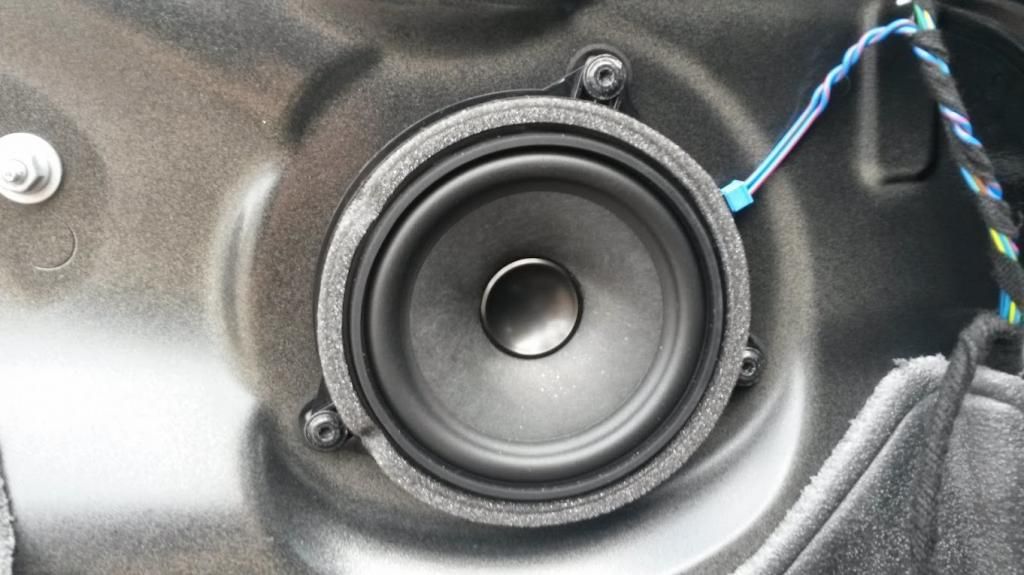 peeling away sticky door foam  door sealing removed 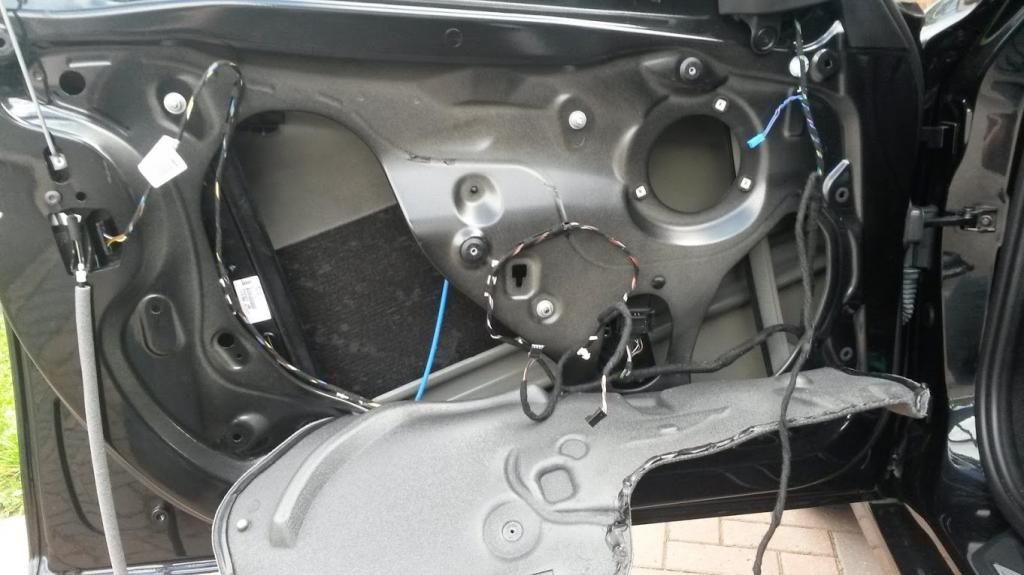 fitting tweeter 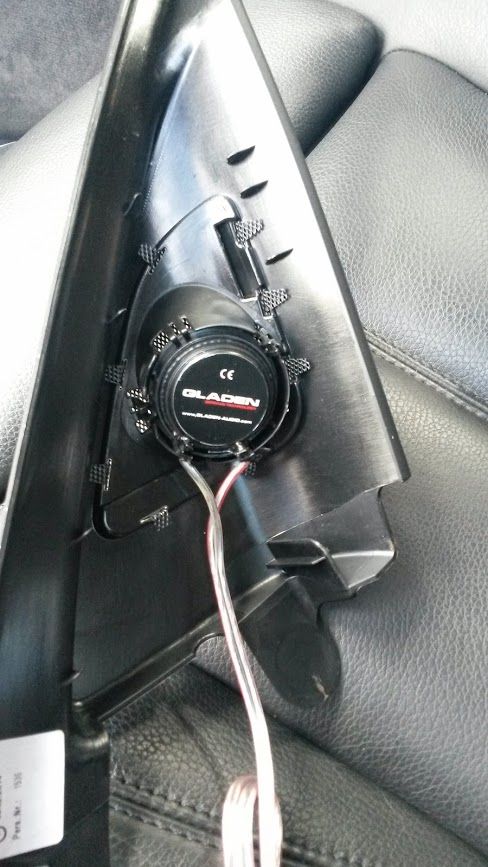 tweeter foam 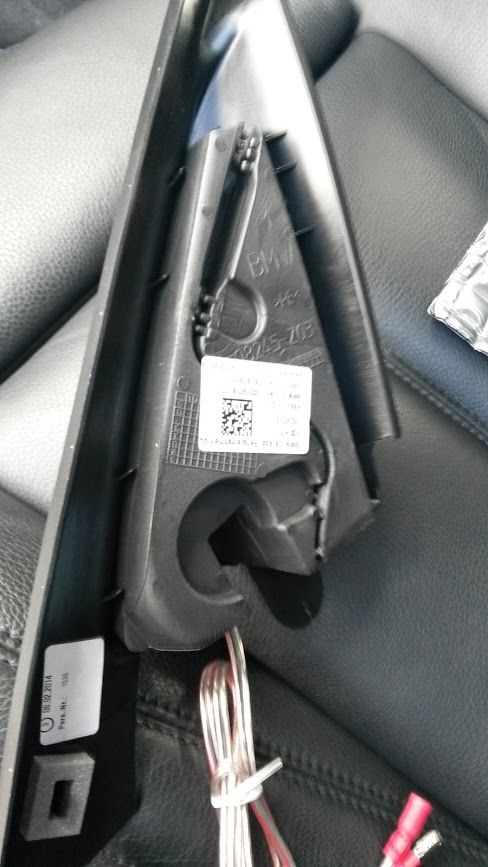 Hi Fi sail fitted 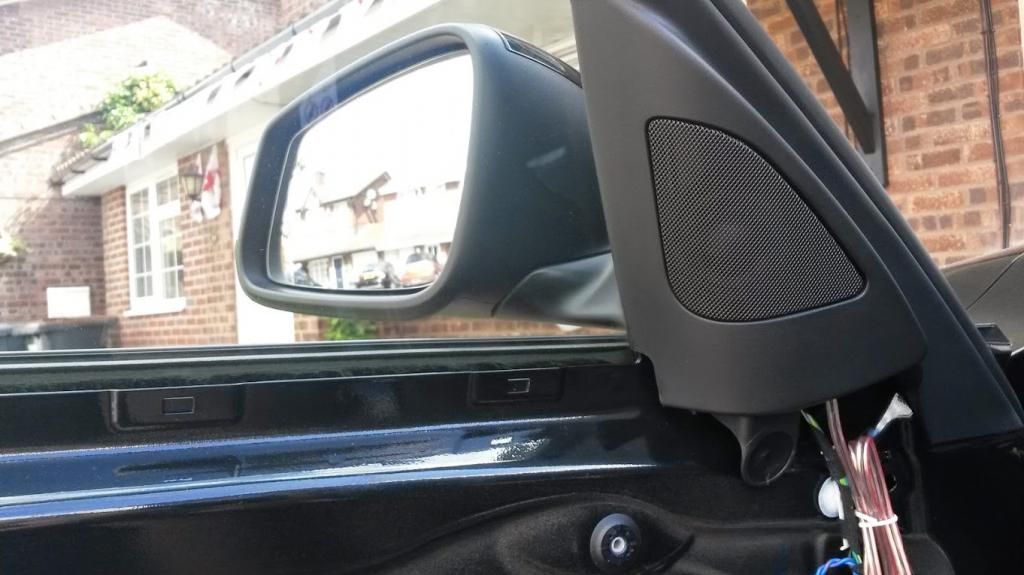 silent coat door deadening 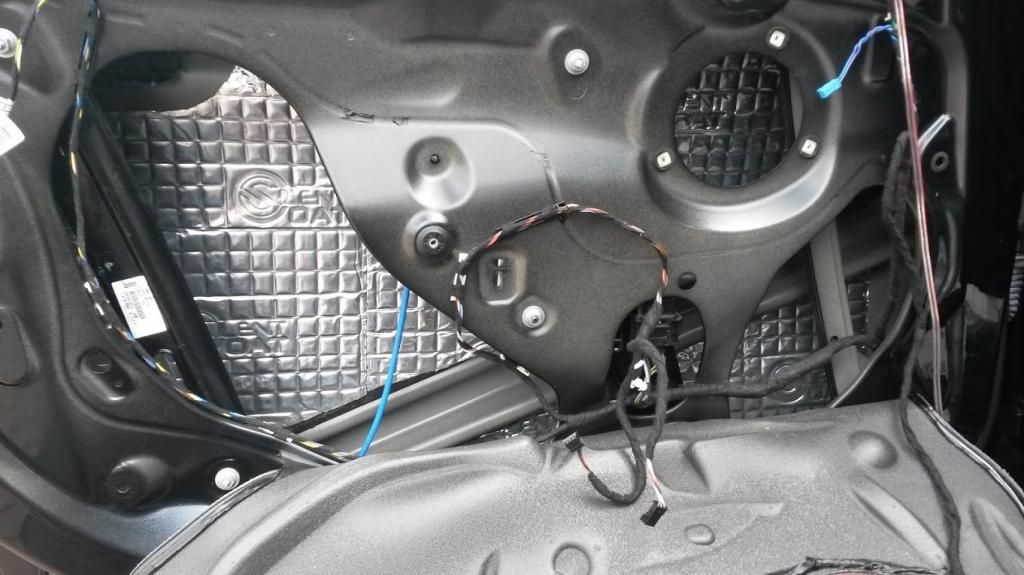 oem v gladen door mids 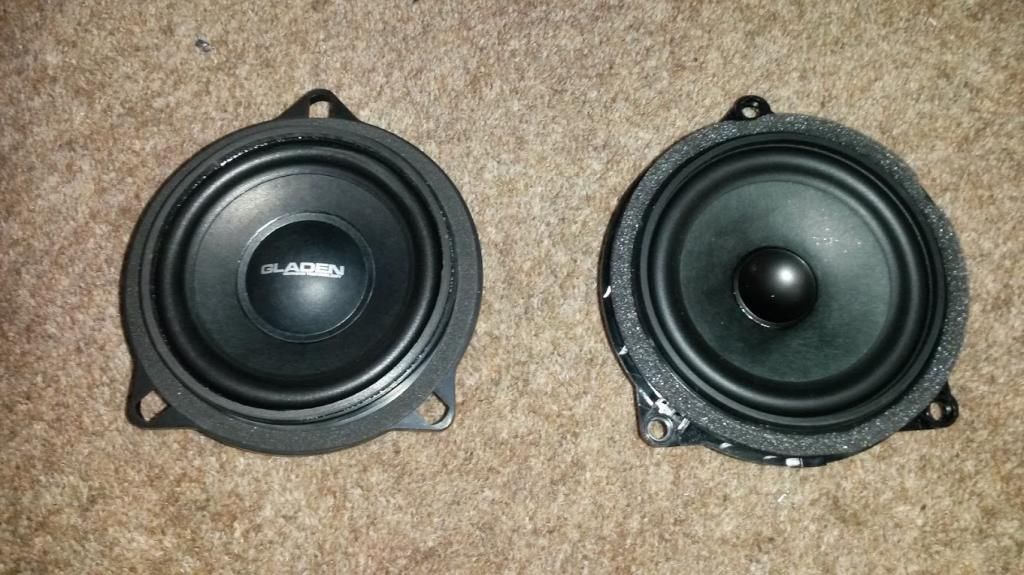 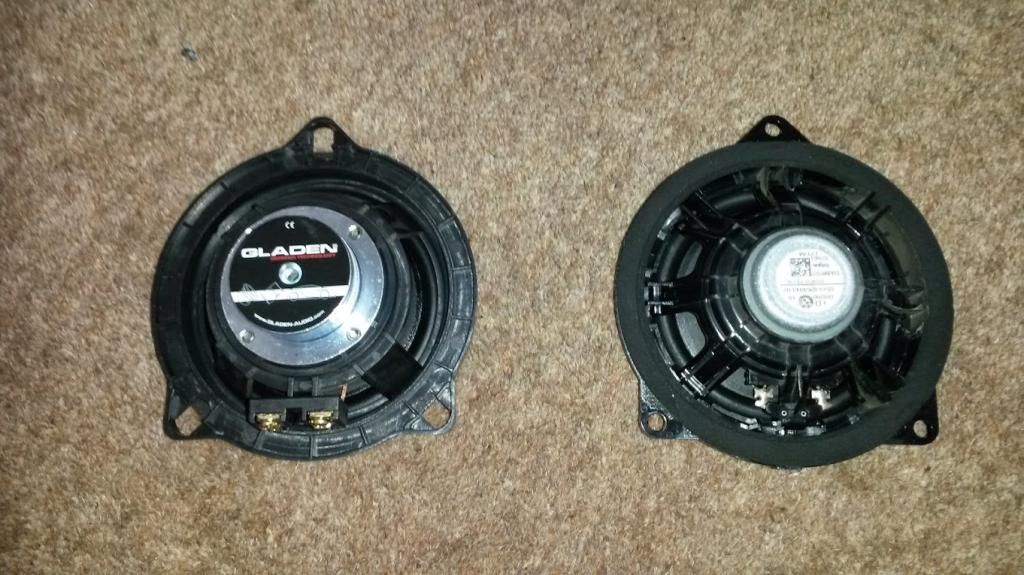 speaker deadening 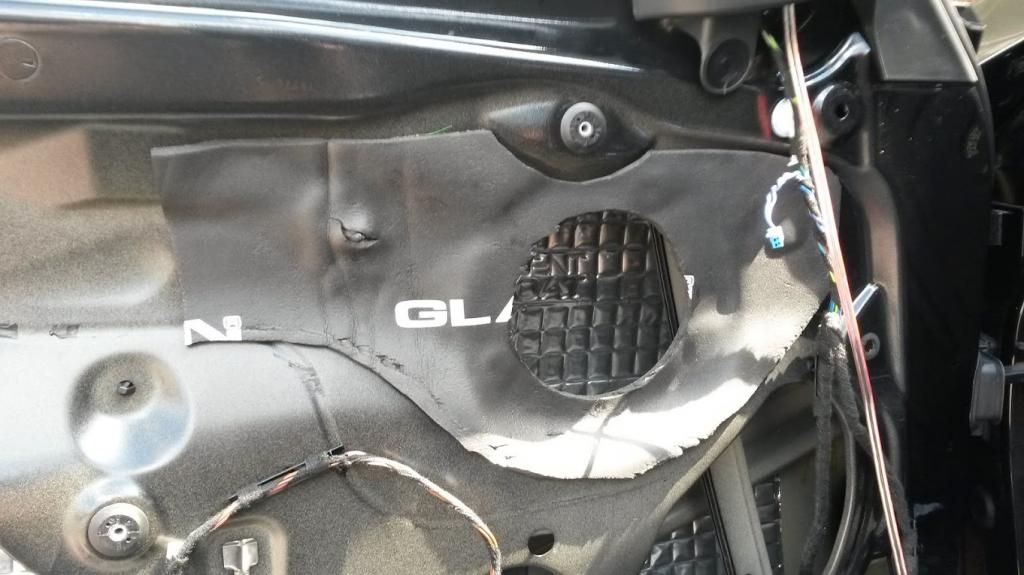 door/glass clearance 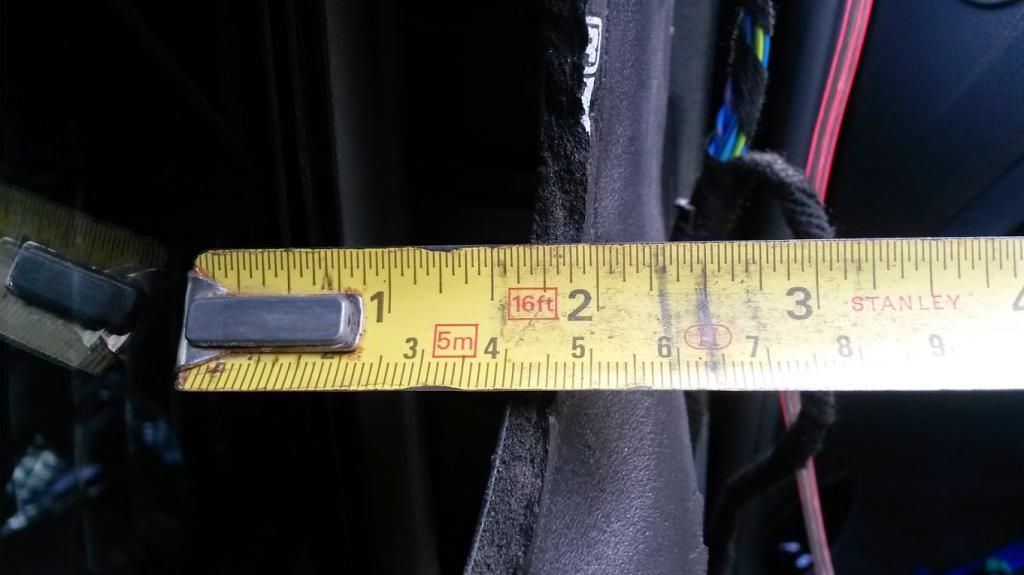 door card with clips 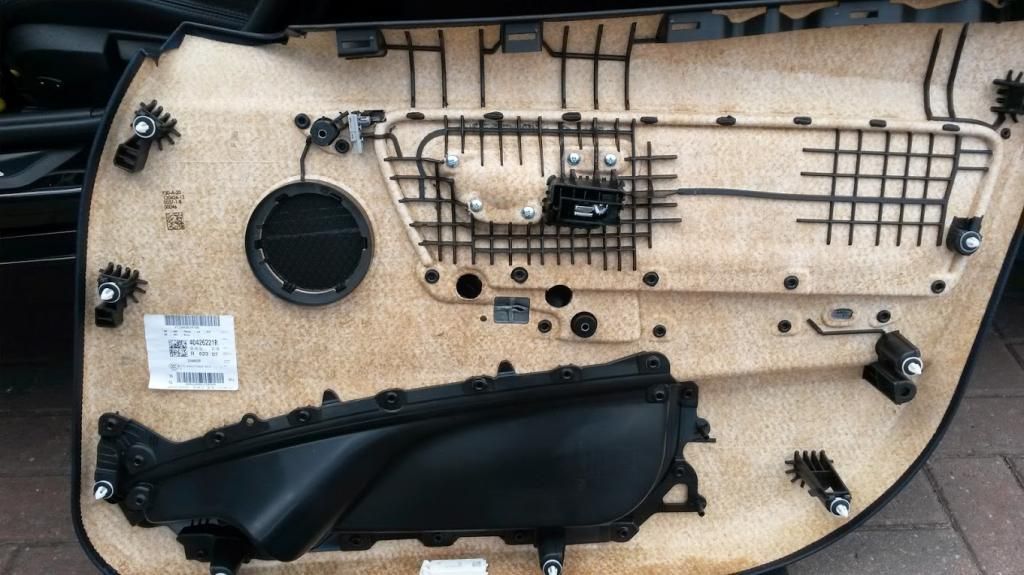 cross overs temp fitted 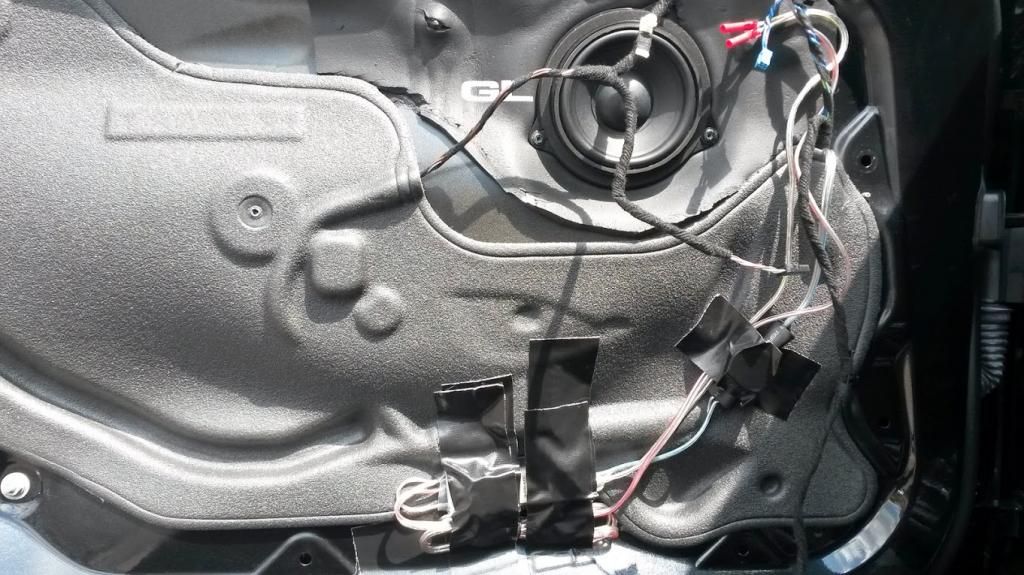 cross over conundrum 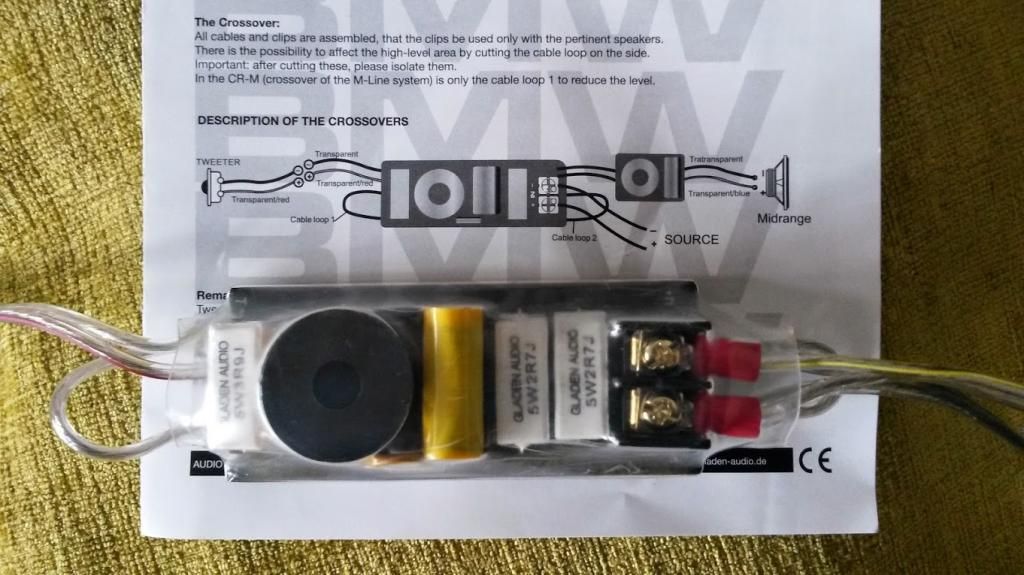 mosconi amp programme 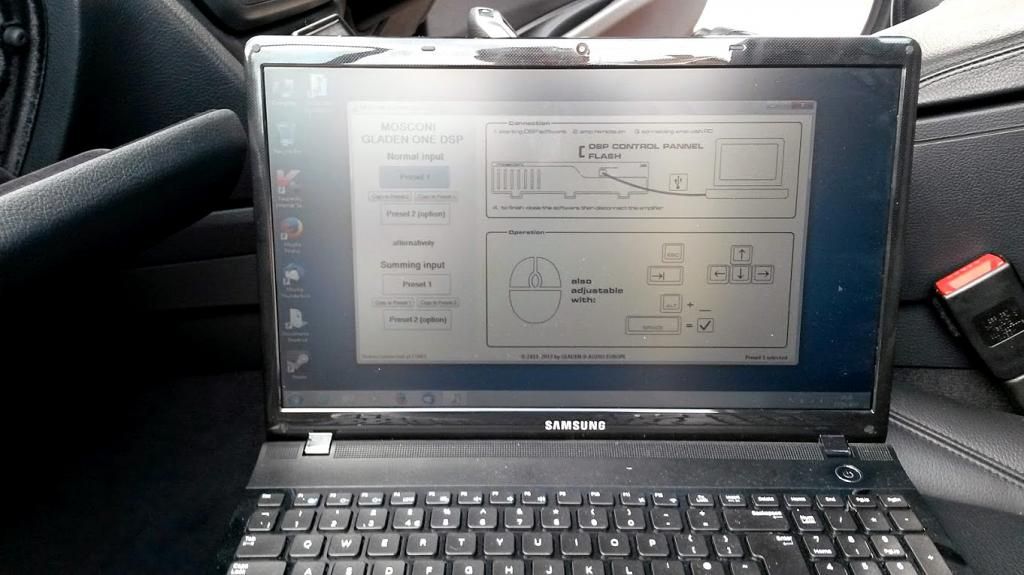 Last edited by davethefish; 11-17-2015 at 05:02 PM.. |
| 06-13-2014, 10:38 AM | #2 |
|
Lieutenant Colonel

498
Rep 1,502
Posts
Drives: M4 CP SSII/SS
Join Date: Apr 2012
Location: Manchester, UK
|
looks like a busy weekend ahead... Enjoy the project
__________________
Current: F82 CP SS/SS
|
|
Appreciate
0
|
| 06-13-2014, 10:55 AM | #3 |
|
Banned

10994
Rep 32,881
Posts |
Very good choice! That setup will sound superb!
The wiring loom should make things a bit easier, I didn't have one for my E90 install and that was probably one of the most time consuming parts of it. How much was the loom? |
|
Appreciate
0
|
| 06-13-2014, 12:47 PM | #4 | |
|
Captain
131
Rep 664
Posts |
Quote:
probably next weekend.... dentist tomorrow  then my lads 18th sunday. |
|
|
Appreciate
0
|
| 06-13-2014, 12:52 PM | #5 | |
|
Captain
131
Rep 664
Posts |
Quote:
or just a 2 channel loom (what i got) for the fronts and subs... £44.99 for the 5 mtr 2 channel loom. |
|
|
Appreciate
0
|
| 06-13-2014, 12:55 PM | #6 | |
|
Banned
10994
Rep 32,881
Posts |
Quote:
|
|
|
Appreciate
0
|
| 06-13-2014, 01:15 PM | #7 | |
|
Captain
131
Rep 664
Posts |
Quote:
and from the amp back to the front door speakers via the quadlock. the amp has switch settings for spreading 2 inputs over the 4 output channels. the other 2 outputs will be rewired to the floor subs with the speaker cable that comes with the kit. so the subs and doors crossovers will have high or low frequencies sent to it. plus the DSP can flatten the high treble signal from the HU and then have your own equaliser settings added, the amps settings can also be uploaded as a file. via a PC. as i think edd has supplied a file for gladen upgrades on E90 post. |
|
|
Appreciate
0
|
| 06-13-2014, 01:19 PM | #8 | |
|
Banned
10994
Rep 32,881
Posts |
Quote:
 And you're right not to bother amping the rears. |
|
|
Appreciate
0
|
| 06-13-2014, 01:33 PM | #9 | |
|
Captain
131
Rep 664
Posts |
Quote:
and it depends on what you want to hear in your car, imo you only need front L&R and bass subs to listen to music. as i don't know of any music other than films that outputs a 5.1 or 7.1 surround sound signal. so unless you plan on watching a lot of films you definitely don't need a centre channel, and all the music concerts i've ever been to have the sound stage at the front...for a HI-FI experience. that, and i shouldn't run into any 'gong' or DPC noise issues |
|
|
Appreciate
0
|
| 06-13-2014, 01:39 PM | #10 | |
|
Banned
10994
Rep 32,881
Posts |
Quote:
|
|
|
Appreciate
0
|
| 06-13-2014, 02:22 PM | #12 | |
|
Banned
10994
Rep 32,881
Posts |
Quote:
But i meant the sound stage doesn't change, the music still sounds like it's coming from the same place. |
|
|
Appreciate
0
|
| 06-14-2014, 10:14 AM | #13 |
|
Captain
131
Rep 664
Posts |
two more parts of the puzzle, picked up the door seals today.
also the shallow shelf for the luggage pocket on the left, is coming in monday/tuesday (part no 51477245912) at £11.  |
|
Appreciate
0
|
| 06-14-2014, 01:40 PM | #14 | |
|
Banned
10994
Rep 32,881
Posts |
Quote:
|
|
|
Appreciate
0
|
| 06-14-2014, 06:24 PM | #15 | |
|
Captain
131
Rep 664
Posts |
Quote:
Been watching a clip somewhere. probably youtube, of the door sails being fitted... |
|
|
Appreciate
0
|
| 06-14-2014, 06:58 PM | #16 | ||
|
Banned
10994
Rep 32,881
Posts |
Quote:
Have you got a trim tool set? I got these: http://www.ebay.co.uk/itm/151191264670?redirect=mobile |
||
|
Appreciate
0
|
| 06-15-2014, 02:45 AM | #17 | |
|
Captain
131
Rep 664
Posts |
Quote:
|
|
|
Appreciate
0
|
| 06-15-2014, 04:08 AM | #18 |
|
Private First Class
 9
Rep 161
Posts |
Interested in how you get on with this. If I was going to do it, that's the kit I would get. Out of interest, what is the difference between the kit you linked and the cheaper one at 589?monsteraudiodesign.co.uk/shop/bmw-plug-and-play-package-1-gladen-one-line-bmw-201-gladen-one-120-4/
Take lots of pics of the install if you can! |
|
Appreciate
0
|
| 06-15-2014, 04:25 AM | #19 |
|
General
 
8566
Rep 19,982
Posts
Drives: 911, Cayenne Turbo, Disco 4
Join Date: Sep 2013
Location: Crieff, Perthshire, Scotland
|
I've not had time to read through the entire previous thread- so is this an improvement to a standard F30 system or something over and above what the HK system would be?
I did read the start of the other thread and there was talk of sound proofing for the doors.. are you doing that as well?
__________________
Current: Porsche 911 991 C4S, Porsche Cayenne Turbo, Land Rover Discovery 4. Gone...G01 X3 M40i, Cayman S 987, F31 340i, Cayman GT4, F82 M4 CP, Lotus Exige V6, G20 330e, F30 330e, Boxster S 987, F31 335d, Mini Cooper SD, E89 Z4, E90 330d 320d, E60 520d, E46 330d 320d, MX5s, E30 325i
|
|
Appreciate
0
|
| 06-15-2014, 04:35 AM | #20 | |
|
Captain
131
Rep 664
Posts |
Quote:
the base UK system has high level speaker outputs that are heavily biased at the higher frequencies to compensate for the lack of tweeters. in the BMW alpine upgrade of just door mids and tweeters, they code the equalisation flat, but still at high level speaker outputs, not to hifi or the rear speakers wouldn't work.... the DSP can flatten the equalisation curve of the high level speaker output, allowing the tweeters to work properly without attenuation. you can also connect to the amp directly with a bluetooth adaptor and either a windows laptop or an android app from your phone, to adjust various levels. without digging around in the boot for the amp.  Last edited by davethefish; 06-15-2014 at 08:06 AM.. |
|
|
Appreciate
0
|
| 06-15-2014, 04:36 AM | #21 |
|
Major

512
Rep 1,404
Posts |
This is going to be a great mod, good luck, hope the weather stays fine and you have plenty of beer to hand!
__________________
Current - F80 M3 CP SS/SO | M Performance Extras
Prev - F30 330D M Sport | White | M Performance Kit | Various Extras Prev - E92 330D M Sport | Black | Highline Older - E46 330i | Silver | AC Schnitzer, E36 328i Coupe | White |
|
Appreciate
0
|
| 06-15-2014, 04:42 AM | #22 | |
|
Captain
131
Rep 664
Posts |
Quote:
i wouldn't necessarily say better than HK, just different. better bass woofers and door mids, but less speakers. depends on you view of sound stage... yes definitely doors to be deadened, probably the rears too, even though i'm not replacing those speakers. i think the f30 lacks deadening throughout the whole car.... you get some deadening with the kit but i've also ordered some 'Silent Coat' vibrodamping for the doors and other areas... |
|
|
Appreciate
0
|
Post Reply |
| Bookmarks |
|
|


